How to Modify the Windows 11 Taskbar Defaults
If the device you use has the minimum specifications required by Windows 11, you may have already been updated whether you initiated the update or not. The update to Windows 11 is optional, but was installed automatically for some users if they did not specifically ignore the update in the update settings.
This post discusses how to modify the taskbar in Windows 11 to look more like the Windows 10 taskbar, as well as how to disable some of the default icons pinned to it.
Below is a video demonstrating the same information.
How to Modify the Windows 11 Taskbar Defaults
Windows 11 is similar to Windows 10 in many ways, with some definite updates to some design elements. One of the biggest design changes you will probably notice is that by default, the taskbar floats in the middle of the screen. As items are opened and pinned to the taskbar, icons are added to the right of the taskbar in the order added/opened, and all icons shift slightly to the left.
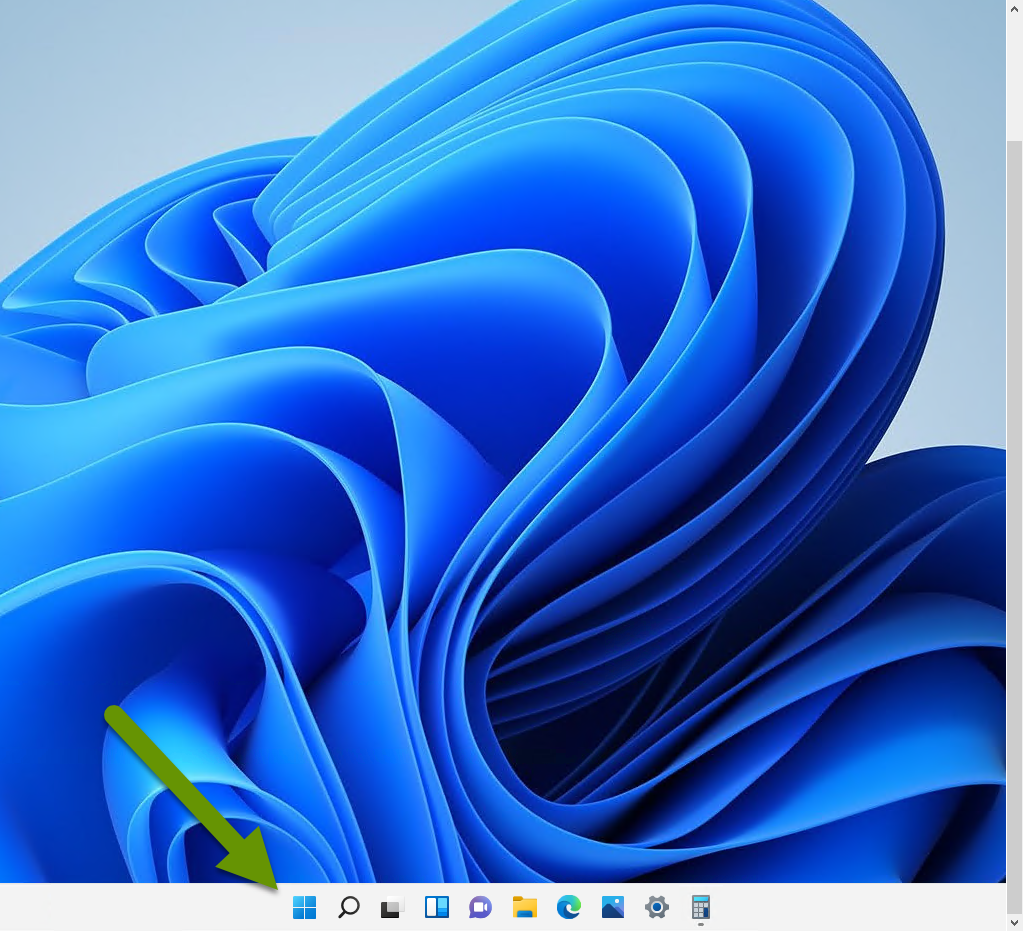
However, if you do not like the floating taskbar, or prefer to have the taskbar aligned to the left so that you will always know where icons are, there is an easy way to modify the taskbar settings. Additionally, there are also some default icons you might not want included in the taskbar that do not allow you to unpin them like traditional taskbar icons. This post discusses how to modify both of these settings.
To modify the taskbar in Windows 11:
- In Windows 11, right-click on a blank spot in the taskbar.
- This will bring up the "Taskbar settings" pop-up menu.
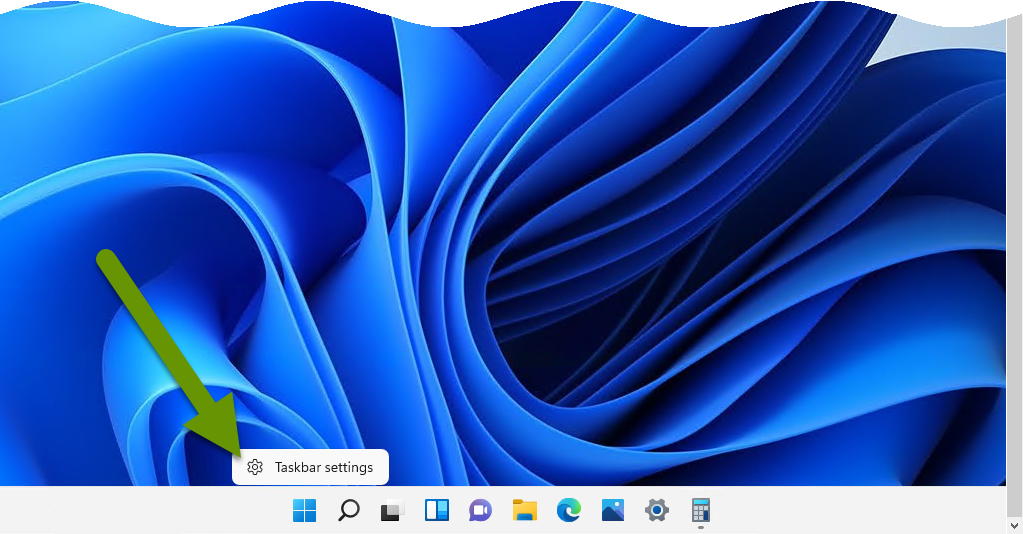
- Click on "Taskbar settings" to bring up the menu.
- Scroll down to "Taskbar behaviors" and click to expand.
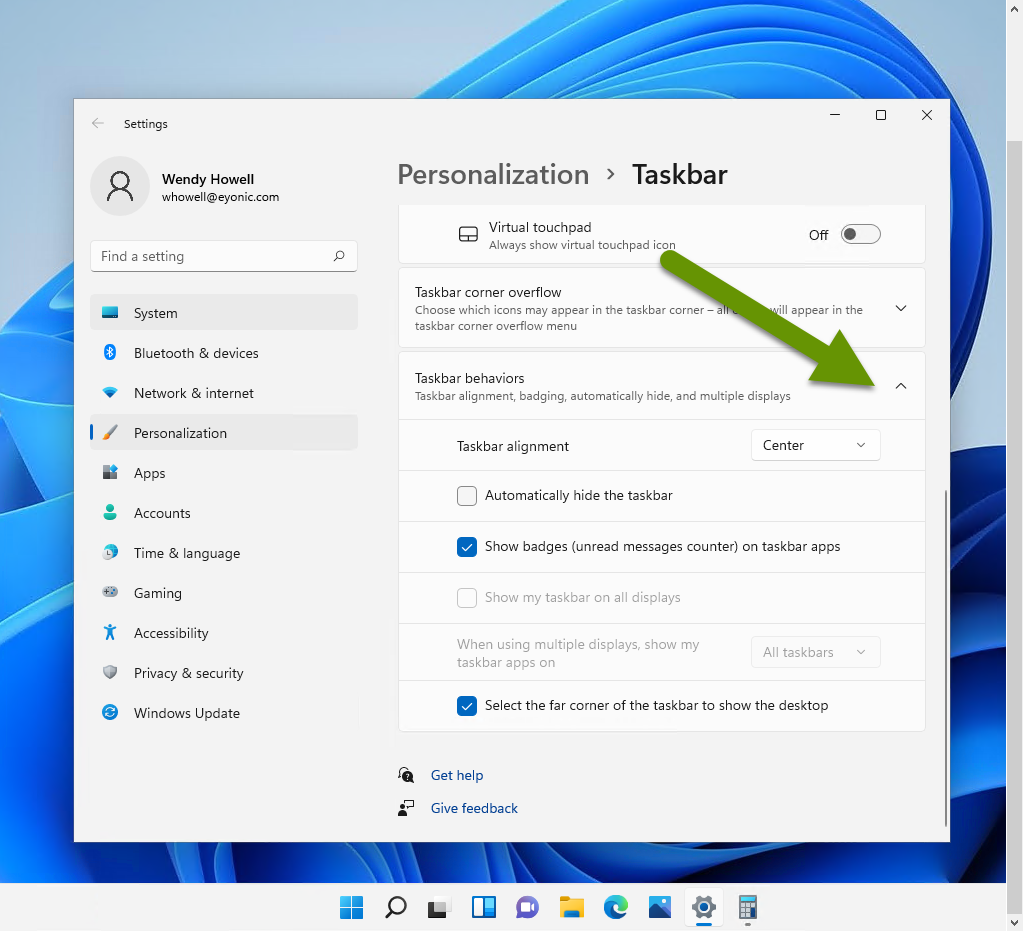
- Click the drop-down menu next to "Taskbar alignment" and select "left".
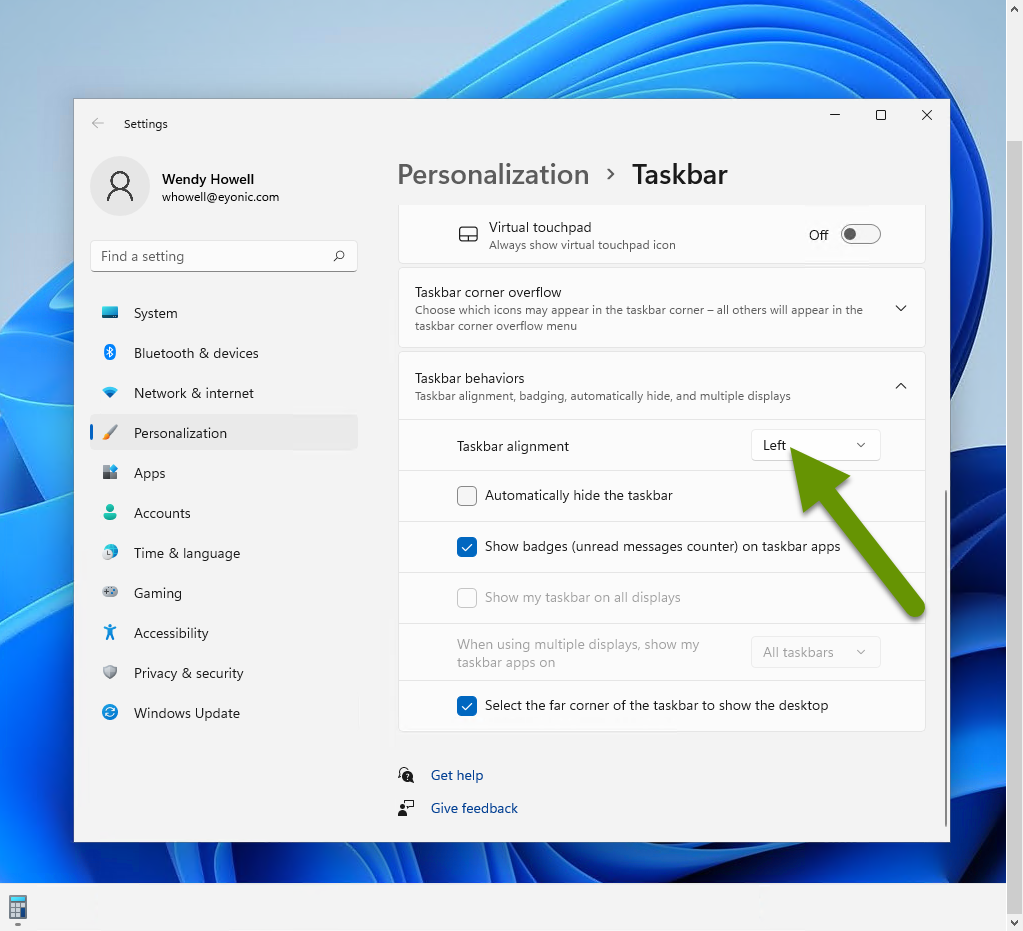
Once the taskbar alignment has been set to left, it will look more like the taskbar did in Windows 10. This setting takes effect immediately so there is no need to log out or reboot to get the desired effect.
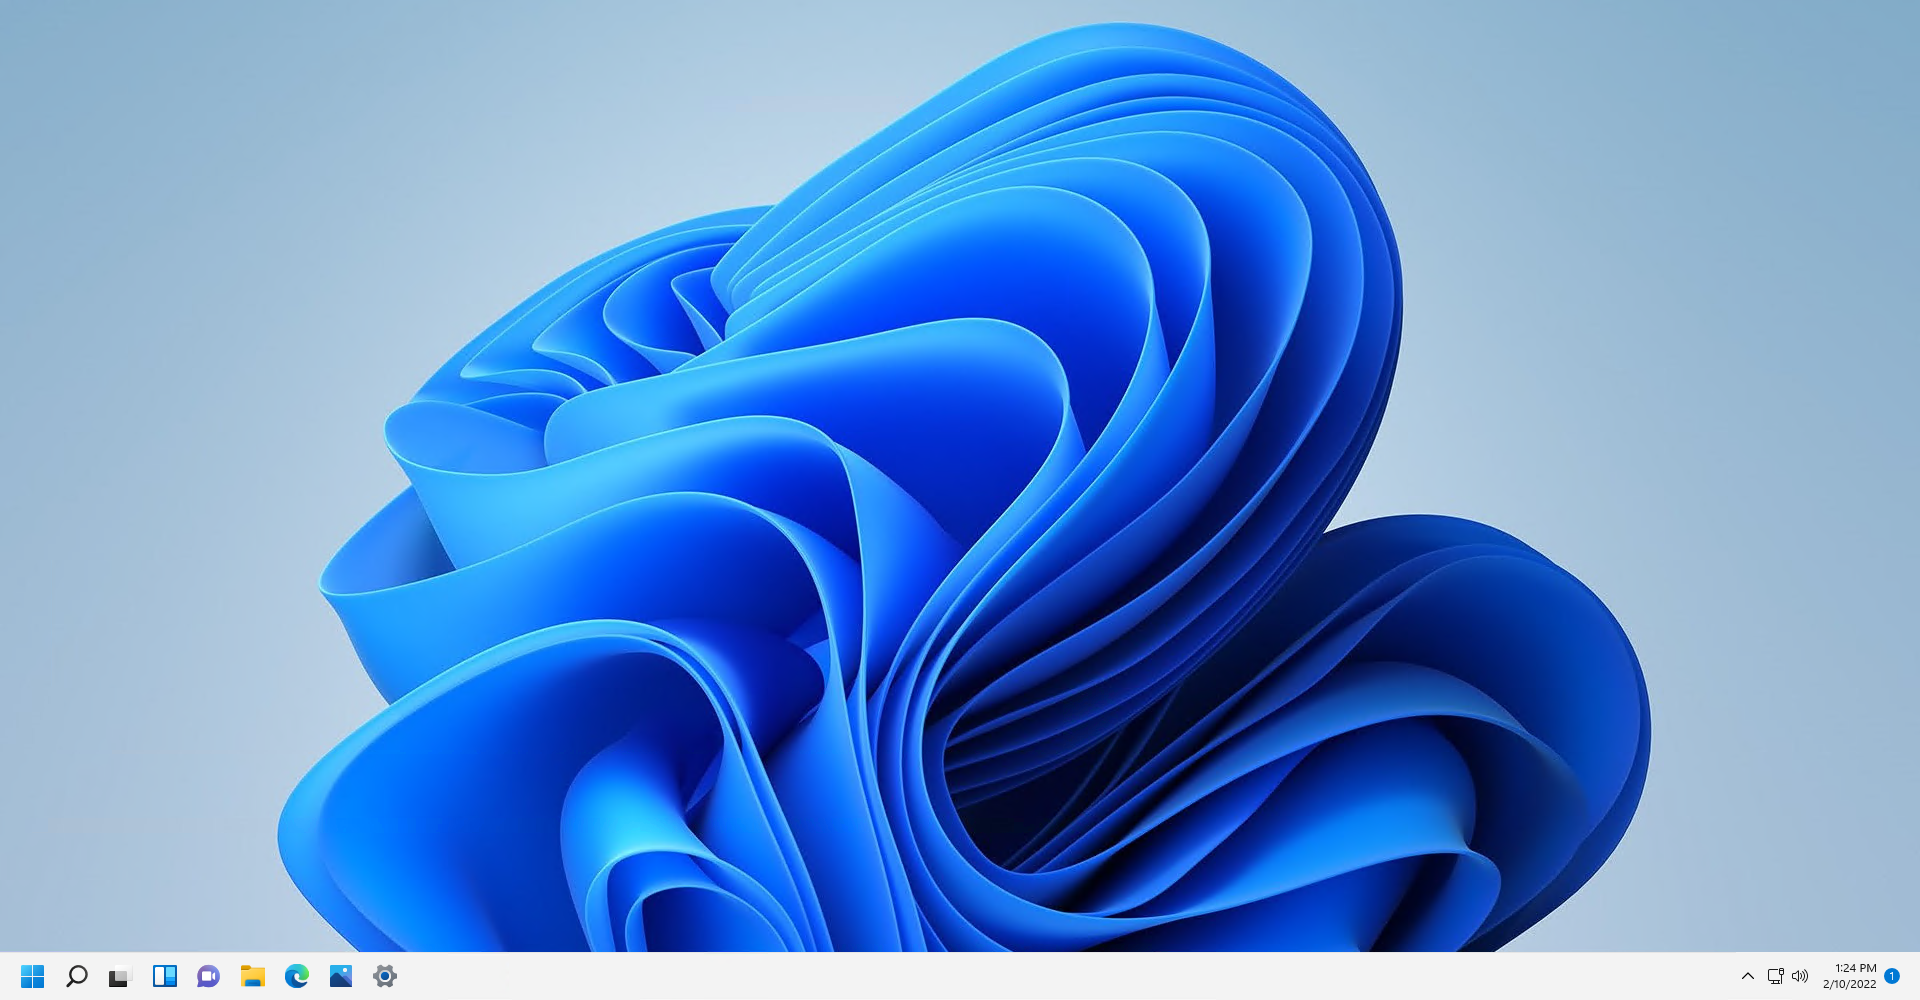
To remove icons in the taskbar that do not have the ability to be unpinned
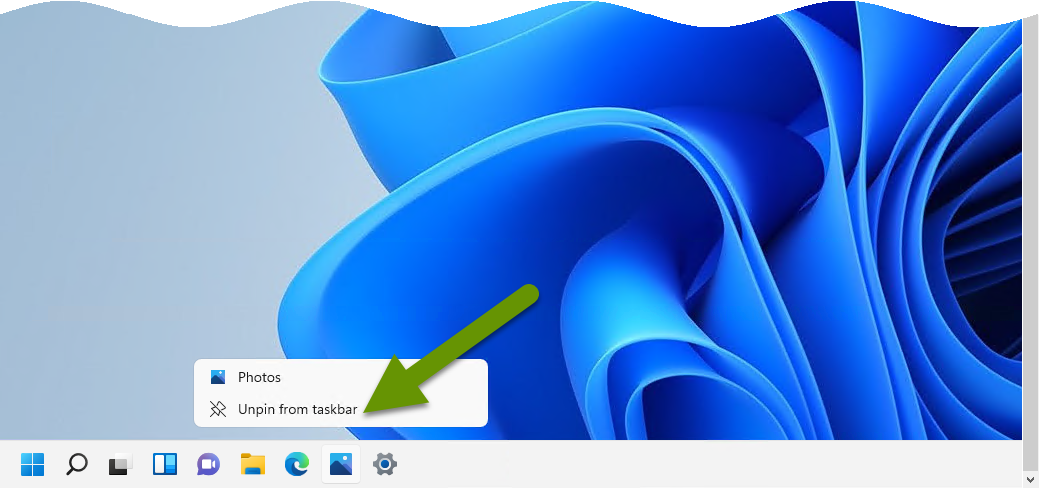
Adding and removing program icons to the taskbar is pretty simple. To add an icon, right-click on it and select "Pin to taskbar". Later, if you decide you want to remove the icon, simply right-click on it in the taskbar and select "Unpin from taskbar".
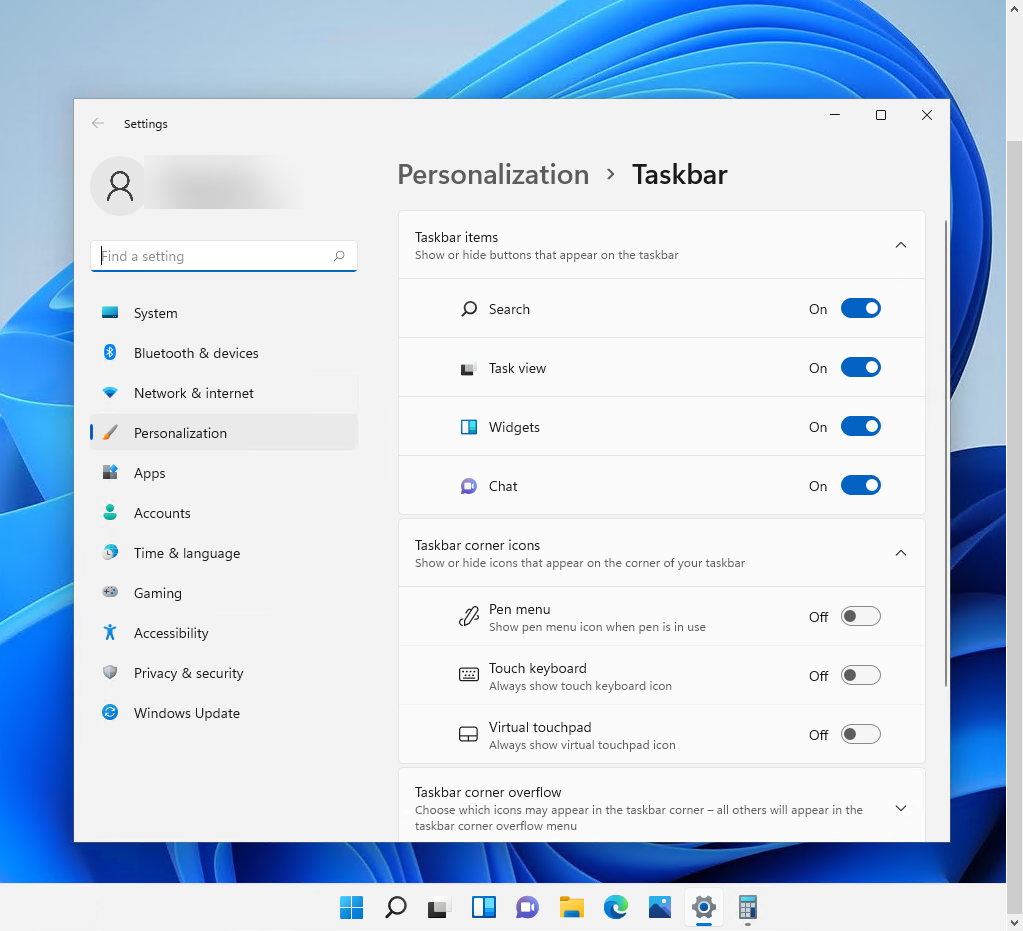
Unfortunately, Windows 11 includes some new icons that cannot be removed by simply unpinning them. Removing these icons is still fairly easy, but the process requires modifying the personalization settings for the taskbar. This can be accomplished by following the steps below:
- In Windows 11, right-click on a blank spot in the taskbar.
- This will bring up the "Taskbar settings" pop-up menu.
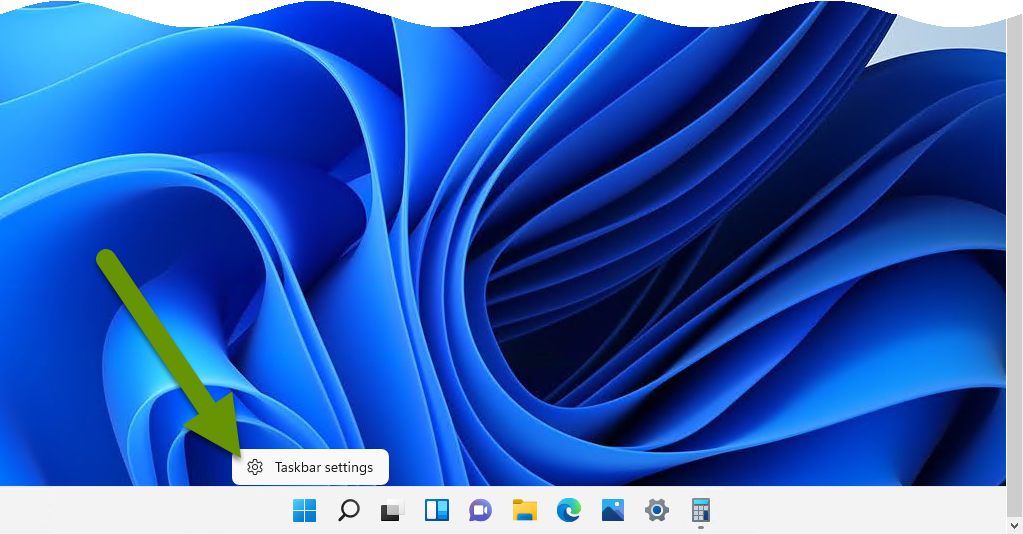
- Click on "Taskbar settings" to bring up the menu.
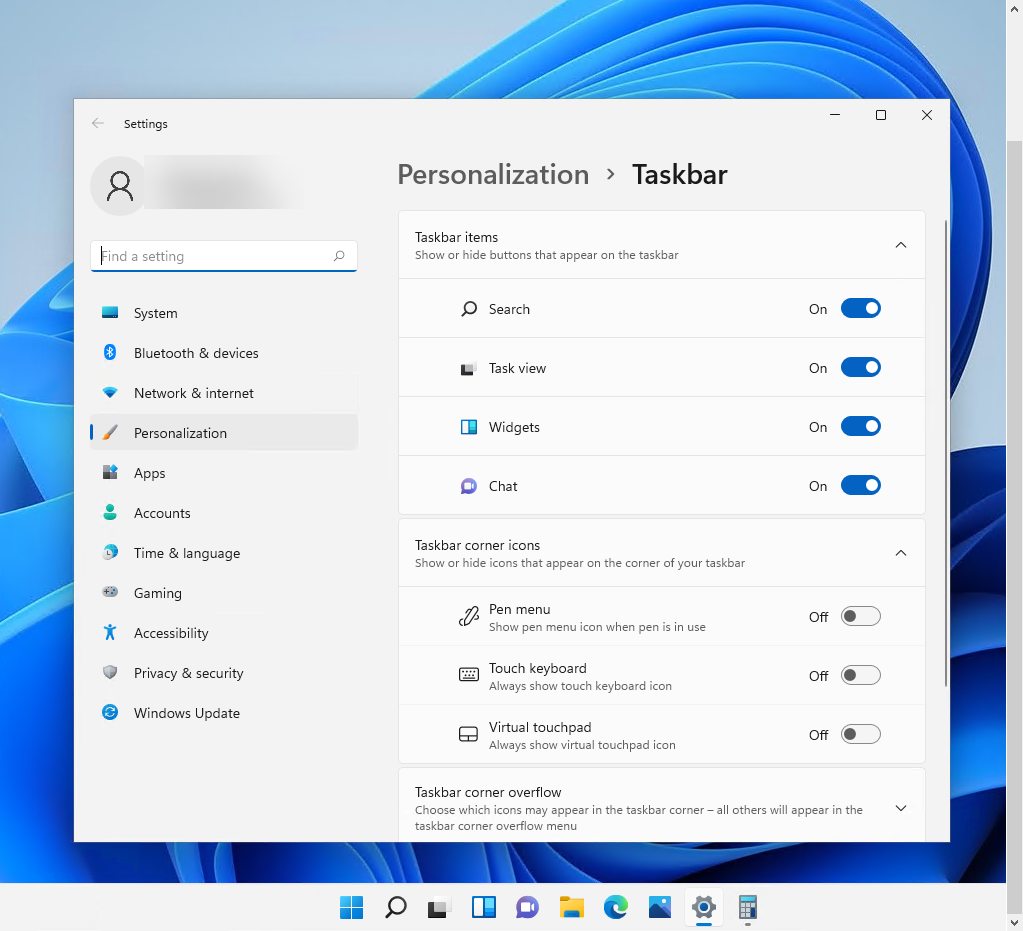
- At the top, under "Taskbar items", toggle off any programs you do not want to have icons in the taskbar.
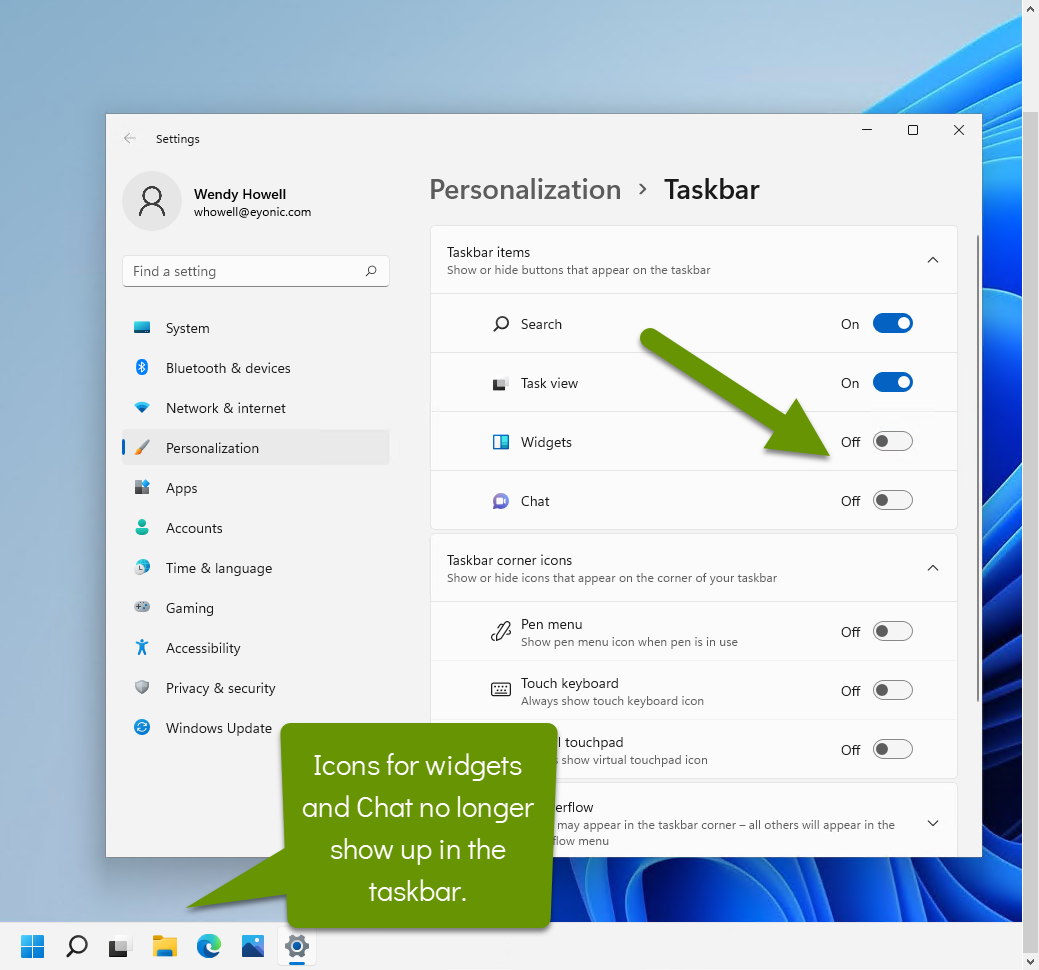
Like the taskbar alignment, any changes to these settings will take effect immediately and do not require logging off or a reboot.
New features are always introduced in new operating systems. Some changes are substantial and change what can be done. Other changes are merely aesthetic, and some users will appreciate them while others will inevitably prefer the old way. Windows 11 introduces a big change to its taskbar by centering it and adding new icons that cannot be unpinned. Luckily, if a centered taskbar is not for you, or you do not like some of the new icons, there are ways to modify these settings.
As always, modifying your device to best fit your unique needs saves time and frustration!

