Windows 7 End of Life is Coming: What you Need to Know - Part 2
Last week in the part 1 of this topic, we covered some of the important things to know about the upcoming end of end of life for Windows 7. Extended support for Windows 7, which includes security updates, ends January 14th, 2020. This post continues this topic by discussing the important things to consider before and after transitioning to a newer operating system.
One of the most important things that can be done to prepare for the end of support for Windows 7 is to begin making a plan as soon as possible. The sooner you start planning the transition the more likely you will:
- Choose the correct specs to meet your needs and that will be compatible with other existing devices
- Find a good price for a device that meets your required specifications
- Successfully get all data and software copied to your new device
- Be fully transitioned to your new device before the deadline
Windows 7 End of Life is Coming: What you Need to Know
Before buying a replacement device
Monitor compatibility
If you use a desktop computer, find out what connections your existing monitor supports. Nearly every monitor has 2 different port types, but you will find some older models may only have one while some newer ones may have 3. Each monitor will have some of the following four connector types:
- VGA - the oldest, analog connector
- DVI - the first and oldest digital connector
- HDMI - newer, supports sound, digital
- Display port - the newest, supports sound, digital support of 4K resolution at 60 frames per second
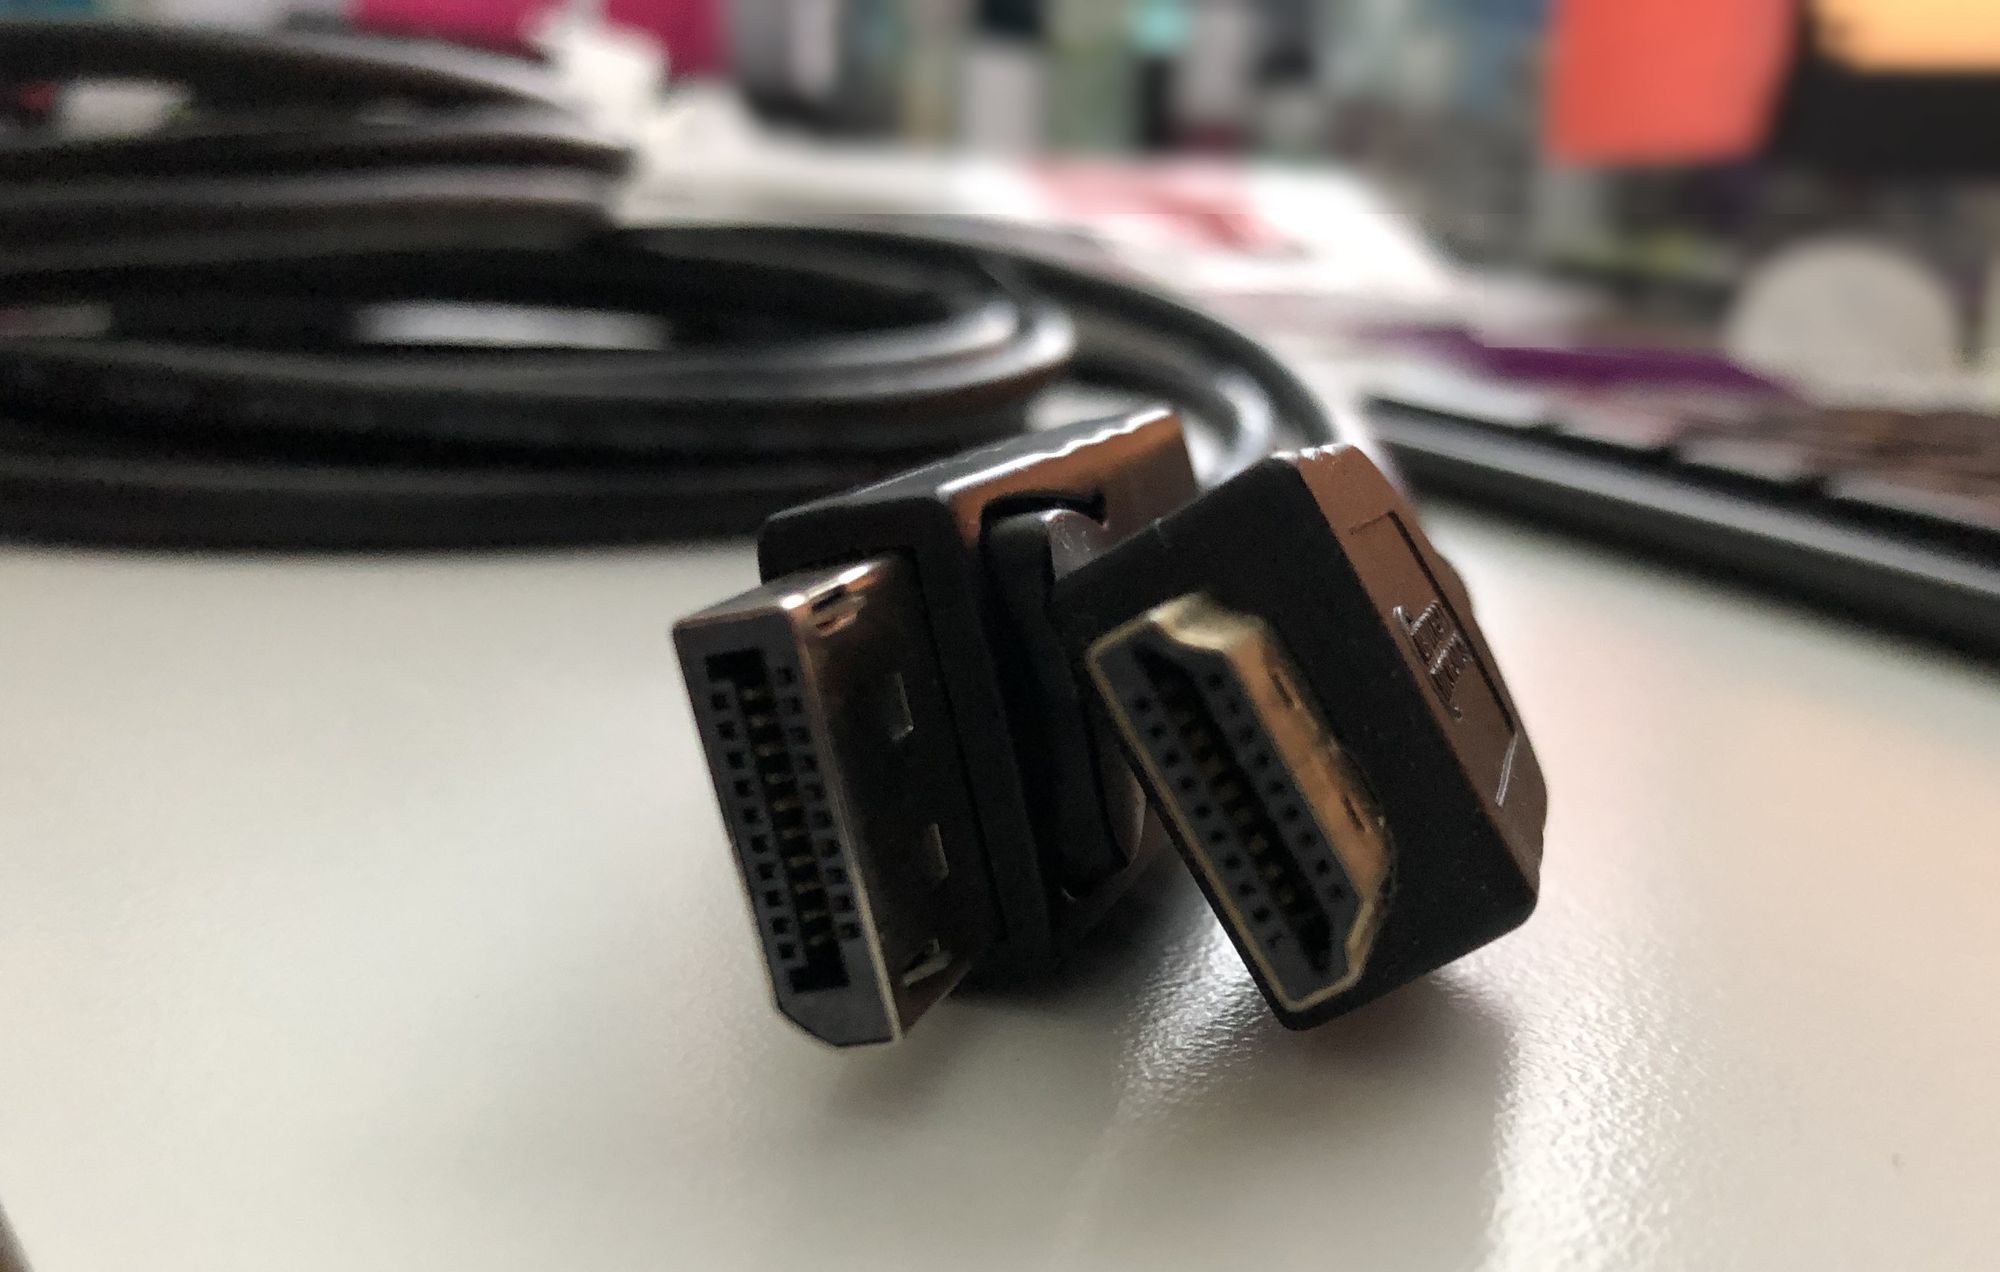
Each connector and corresponding port looks different, with HDMI and display port connectors being the most closely related. VGA connectors are distinctly blue, DVI connectors are white while HDMI and display port are black. Visually this can help identify connection types more quickly. Lastly, HDMI ports are notched on both sides while display port is uniquely notched on only one side. See the image example below for the small difference between display port and HDMI.

Storage Needs
Windows 10 is often sluggish when running on a traditional hard drive. For the average user, large hard drives end up with lots of unused storage though there are groups of users who require large amounts of local storage. Photographers, designers and those with database files will require more storage than average users. Regular users should upgrade to devices with solid state drives, or SSDs. Users who need more storage should consider purchasing a device with 2 drives - an SSD drive for the operating system as well as a large capacity hard drive for file storage.
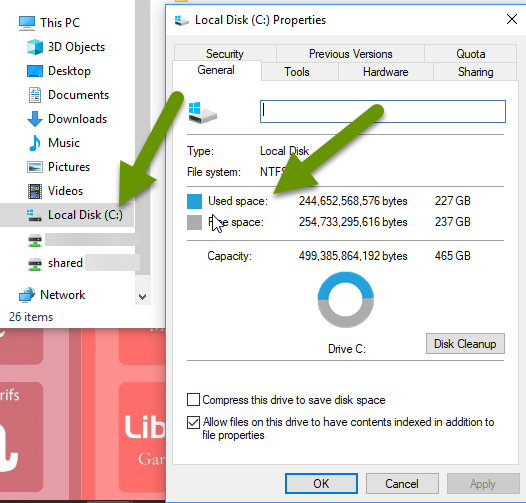
Before upgrading, look at how much storage you are currently using to find out how much you need. This will help you better determine what size drive will meet your current needs as well as providing room for growth over time. To find the total amount of storage being used on the current drive of any Windows device, right-click on Local Disk (C:) and select "Properties". The total used, free and storage capacity information is displayed on the General tab.

If you need more specific information, navigate to sub-folders like your user folder, desktop folder, or any other folder and follow the same process to find out how much storage each specific folder is using. Keep in mind, storage grows over time and you will likely have items in the downloads folder, installed programs no longer being used, and Windows update files taking up space.
Software management
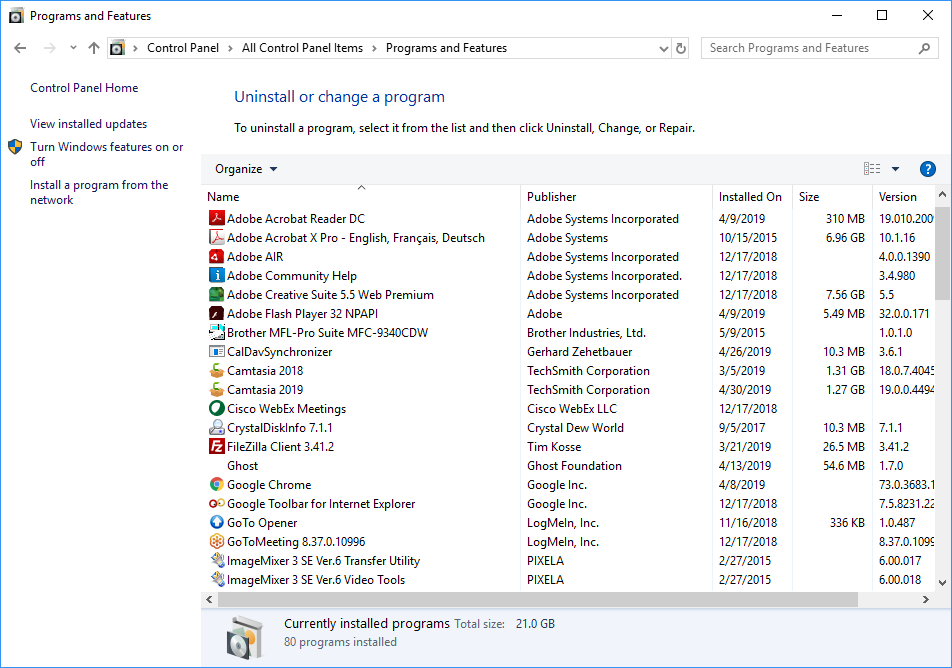
Open "Programs and Features" from the Control Panel to find out what software applications are installed on the existing device. This will help you plan to move to the new device. Document any applications you actively use. Where applicable, locate any license keys, product keys, or other unique information needed to reinstall the software. Lastly, make sure you have an install disk or online location so you know how you will reinstall the software when the time comes.

After buying a replacement device
Copy files over
If you are unsure where a special program stores its data, try looking at the about menu within the software. Each program stores data in different locations and even finding where the data is stored can be a different process. For example, from within QuickBooks you can find the location of the company file by pressing F2. Where necessary, search the internet for standard file locations for third-party software and applications.
Once you know where the files you need are stored, copy those files from your current device to the replacement device. In addition to folders used by installed software, be sure to capture important folders within the Users folder like:
- The Documents folder
- The Desktop folder
- The AppData folder
Some people prefer to grab their specific named user folder inside the Users folder, which will include all the folders listed above. This is fine as long as you have plenty of storage space. Copying an entire user folder will copy some data you do not need. If storage space is minimal, it might be better to carefully prune data out rather than copying the user's folder.
Install third-party applications and software
Once the replacement device has your data on it, you will still need to install any additional software you use. This can include:
- Productivity software like Office, Teams, Slack, etc.
- Specialty applications like Camtasia, Snagit, Photoshop, etc.
- Business management software like Quickbooks, Project, etc.
- Any other locally installed applications you use
If you have devices running Windows 7, it is important to start planning your transition to Windows 10. End of extended support, which means the end of security updates, ends in just over 8 months. The best way to transition is to plan ahead, determine what your current needs are and may be in the near future, look for devices that meet your needs, and give yourself enough time to successfully copy your files and software applications to your replacement device.
As always, there are multiple ways to do almost anything when it comes to tech, which includes moving to a new device. However, if you follow the steps above you will set yourself up for success!

