
Why QuickBooks Desktop Does Not Print to Your Windows Default Printer

If you have the desktop version of QuickBooks, you may have noticed that when you print documents of any type from QuickBooks, it does not necessarily print to your local default printer set in Windows. This is the case whether you manually set your default printer in Windows, or allow Windows to set your default automatically.
Luckily, this post demonstrates how you can set the default printer for QuickBooks so you always know where items like checks are printing from even though QuickBooks does not automatically use the Windows default printer.
Why QuickBooks Desktop Does Not Print to Your Windows Default Printer
If you have ever printed a document from the desktop version of QuickBooks, you may have noticed that it showed up at an unexpected printer, meaning not the printer set as the default on Windows. This happens because, for good or bad, QuickBooks has its own settings for the default printer. In fact, a default printer can be set for printing each type of item.
This could be helpful if you had a printer dedicated to printing checks and another printer for invoices, statements, estimates and more. However, if you are unaware of this setting, this can be very frustrating because no matter what you change in your Windows settings, QuickBooks will continue printing to the printer set within its own software.
To verify or modify the default printer in QuickBooks:
- From within Quickbooks Desktop, click on "File" in the upper left corner and select "Printer Setup...".
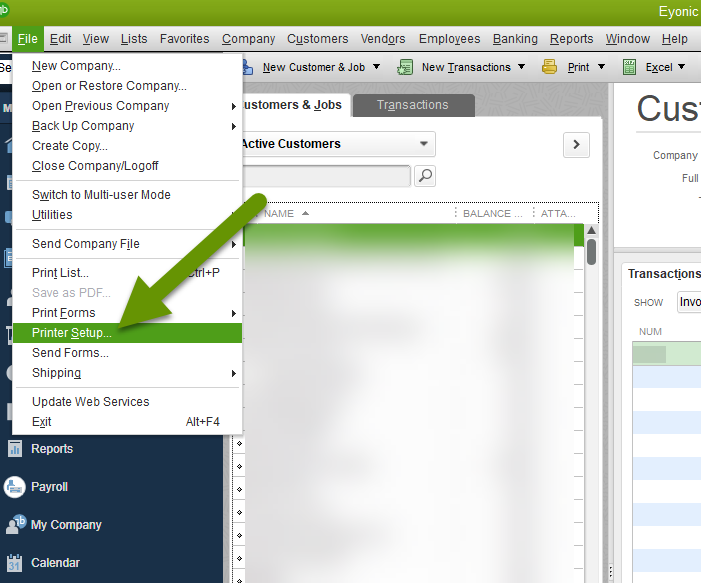
- This brings up the "Printer setup" properties box.
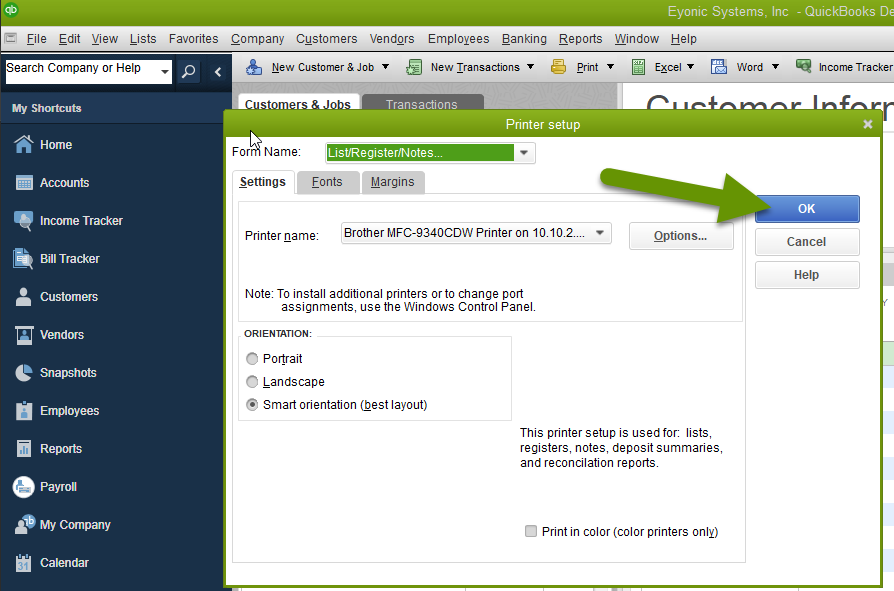
- At the top of the box, click on the drop-down menu next to "Form Name:" and select a form from the list so you can set a default printer for that form.
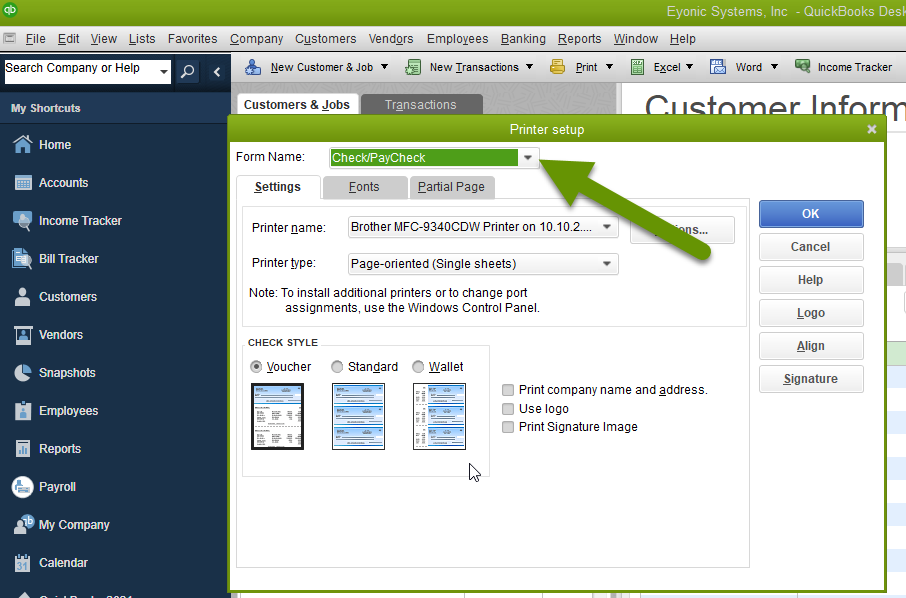
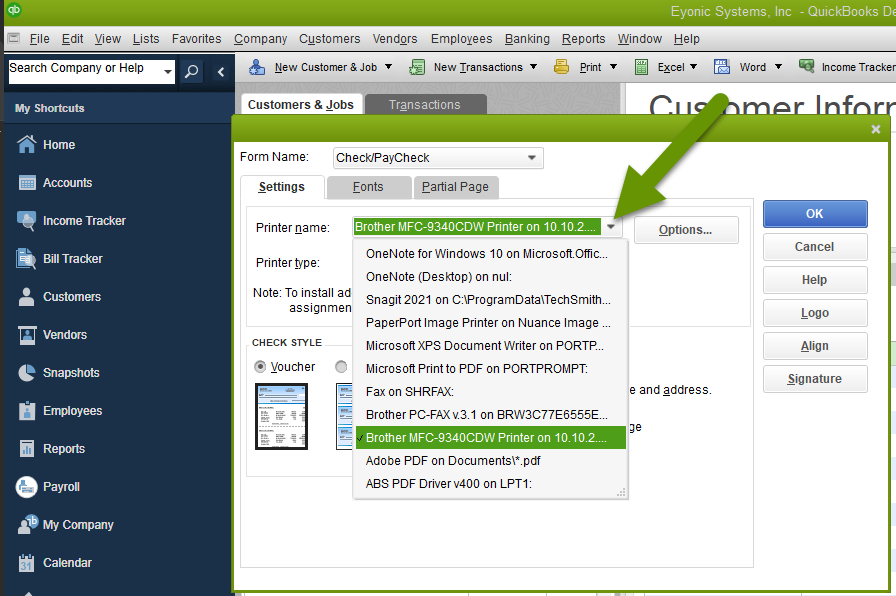
- Click on the drop-down menu next to "Printer Name:" and select the printer you want to be the default printer when printing the previously selected form type.
Continue to set the default printer for each form type that is printing to the wrong printer, or that you would like to change. You will notice there are many forms in the form list including:
- 1099s/1096
- Bill Payment Stubs
- Bill/Credit
- Check/PayCheck
- Credit Card Receipt
- Credit Memo
- Deposits
- Details from Centers
- Estimate
- Graph
- Invoice
- Item Receipt
- Label
- List/Register/Notes
- Online
- Paystub
- Purchase Order
- Report
- Sales Order
- Sales Receipt
- Statement
- Timesheet
NOTE: Your list of available forms may vary from mine depending upon version and release number.

- Once you have finished setting the default printer for each form, click the "OK" button to save these settings.
With these settings saved, whenever you print from within QuickBooks desktop, your documents and forms should print to the printer you set in the Printer setup menu within QuickBooks, regardless of what your default printer is set to in Windows.
QuickBooks Desktop application does not use the default Windows printer. Instead, you need to set the default printer in QuickBooks as this setting is stored there in the Printer setup menu. A different printer can be set for many form types, and you can choose which to set so different types of forms print to different printers. It can be challenging to understand why printing documents are not going to your default printer. Luckily, setting the default printer for each type of form in QuickBooks is easy.
As always, knowing what is happening, and where the settings are controlling these actions, is key in saving time and getting the results you want!