Two Ways to Be More Efficient When Using Excel Data Filtering
Using Excel can save a great deal of time if you plan ahead before entering all of your data. Excel can help locate and identify data trends, track sales and inventory, locate issues within your data, drill down into data to find outliers, help graph your data and much more. Filters can be one of the most useful ways to find items in your data such as finding your least or most common items or to validate data integrity.
This post discusses two ways to be more efficient when using Excel data filtering.
Two Ways to Be More Efficient When Using Excel Data Filtering
There are two ways you can be more effective when using Excel to look for specific items in your data. These include searching for specific items from within a filter and sorting from within a filter.
Searching for a specific item within a filter
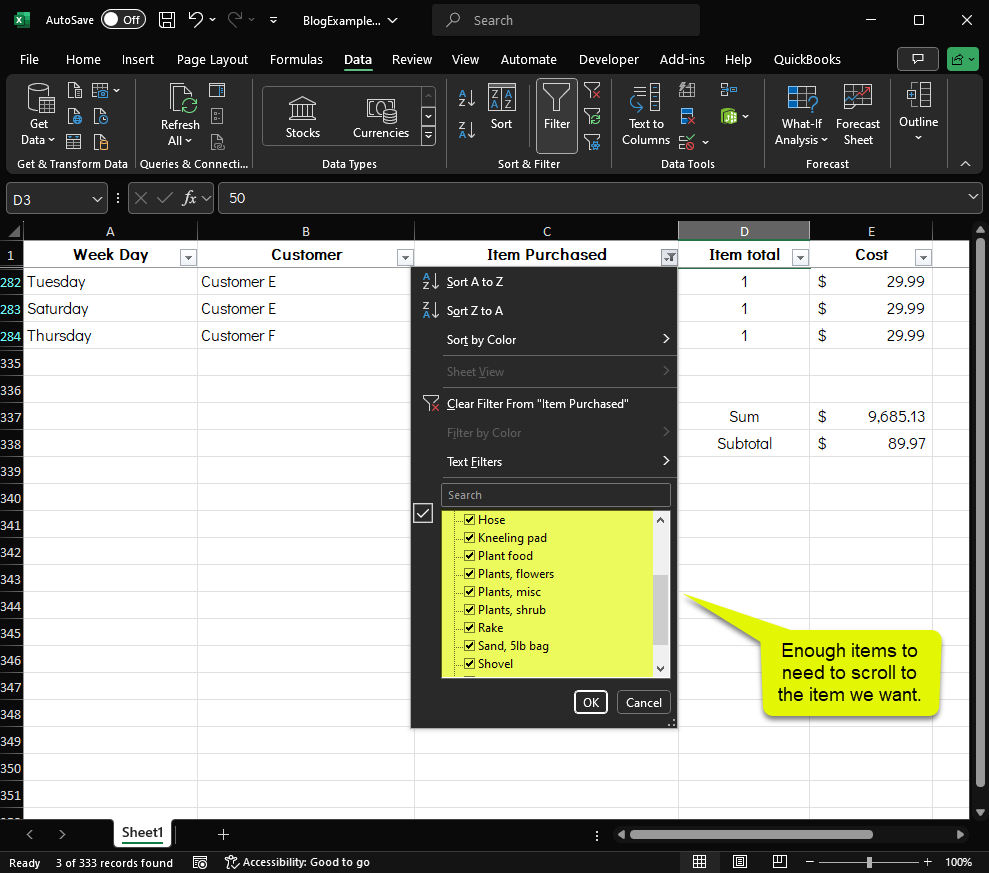
When you have a great deal of data in an Excel spreadsheet, using filters can help. At the same time, the greater the number of unique items in a column, the less efficient the filter can seem. Clicking on the filter may show you a list of hundreds or thousands of items. There is an easier way to access a single item than scrolling down to the item.
- In an Excel document with a great deal of information, if a filter is not already applied, select the titles to filter by and click on the Data tab, then click on the Filter icon.
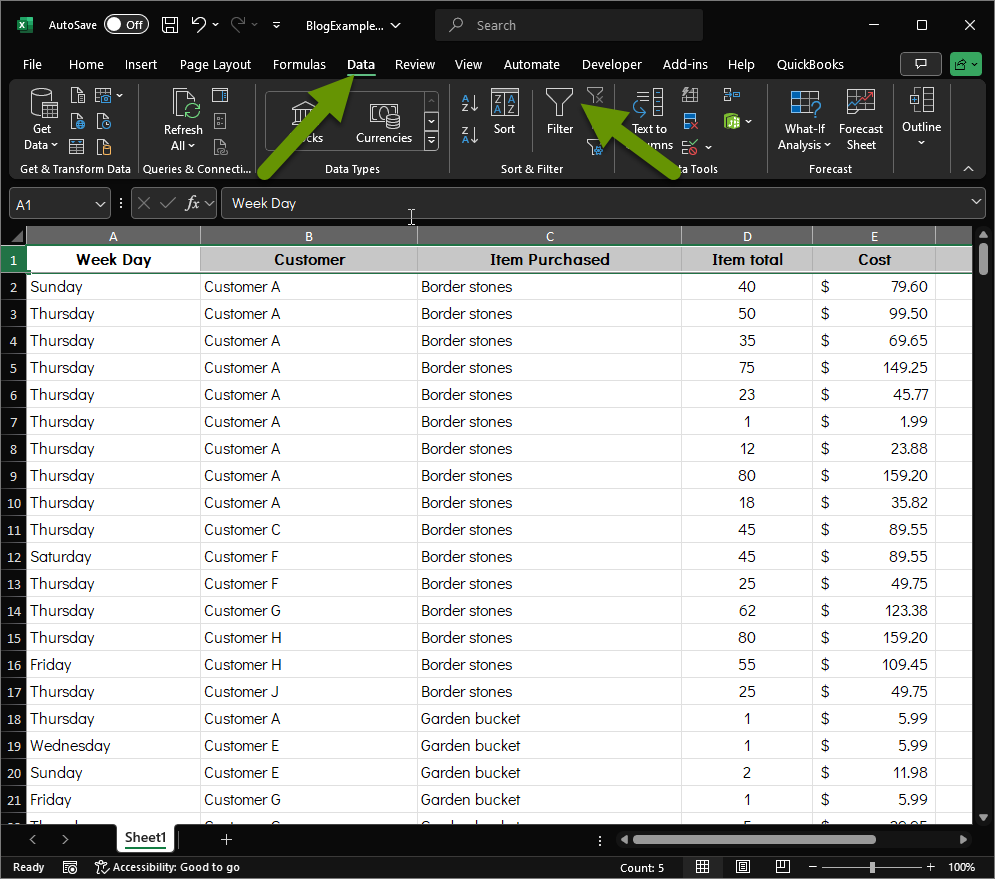
- With a filter applied, choose one of the columns of data you want to use to narrow down your results.
- Click on the arrow next to the filter and begin typing in the Search box for the item.
- Once the item appears in the list with a check next to it, click the "OK" button or the "Enter" button.
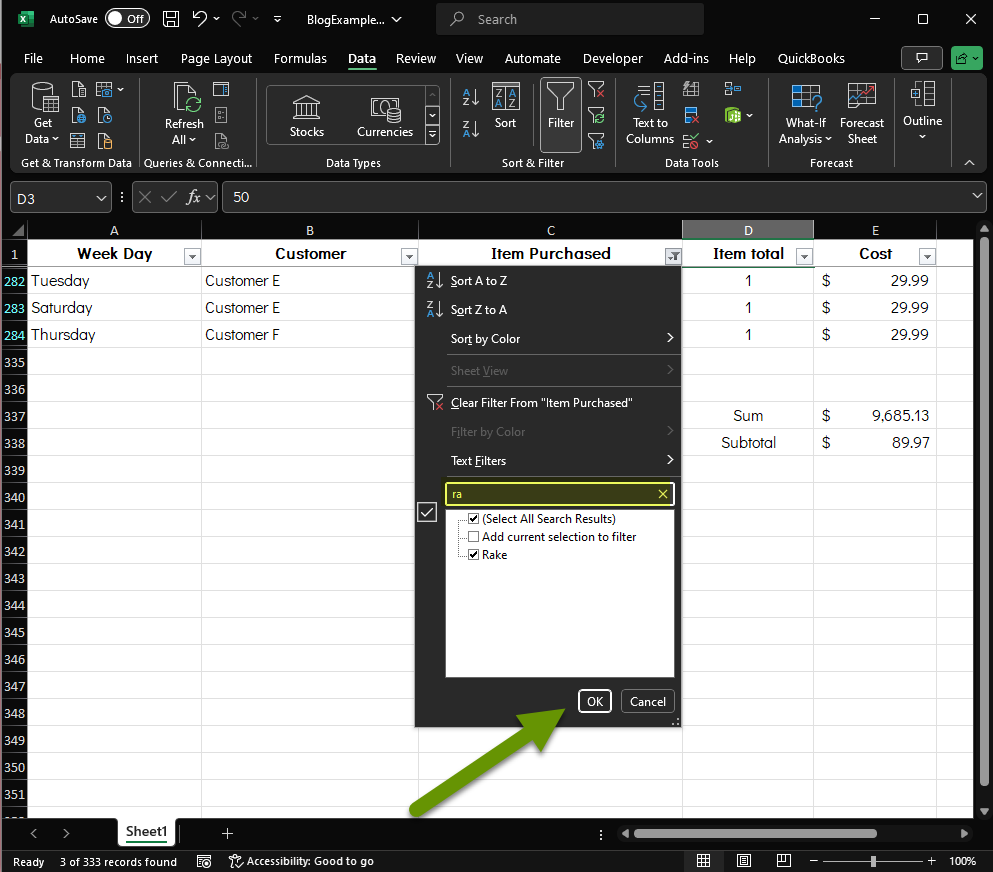
- Once you have selected the specific criteria, the sheet will update with only the results that match the filter you just set.
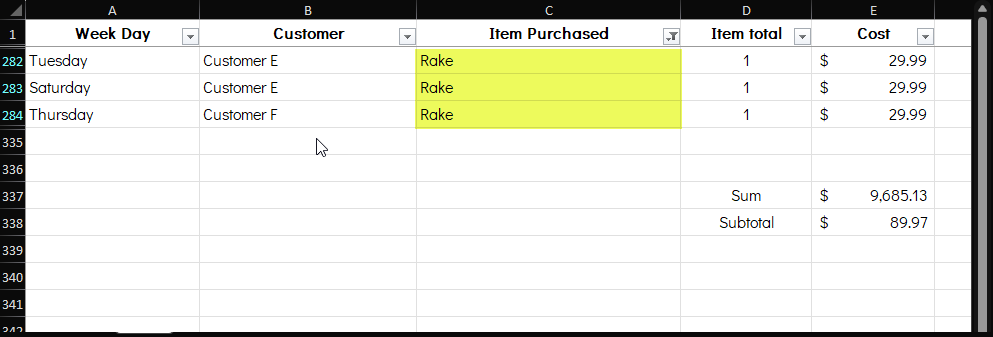
This is a much faster way to filter data when you have a larger number of unique items compared to scrolling down the list of items in the filter box which can look like this:
Sorting from within a filter
In addition to searching within a filter, you can also sort from within a filter. The benefit to this is that you can sort at any time from within any tab in the menu.
- Click on the drop down filter and click "Sort by Color" and "Custom Sort..." to create a custom sort order.
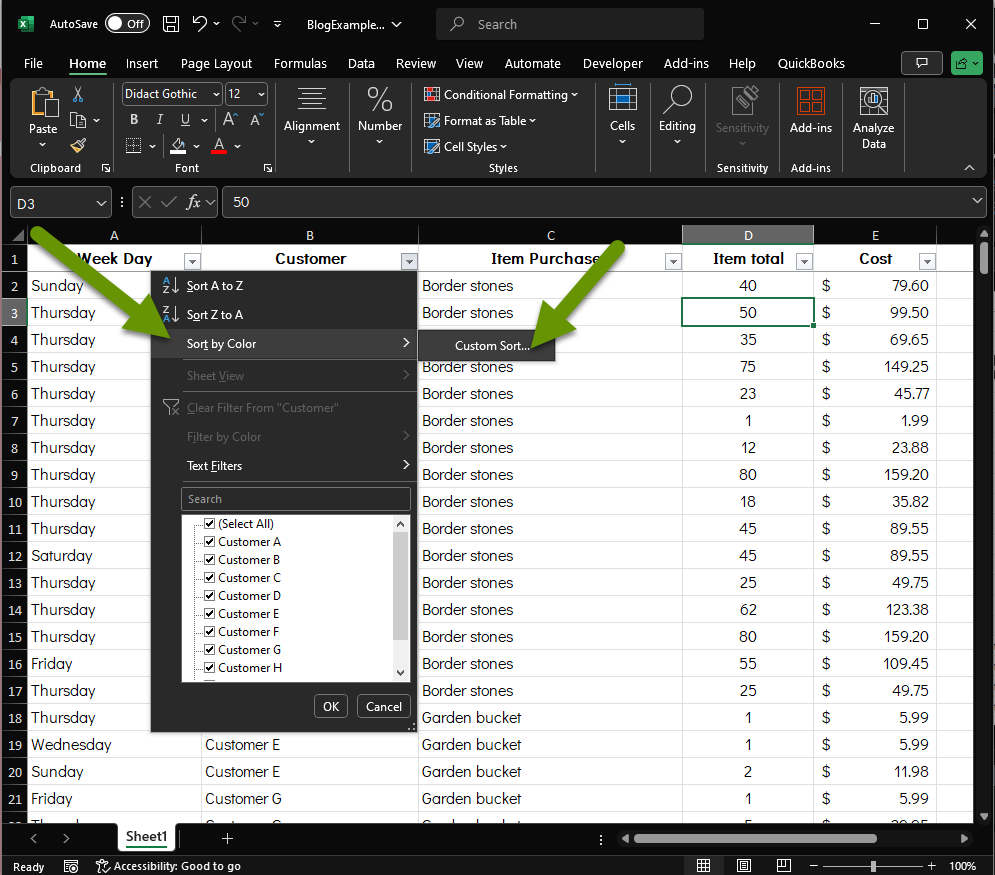
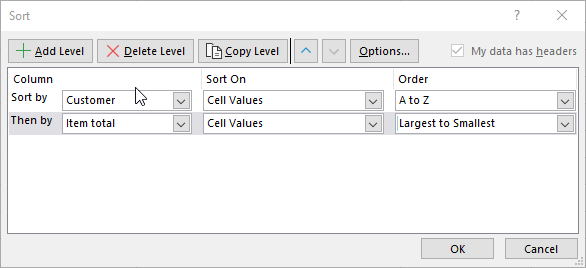
- In the Sort box, add any number of levels to sort by, including the order you want them to sort and also which order to sort in.
- Click the "OK" button to apply the sort.
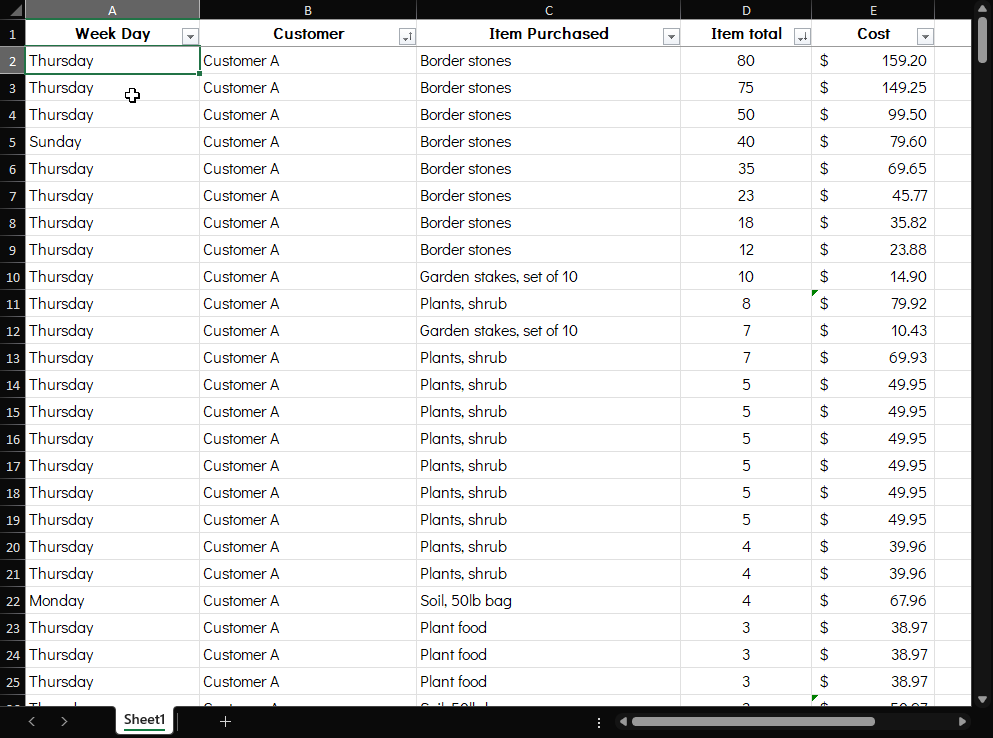
- Once the sorting options have been applied, your data should update.
Filters are a great way to sort large amounts of data and to narrow results until you find exactly what you are looking for in the data. This might be trends, most/least common items, best/worst customer, best/worst item, best/worst sales day and so much more. Filters are even better when you can more efficiently locate specific items and sort the data. Searching within a filter and sorting within a filter are two ways to use filters more efficiently.
As always, knowing how to best utilize the tools within Excel saves time and helps you find what you need faster!

