
Tips for Using WooCommerce to Sell on Your Website

If you aren't familiar with it, WooCommerce is an open source plugin that integrates with Word Press websites to facilitate sales. One of the things that makes it great is it is free to use, has been around for years, and there are many additional plugins that provide extended features. There are, of course, fees associated with accepting certain payment types like any application has, but having and using the plugin to create a store of products does not include recurring fees or fees associated with simply using the plugin.
There are quite a few settings inside of the WooCommerce plugin, and though it is straightforward, some things can go unnoticed. This post is part one of two dedicated to providing tips for integrating WooCommerce to sell on your website. This includes settings that can help your business, as well as ways to make managing products easier.
Tips for Using WooCommerce to Sell on Your Website
This post is focused on the settings portion of WooCommerce and will discuss several sections in settings that can be modified to make WooCommerce easier to use, affect how users interact with your website, and much more. Part two of this series will discuss creating products for sale and how to efficiently fill your store.
NOTE: By no means will these posts cover everything, rather they will point to areas that could be helpful to your business or that might otherwise be missed. It is always important to take the time to go through all settings in any plugin to make sure it will operate the way you expect it to.
Settings menu
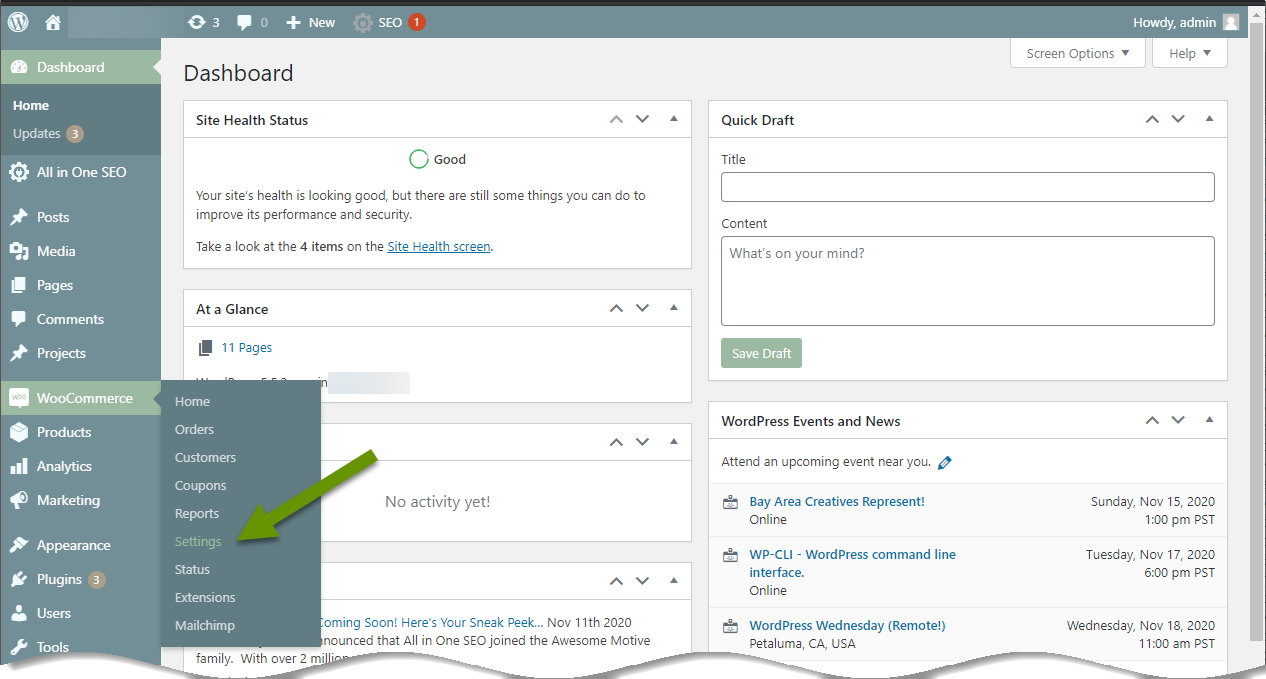
First, to access the Settings menu, log into the website with the WooCommerce plugin already installed and activated. From your dashboard, click on "WooCommerce" in the left panel and then click on "Settings" in the pop-out menu.
This will bring up the Settings menu which has several tabs, some of which also have sub-categories.

General tab
There are two areas in the general tab you should address before taking your store live: selling locations and currency.
Selling locations
An important thing to consider before adding products and going live with your store is deciding which countries you want to sell to. Scroll down to the heading "Sell to specific countries" and select from the drop-down options. The three options are:
- Sell to all countries
- Sell to all countries, except for...
- Sell to specific countries
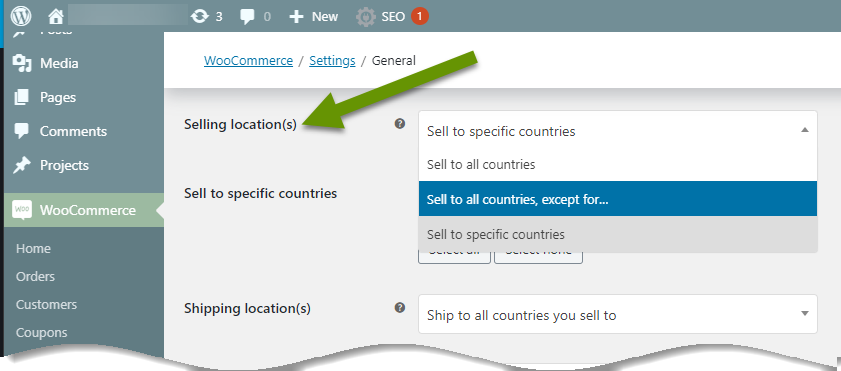
These options make it easy to set which countries you will sell to, whether all of them, most of them or only a few. Wherever you want to sell products, be sure to designate this information upfront so there are no surprises later.
Currency
It is important to set the currency for items you are selling. This ensures items are listed with prices that are exactly what you expect. To set the currency, scroll to the bottom of the general tab and set the options which include:
- Currency
- Currency position
- Thousand separator
- Decimal separator
- Number of decimals
The most important setting is currency, while the others are mainly for formatting. However, setting the defaults here saves time when you add products later.
Products tab
Two important areas of the products tab are: reviews and inventory.
Reviews
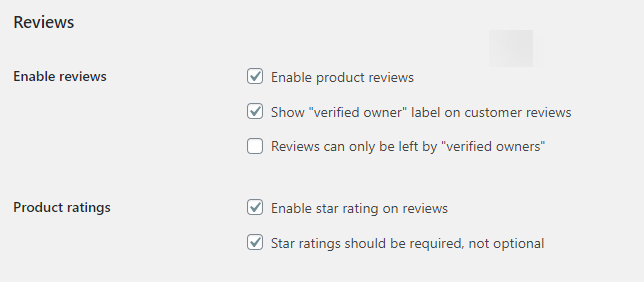
The General section of the products tab is where you can manage product reviews and ratings on products. Check to enable or disable reviews, require reviews to be from verified owners, enable star ratings and more.
Inventory
There are several areas of importance in the inventory sub-category. If you are selling something that has infinite supplies like a digital e-book, you can simply leave the box next to "Enable stock management" unchecked. However, if you plan to sell something whose stock is finite, you will want to enable stock management.
If desired, set a time for hold stock (see explanation in image below), enable low and out of stock notifications, and a recipient for those notifications. Also, set the number for low stock and out of stock thresholds. These thresholds will determine when notification emails are sent when enabled. Lastly, decide whether or not to show the quantity of stock for each product.
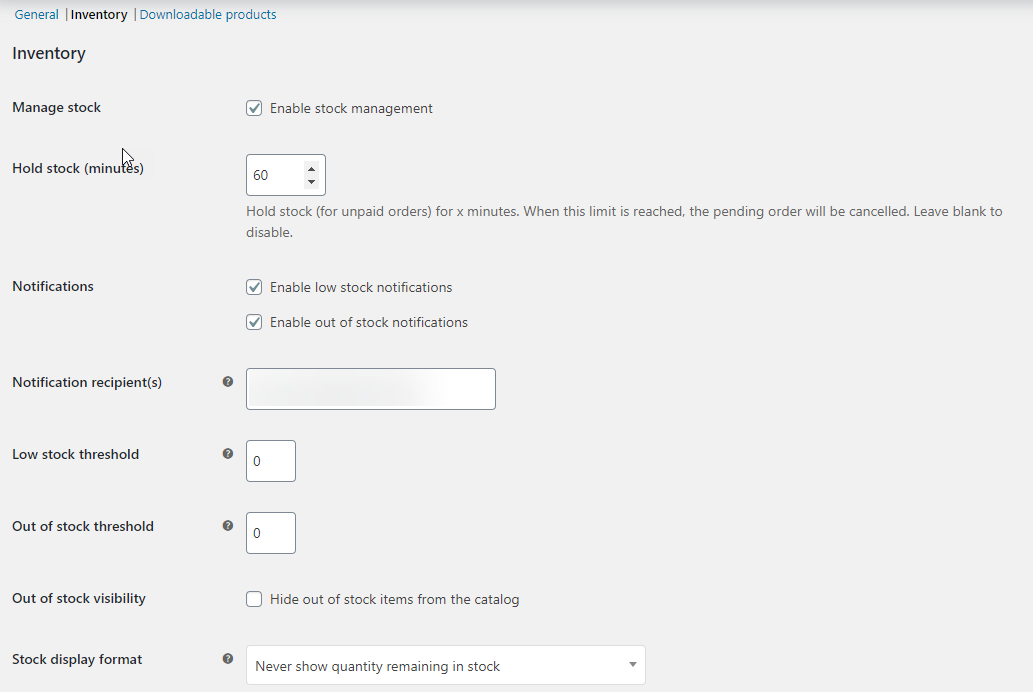
Keep in mind these settings can be also be modified individually for specific products as needed. The most efficient use of these settings is to set them to what you most commonly want them to be, then change them when needed inside special products.
Shipping tab
The shipping tab is broken into 3 sections:
- Shipping zones - create zones based on areas you send to, these can be as general or as specific as you like.
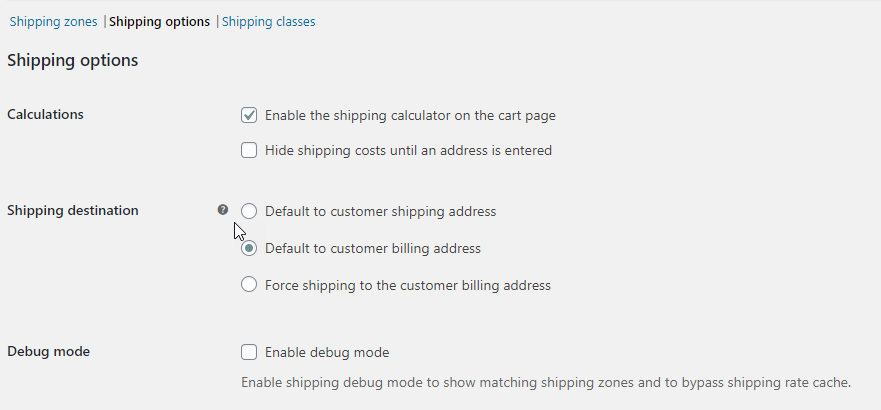
- Shipping options - determine if shipping is on the cart page or requires an address, and choose the default shipping destination.
- Shipping classes - use these to set amounts for shipping types such as ground, 2-day, and overnight.
Payments tab
Choose which types of payments you want to accept on your site. This setting usually requires additional WooCommerce plugins like WooCommerce PayPal Checkout Gateway, WooCommerce Stripe Gateway, etc.
Each payment option will require some setup to work. Once the setup is complete, be sure to practice using the systems to verify they work as expected before going live with your store!
Accounts & Privacy tab
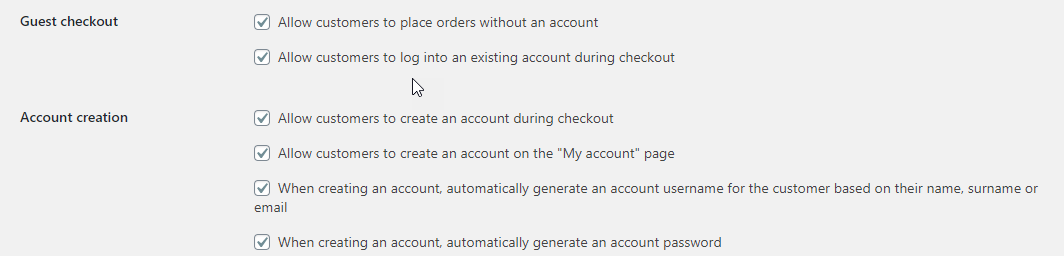
The Accounts & Privacy tab is important because it is where you choose to allow customers to order from you as a guest, or whether they can or must create an account to place an order. These options are up to you, but I would suggest considering how you feel when you order from a site that forces you to create an account versus the benefits of having every customer create an account.
Emails tab
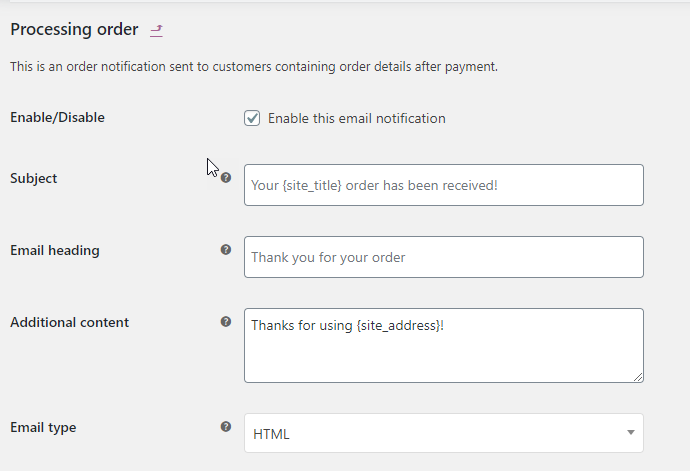
The emails tab has a large list of template emails that can be sent out when certain triggers or circumstances are met. Be sure to set the recipient email for orders and cancellations, etc., to go to an address you check often. Also, click the Manage button to check the content of these emails and/or make modifications to fields like the subject line, email type and more.
There are lots of settings to consider when selling products on your website. WooCommerce is a free plugin that helps manage products, sales, inventory and much more. If you decide to use this plugin to sell items on your website, be sure you go through all of the settings before going live with your store. Next week we will discuss how to efficiently create products for your store!
As always, if you are a smaller business or an individual, using plugins that do not have recurring fees just to access them can save you a great deal of money!