
Tips for Using WooCommerce to Sell on Your Website - Part 2

WooCommerce is a free plugin that integrates with WordPress websites to help manage products, sales, inventory and more. Some benefits of WooCommerce are that it has been around for many years, is updated frequently, and is free to use. Like all plugins, WooCommerce works best when you take the time to configure the settings for your unique situation.
Last week we discussed some important settings in WooCommerce that you would not want to miss before going live with your store. Some of these included controlling inventory, currency, managing ratings, shipping and more. This week we will discuss some of the available settings when creating a new product, and some tips for saving time when creating products for your online store.
Tips for Using WooCommerce to Sell on Your Website - Part 2
There are two main ways to create products in WooCommerce: importing items from an existing file, and adding them through the WooCommerce plugin. This post discusses ways you can save time when inputting items within the WooCommerce plugin.
NOTE: If you already have all your items in a CSV or TXT file, use this to import your products into WooCommerce. You will still need to map the columns to match WooCommerce settings and add images, so the information below should still be good reference.
The most efficient way to add products to the WooCommerce plugin is to create a template product item for each type of product you sell. Once a template has been created and configured, simply copy it for each additional version of the product, modify the details and publish.
Adding products more efficiently consists of:
- Grouping similar items
- Creating a template product for each group and entering the details
- Copying the product template for similar items, updating the info and publishing
Group similar items
Ideally you want to group items that are similar enough that most of the details will not need to be changed when you copy the template to create a new product. As an example, if you sell clothes, you might group products into categories like pants, shirts, sweatshirts, socks, etc. If you only sell shirts, you might group them into categories like nature, animals, funny sayings, movies, etc. The important thing is to group items in such a way that they require the least amount of modifications.
For example, a detail that can be set for a product is the cost of shipping. Most shirts should fall in the same cost range, while pants, would fall in another. This means they are best in their own groupings. The more you can group similar items with similar attributes, the more time you can save when creating new products.
Create a template item for each group and entering the details
Once your products are broken into groups, create a product template for one of the group categories. The settings for each product are broken up into a main section in the middle and a small section on the right.
The main section
In the main section, fill out the following information about the product:
- Give the product a name (this will be displayed on the website if the product is published).
- If desired, add a description. The top descripion is supposed to be the more detailed description. It displays when an item is clicked on and opens in a new window.
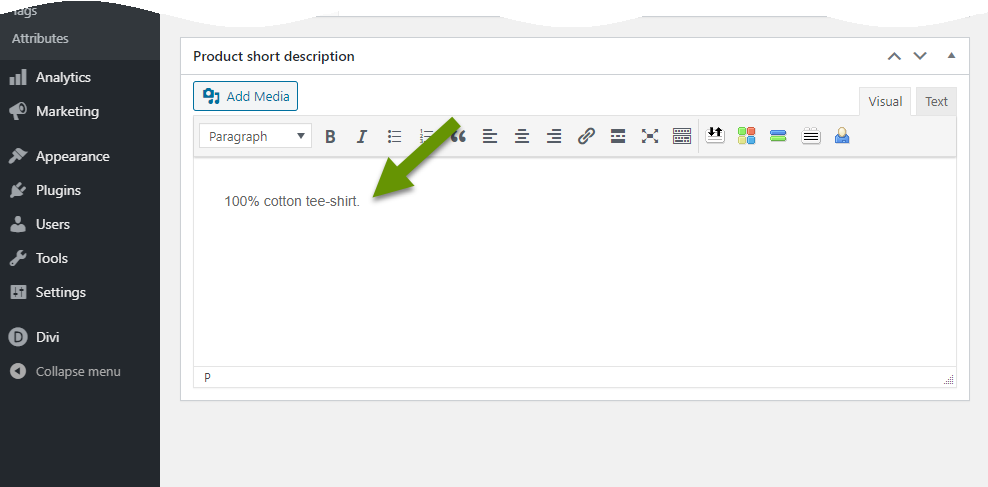
- At the bottom add a Product Short Description if desired. The shorter description is displayed below the item on shop pages.
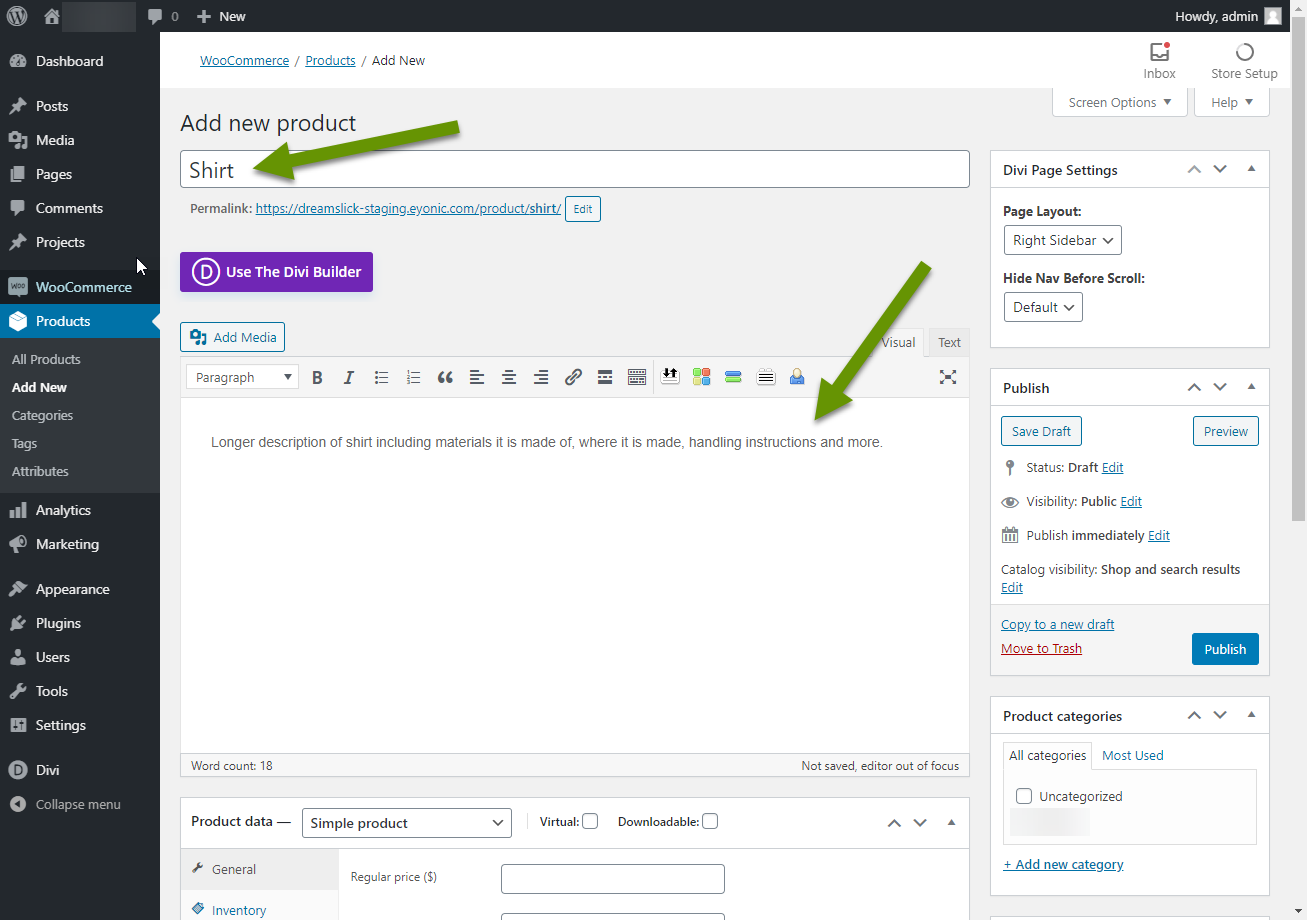
In the middle of the main section, the Product data section has many items that can be set to save time:
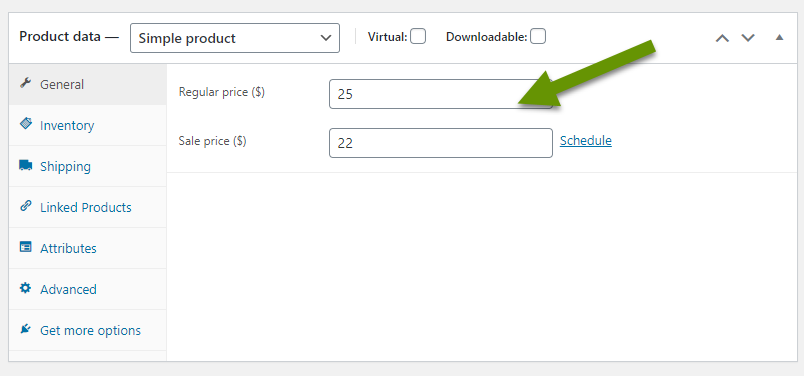
- On the General tab, set the regular price and an optional sale price for the item. You can even schedule a date period for the item to be on sale.
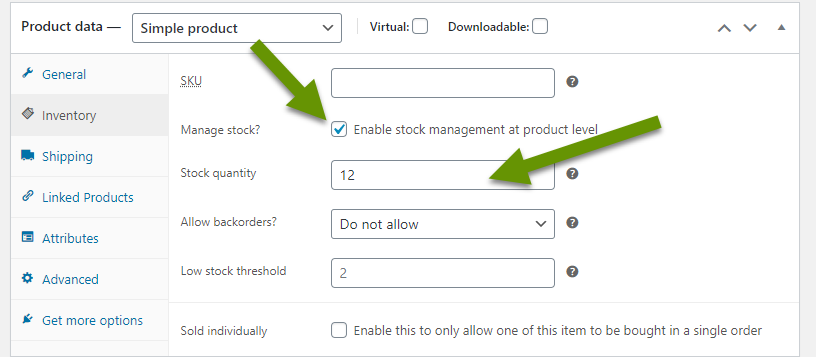
- On the Inventory tab, select whether or not to manage stock. Some items do not require this, like items that can be downloaded, or items being made when ordered where materials are always in stock. The default setting is to not manage stock.
- If you are going to manage stock, click the box to "Enable stock management at product level". Set the quanity and whether or not you want to allow backorders.
- Also, if your item is unique and you will only have one single item, click the box next to "Enable this to only allow one of this item to be bought in a single order" next to the "Sold individually" setting. This prevents someone from purchasing more of an item than you have to sell, which can otherwise be a mess!
- On the Shipping tab, select a shipping rate from those you already created in the Settings section of the WooCommerce plugin.
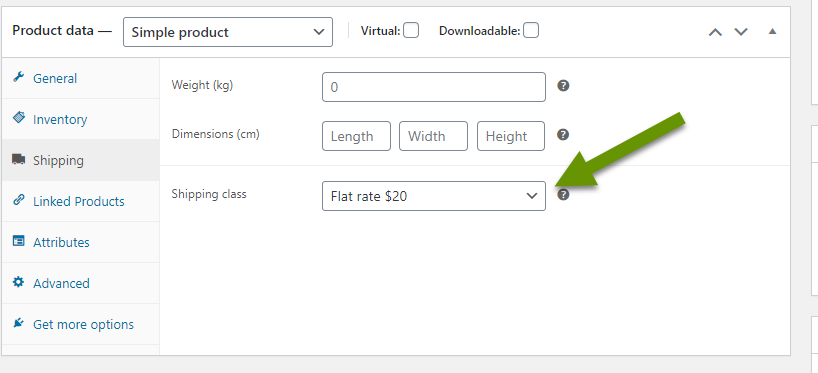
There are other tabs in the product data section, but these are the ones most likely to have data that applies to multiple objects. Again, the more alike items are in your groupings, the more these settings will apply to each item in them.
The right section
The right section has one main thing to set for the product template: the product category. Product categories help you group items to make it easier for visitors to shop and purchase.
In our clothing example above, you could create a category for shirts, pants, sweatshirts, socks, etc. By doing this, and assigning products appropriately to each category, you can add shopping modules based on categories. More specifically, a single shopping module can be added to a page, or multiple modules can be added to a single page.
To add a product category:
- Click the "Add new category" link.
- Type the name of the new category and click the "Add new category" button.
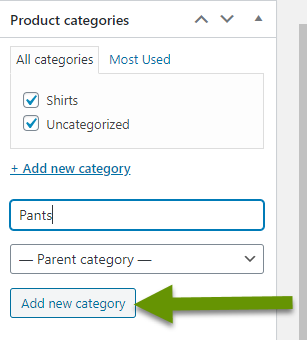
- Once a category has been created, a product can be added to the category by clicking the box next to the appropriate category name(s).
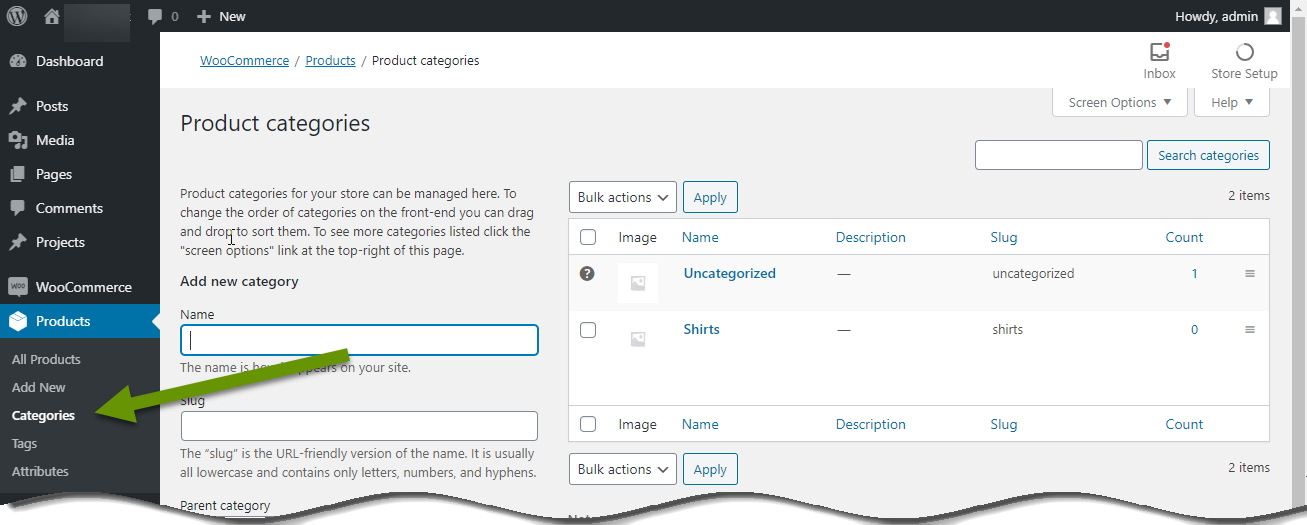
- Categories can also be managed by expanding the Products section in the left Dashboard pane and selecting "Categories".
Copy a template and update the info for additional products
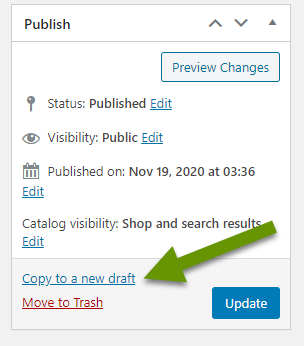
Now that you have a template for a category of products, you can add additional products more quickly. Simply open the appropriate template product and click the link to "Copy to a new draft". This opens a copy that can be modified and published without changing the original template.
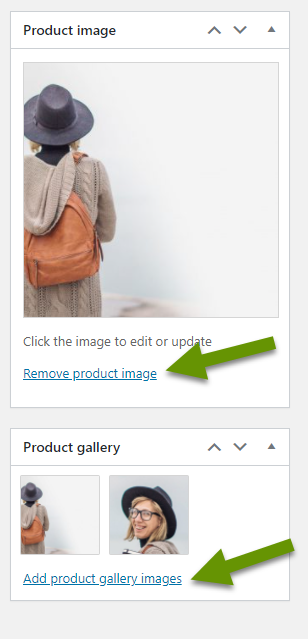
Once the new draft opens, update details as necessary. If you grouped your items carefully, the main items you need to update should be limited to the name of the product, the description and the images for that product. Once all changes have been successfully made, click Publish to add the product to your store. Continue until all products have been added to your store. Be sure to set the image or image gallery as shown below:
- Click the link to "Set product image".
- In the pop-up menu, add images for the product or select from images already uploaded to the media library.
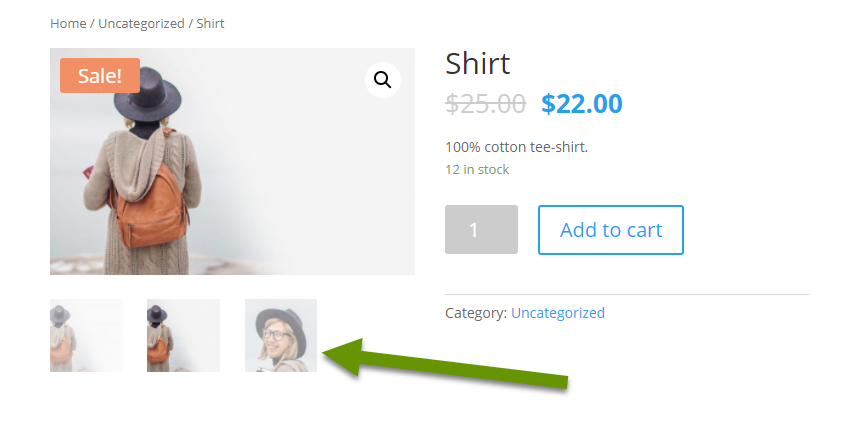
Note: Setting the product image only allows you to upload a single image. If you have multiple images for a product, set the product image which appears in the shop, then add images by clicking the "Add product gallery images". This will allow you to upload additional images which are displayed once you click on the item for more details.
Creating a template for each product group or category is an efficient way to add products to your web store when using the WooCommerce plugin. Taking the time to carefully set up a template, so it can be copied and modified to create additional products, can save an enormous amount of time. The more products you have, the more time you will save. Be sure to create your templates carefully. Going back to update hundreds of items can cost as much time as you originally saved when a mistake is made!
As always, there is often a quicker way to do things, though it may require more up-front planning to successfully accomplish.