
The Safest Way to Move Folders Between SharePoint Sites

SharePoint is a Microsoft application that integrates with Microsoft Office. It is the backend storage system that manages files users access via OneDrive. OneDrive can be set up as a personal or business account. When used by a business, the application allows users to access, store, and share files with other employees. OneDrive is often set up using multiple SharePoint sites, as this is how file access and permissions are managed.
This post discusses the best way to move folders between multiple SharePoint sites via OneDrive to help prevent data loss.
The Safest Way to Move Folders Between SharePoint Sites
On a Windows device, moving files is fairly straightforward. The easiest way to move files is to open two Windows Explorer windows and navigate to the from location in one window and the destination location in the other window. Then, click and drag all files and folders you want to move from the original location to the destination.
If you are moving files from and to a location that is on the same device, such as to and from the local solid state drive (SSD), the files will default to being moved. If you are moving files from and to different drives, such as a local SSD and an external flash drive, the files will copy by default.
Unfortunately, safely moving files that are accessed via OneDrive can take a few more steps when they are being moved between SharePoint sites. This post discusses the safest way to move files between multiple SharePoint sites.
Having multiple SharePoint sites
Creating multiple SharePoint sites allows the owner/creator to apply permissions to all folders and files stored in each site. For example, you might have template files, company information, marketing materials and such stored in a general site and then create a secondary site for private items like salaries, benefits, financial information, etc.
The way to tell if you have more than one SharePoint site is by looking at the list in Windows Explorer under a OneDrive business or personal account.
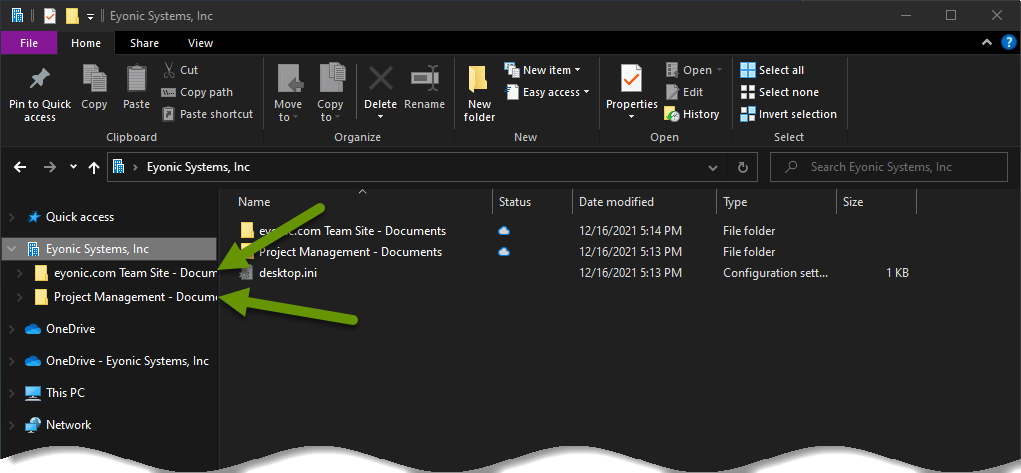
In the example above, you can see that there are two unique sites under the account. Additionally, under the Status heading for both sites, the cloud symbol shows that these files are stored in the cloud which is the default setting.
Unfortunately, if you try moving files between sites, and the files are stored in the cloud rather than locally, you may run into issues. Issues can include files being skipped or files being moved into the Recycle Bin rather than to the new site.
Luckily, there is a better way to move files between two SharePoint sites.
To move folders and files between two SharePoint sites, follow the steps below:
- First, navigate to the parent folder of the folders and files you want to move to a new location. If the folder you want to move has a cloud symbol as its status, you will want to synchronize the folder and all sub-folders and files to the local machine before moving them.
- To do this, right-click on the parent folder and select "Always keep on this device" from the pop-up menu.
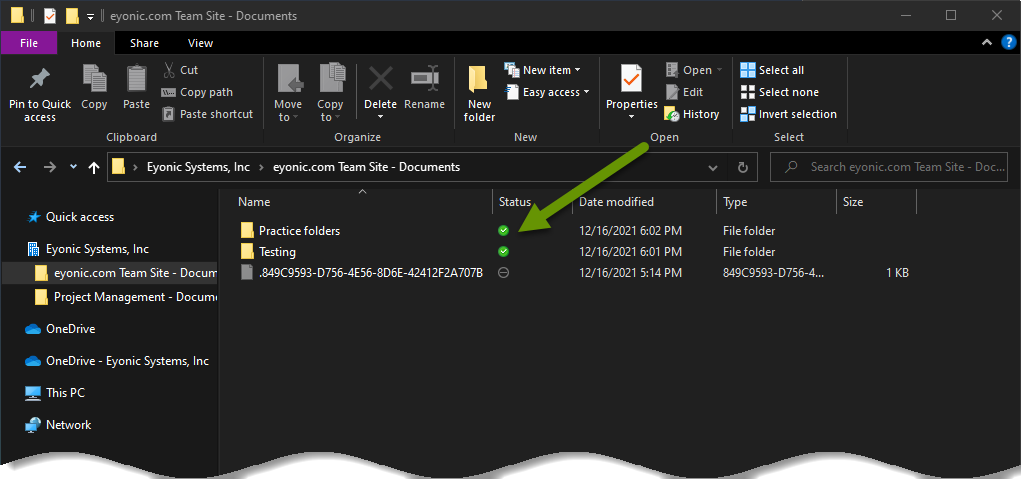
- Wait for all of the files to synchronize to the local device. Once all files have been downloaded, the status of the folders will have a green check instead of the cloud.
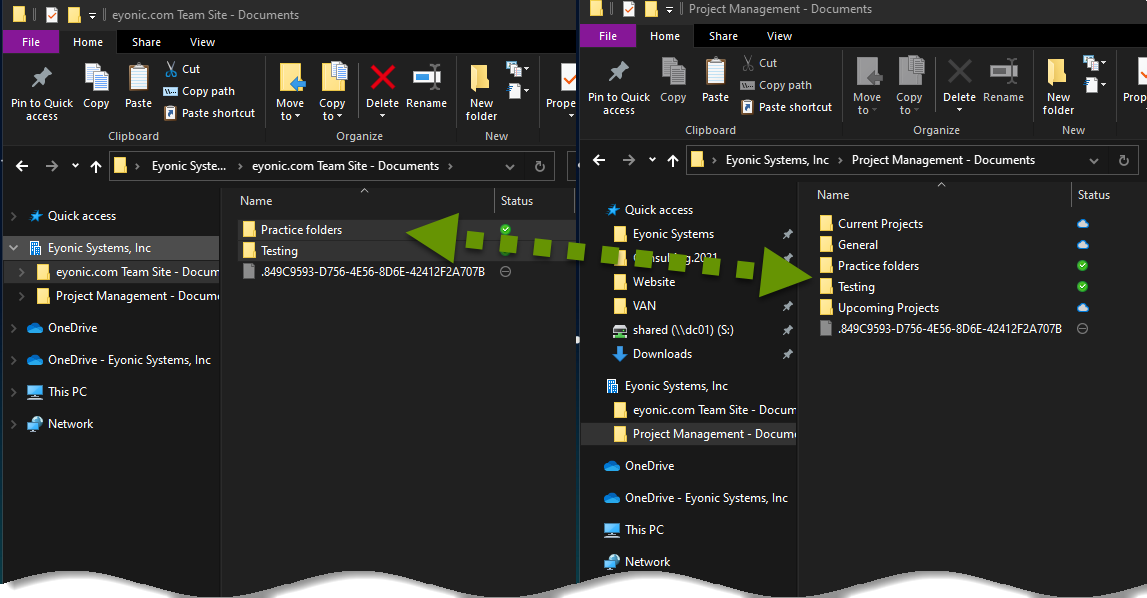
- With the files stored locally, right-click on the main folder to move and select "Copy".
- In a second Windows Explorer window, navigate to the destination location then right-click on an empty area and select "Paste".
- Wait for all of the files to synchronize and copy to the location in the new site on the local device. Once all files have finished synchronizing, the status of the copied folders will have a green check as their status.
- With all folders and files synchronized to the new SharePoint site, right click on the folder in the original and new site location to verify the total number of folders and files within each match.
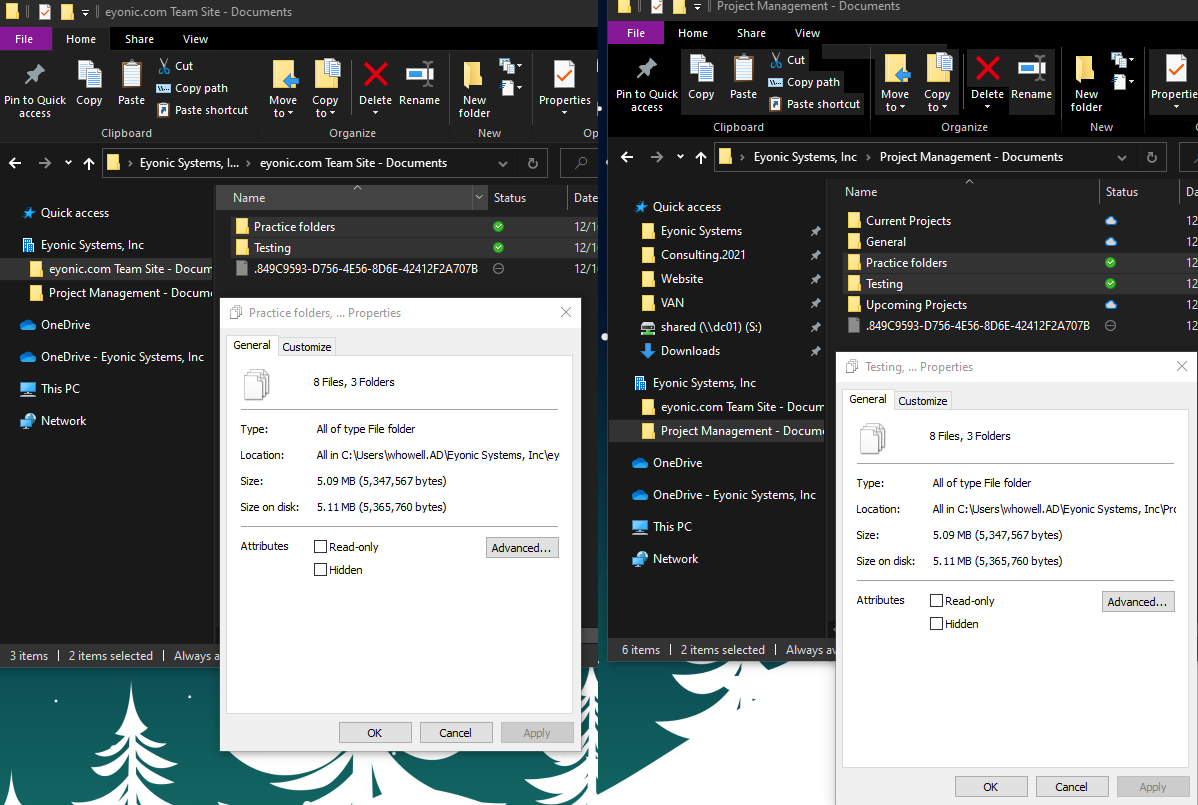
- If the number of folders and files match, delete the folders from the original site.
- If desired, or if you need the space on the local device, right-click on the folder in its new site and select "Free up space" from the pop-up menu so the files are only stored in the cloud.
While it is a process to synchronize folders and files to the local device before moving them, this is by far the safest way to move folders and files in OneDrive when moving them between SharePoint sites. Synchronizing the files to the local device helps the files move more quickly, while copying them rather than moving them helps ensure none of the files are skipped.
As always, when it comes to file management, it always pays off to take a few extra steps to ensure your data is secure and nothing gets lost!