The One Fix You Should Try Before Reinstalling Failing Office Applications
There are a myriad of issues you can run into when using office applications. Some of these are common, while others are less common, but there are standard solutions that often apply to both types of issues. Sometimes a fix is temporary, and the issue persists. Other times the issue is more transient and a fix seems more permanent, with the issue disappearing for months or years.
This post discusses the one fix you should try when other solutions have failed and before reinstalling office as a last resort to getting applications working properly again.
The One Fix You Should Try Before Reinstalling Failing Office Applications
When you run into an issue with a Microsoft Office application, depending upon the type of issue, there are several things you can do to try to fix the issue. These solutions include, but are not limited to:
- Closing a file and reopening it.
- Saving a file and giving it a new name.
- Restarting the application.
- Opening one of the other Office applications to see if the issue exists there as well.
- Opening the file on another computer to see if it only happens on one device.
- Repairing the software (where applicable).
- Restarting the computer.
- Installing all Windows updates to be sure an in-progress update is not causing the issue.
If none of these items fixes the issue, it might be time to move to a higher level fix. This is often where people consider reinstalling the software, which can require downloading the executable and having the appropriate license or product keys. However, there is one other thing you can do to fix issues with Office applications that is easier than reinstalling the software.
To fix issues with an Office application:
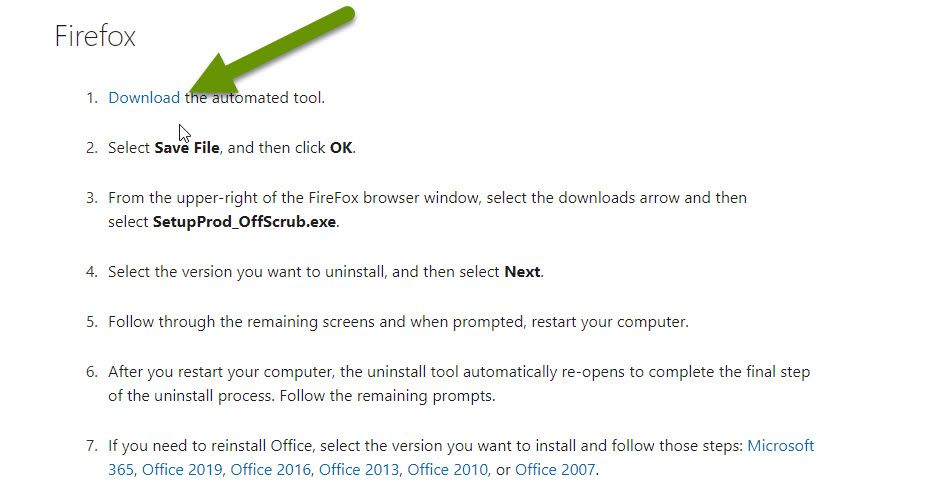
- Visit Microsofts's support website where you can download the utility used to fix the apps. There are several links, each going to the same place, but the directions are broken out by web browser.
NOTE: The support website title, and hyperlink, have the words "uninstall Office automatically" in them. When you see this, you are in the right place as luckily, this is not the only thing the utility does.

- Click any of the "Download" links. There are instructions for many of the main web browsers.
- Click on the download which will bring up the installer for the utility.
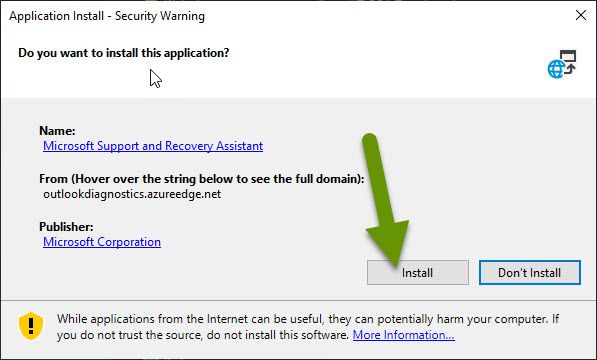
- Click the "Install" button to install the utility.
- When prompted, accept the user agreement.
- If you are prompted with a window listing specific applications and asking which one you want to remove, close the utility and give any reason for cancelling.
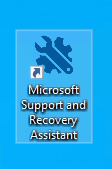
NOTE: Once installed, the utility has a name that better represents what this tool is used for as well as what it does.
- Open the utility and select the application from the main menu that you are having issues with, then click the "Next" button.
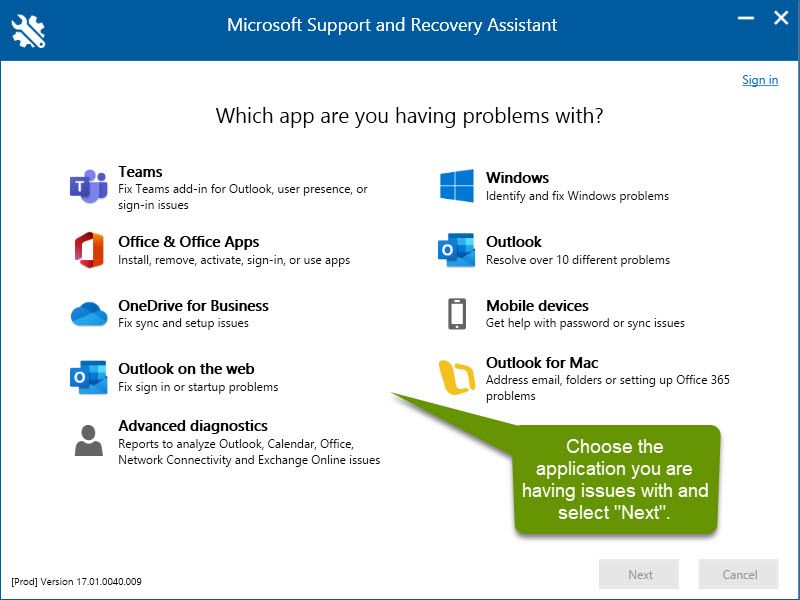
- After selecting the application you are having issues with, choose from the appropriate menu items to address the issue you are experiencing.
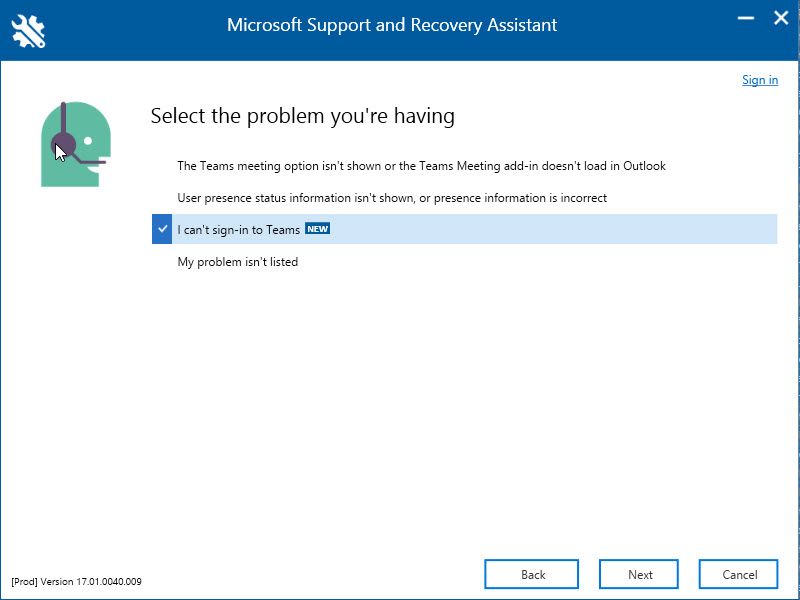
- Continue to follow the prompts according to the application you have selected and relative to the issues you are experiencing.
- When the utility finishes, try using the application you were previously having issues with to verify the fix worked. Ideally, you should be able to use the application normally again.
Like most applications, there are a wide variety of things that can go wrong when using an Office application. Some things that often cause issues are leaving applications open for weeks at a time without ever closing them, having too many applications open, and pending windows updates. The solutions listed above should fix issues caused by these situations, but if you have already tried common fixes and are still experiencing issues with an Office app, try the Microsoft Support and Recovery Assistant rather than reinstalling the software.
As always, knowing a tool exists and how to use it, can save a bunch of time and frustration!

