
Save Time by Automating Tasks Using Shortcuts on an iPhone

Saving time by being more efficient can be a challenge. When it comes to technology, there are some common ways to be more efficient. This includes knowing multiple ways to accomplish the same thing, which helps when you get stuck or something is not working right. Another thing that helps is using new tools that are better suited to the task. Lastly, using shortcuts, where possible, saves time.
This post discusses how to save time by automating tasks using the Shortcuts app on an iPhone.
Save Time by Automating Tasks Using Shortcuts on an iPhone
If you have a recent iPhone you should have the Shortcuts app.
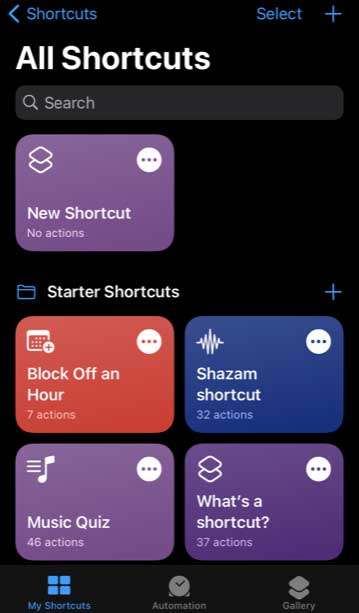
The Shortcuts app has three different tabs:
- My Shortucts - consists of shortcuts you have already created and Starter Shortcuts, which are examples of common shortcuts.
- Automation - a place to create automations that trigger when certain conditions are met. These can be for a single device or all devices on a home network.
- Gallery - a grouping of starter shortcuts, automation suggestions, shortcuts from your apps and several other items.
The main difference between creating a shortcut and creating an automation is that a shortcut is something you would manually initiate. For example, if you wanted to focus to do yoga, you could create a shortcut to enable do not disturb (DND) on your phone and play the Yoga Radio station on Pandora. You could use this shortcut to cause both of those actions to happen when you needed it.
On the contrary, an automation for these same actions would happen automatically and could be created so that when you played the Yoga Radio station on Pandora, enable do not disturb on your phone. Both the shortcut and the animation can be useful, but they are triggered differently.
Creating a shortcut
In the example below we will create a shortcut to send our most recent photos to selected contacts when run. To create a shortcut:
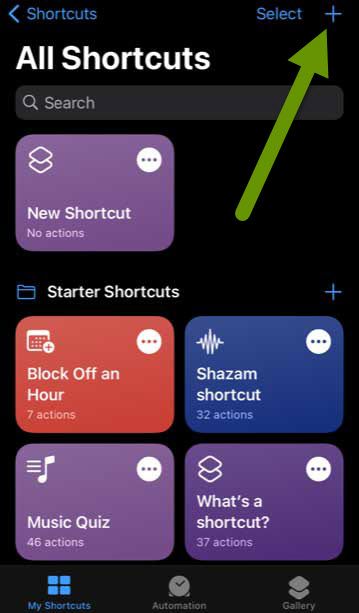
- Open the Shortcuts app and click on the + button in the upper right corner in the My Shortcuts tab.
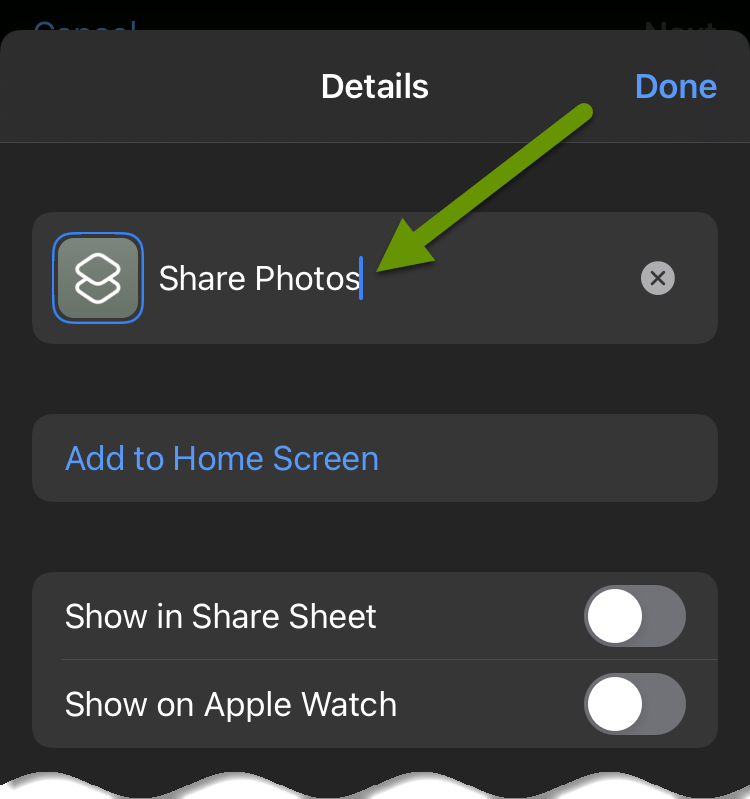
- Click the three button circle next to "New Shortcut" to rename the shortcut to something that makes sense for the type of shortcut you plan to create.
- Click "Done" to save this setting.
- Click the + Add Action button to add your first action to the shortcut.
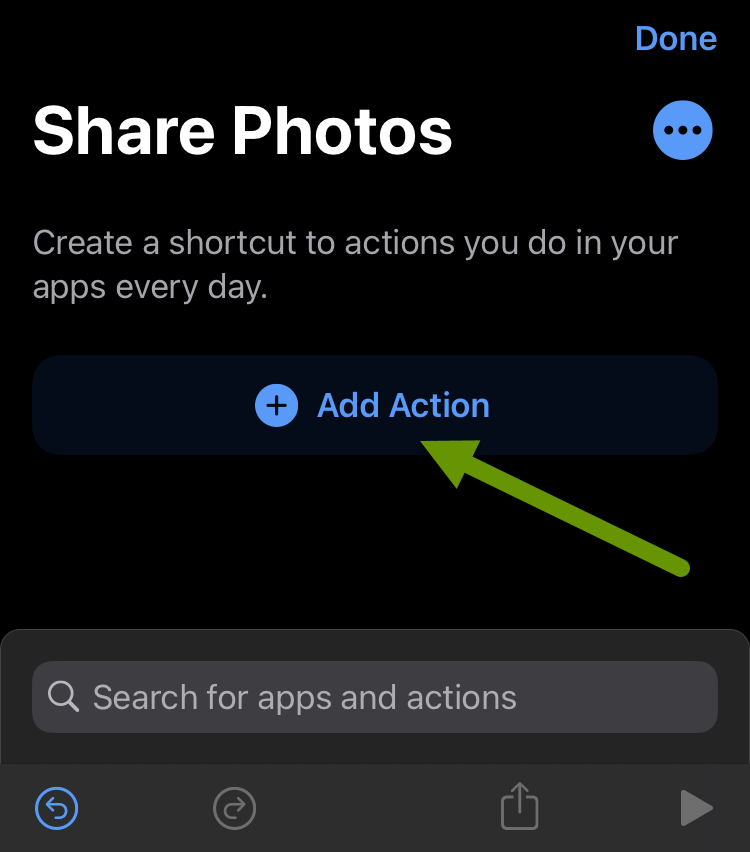
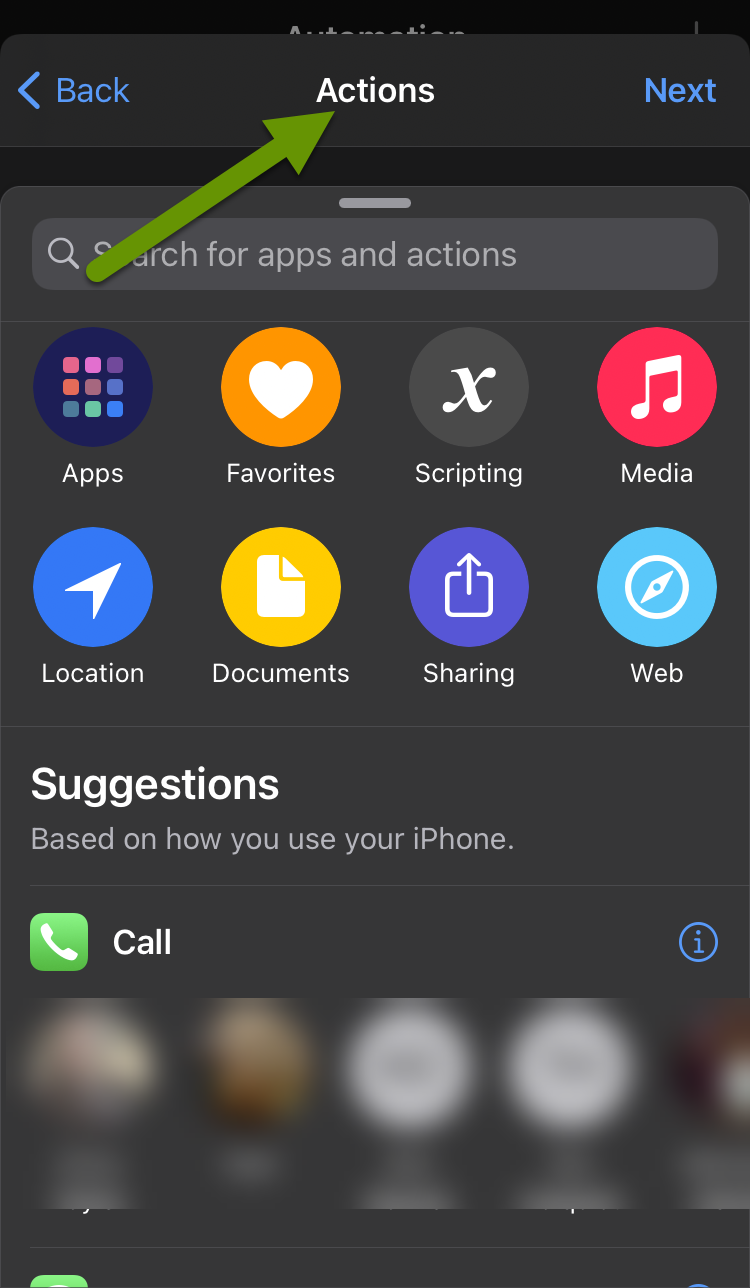
This brings up a popup with access to apps, suggestions and a search for apps and actions menu in addition to suggestions based on your usage.
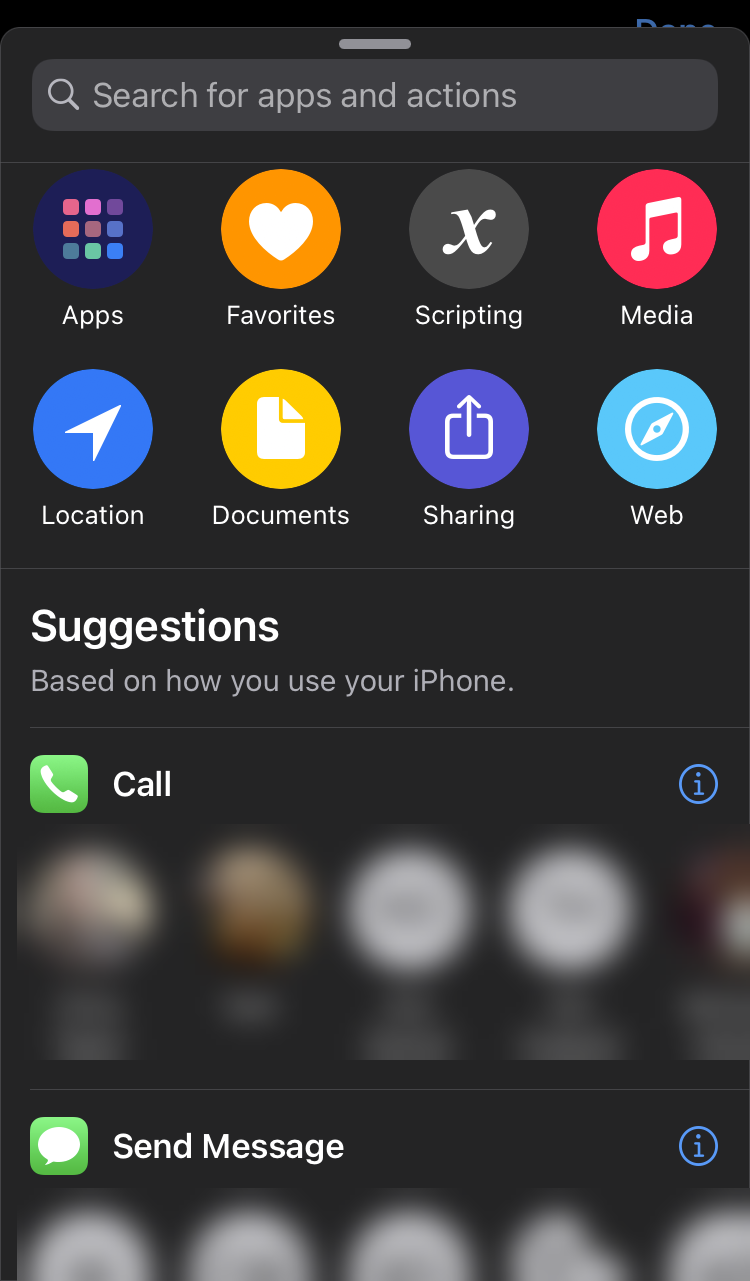
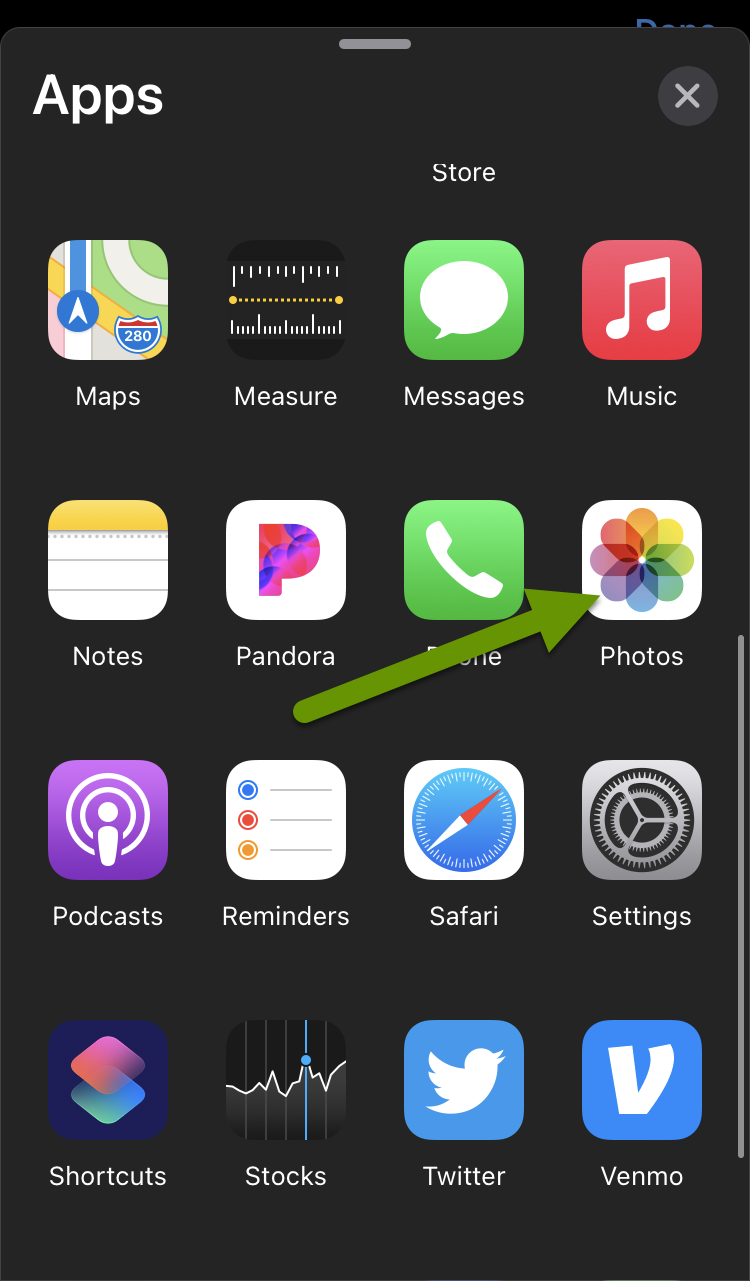
- Click on "Apps" to access the Photos app.
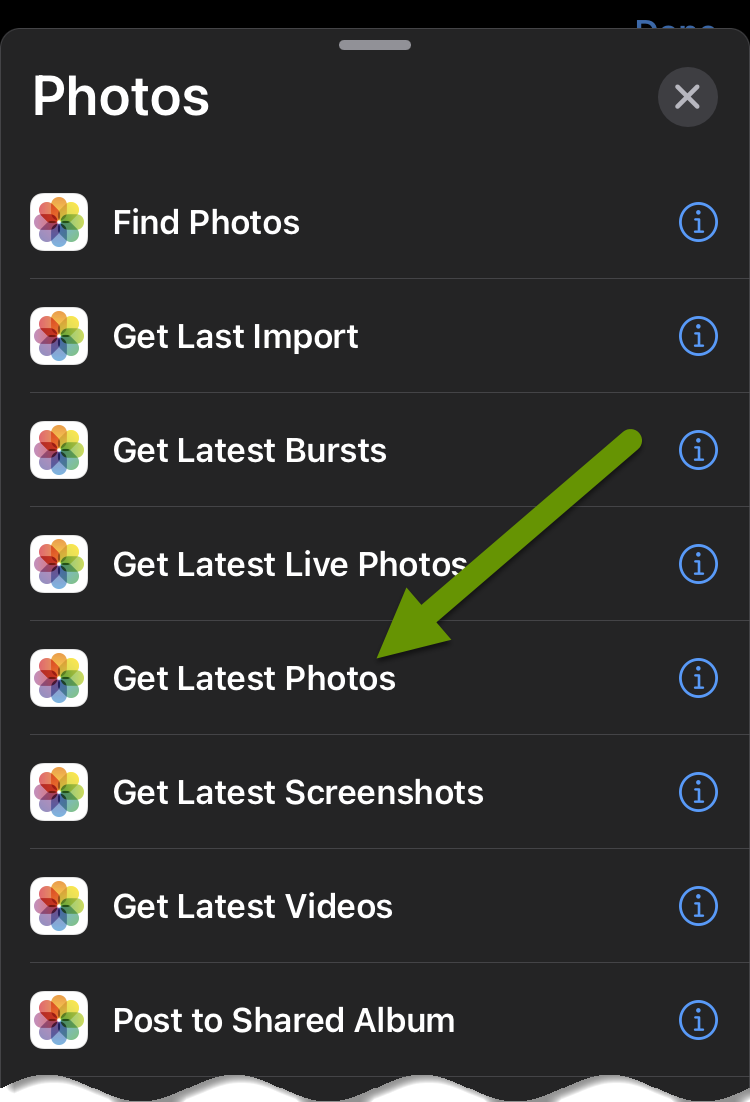
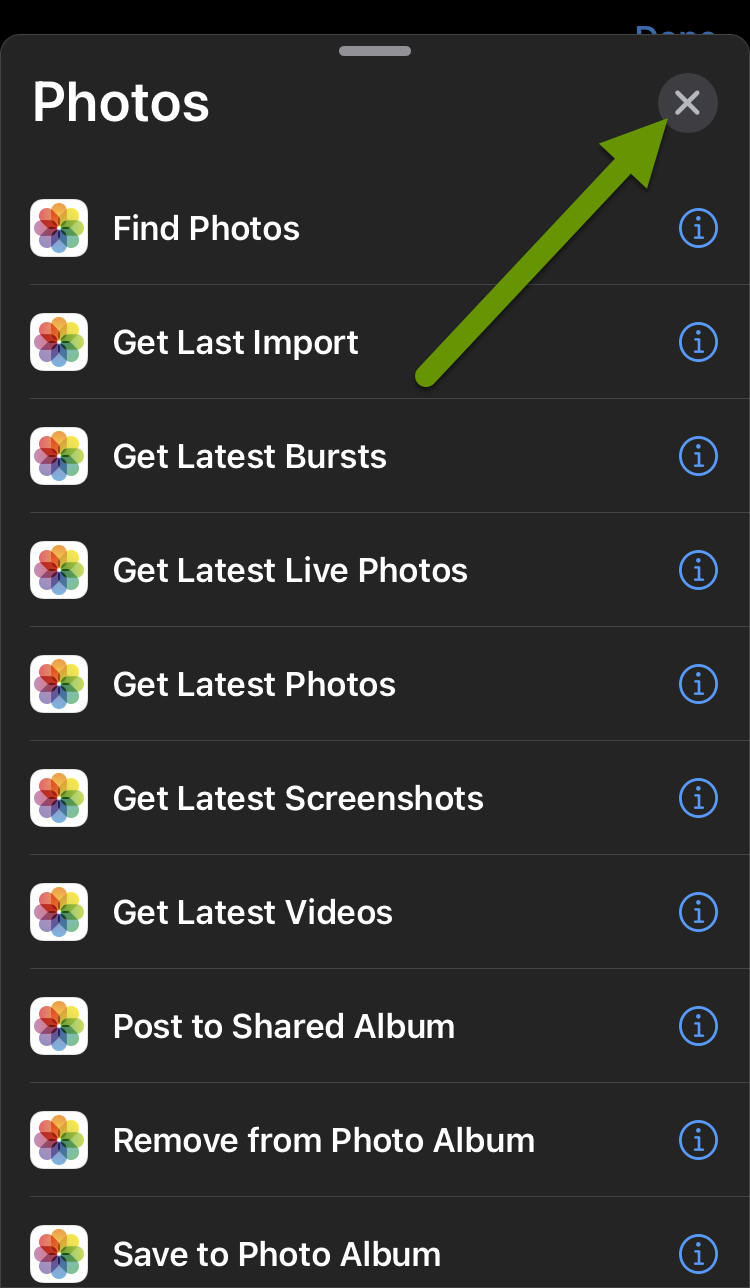
- Once the Photos app is selected, you will be prompted with the possible actions for the Photos app.
- For our example, we are going to select "Get Latest Photos".
- This will add this action to the shortcut menu which has several options. In this example, we can click on the default of "1 photo" and change this to as many photos as we want to share.
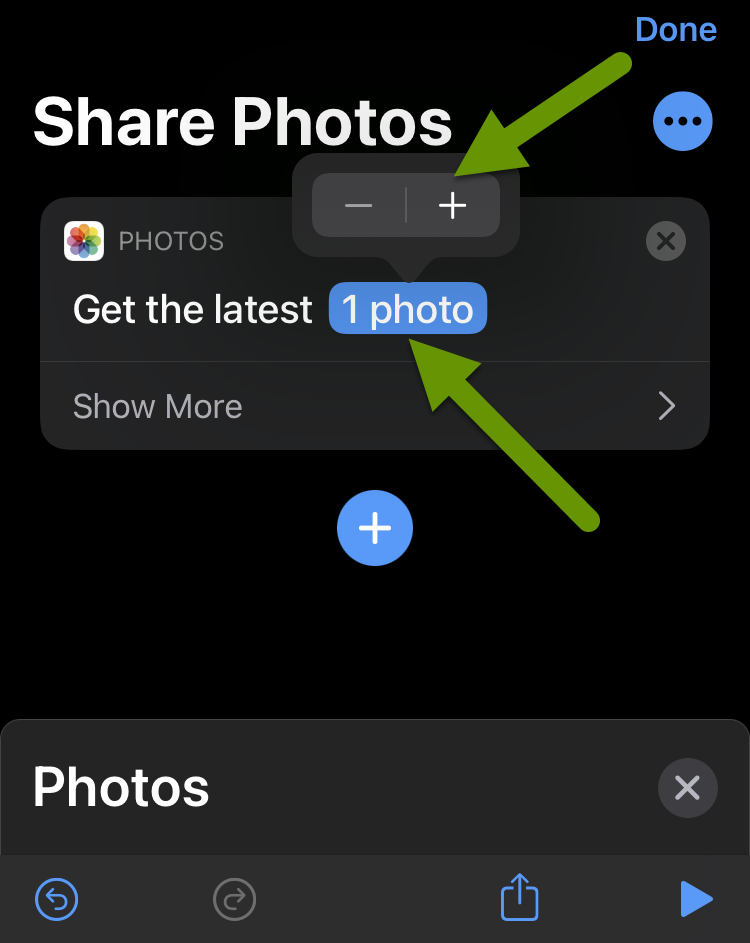
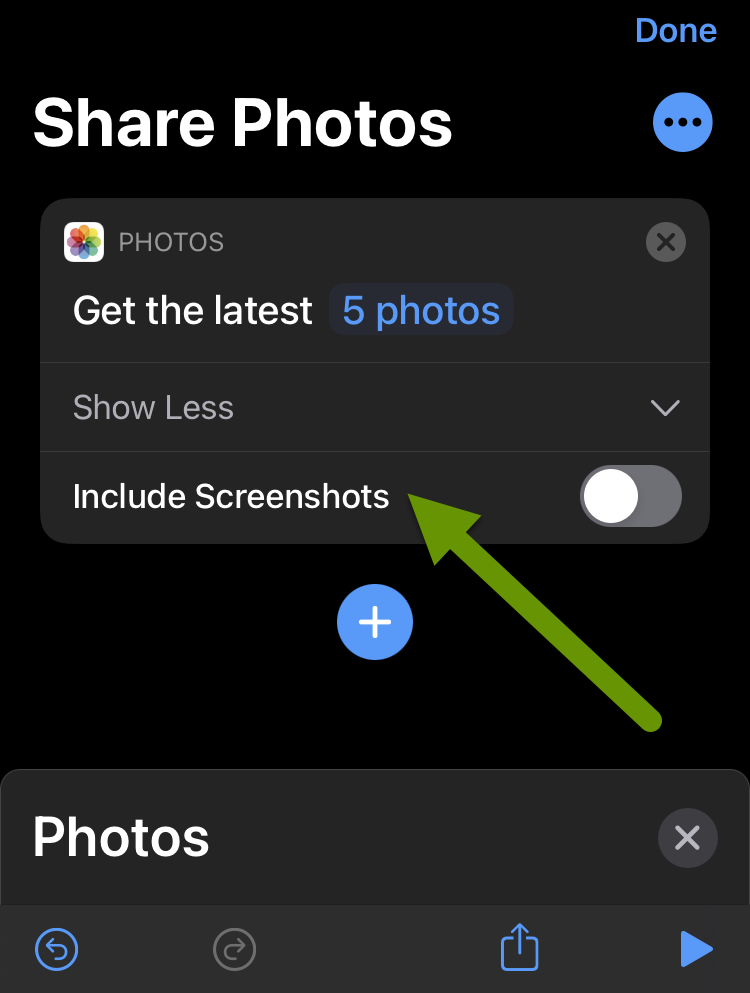
- You can also click the "Show More" button to modify more settings. In this example, the additional setting is whether or not to include screen shots in the latest photos. Additional settings will vary by action item chosen.
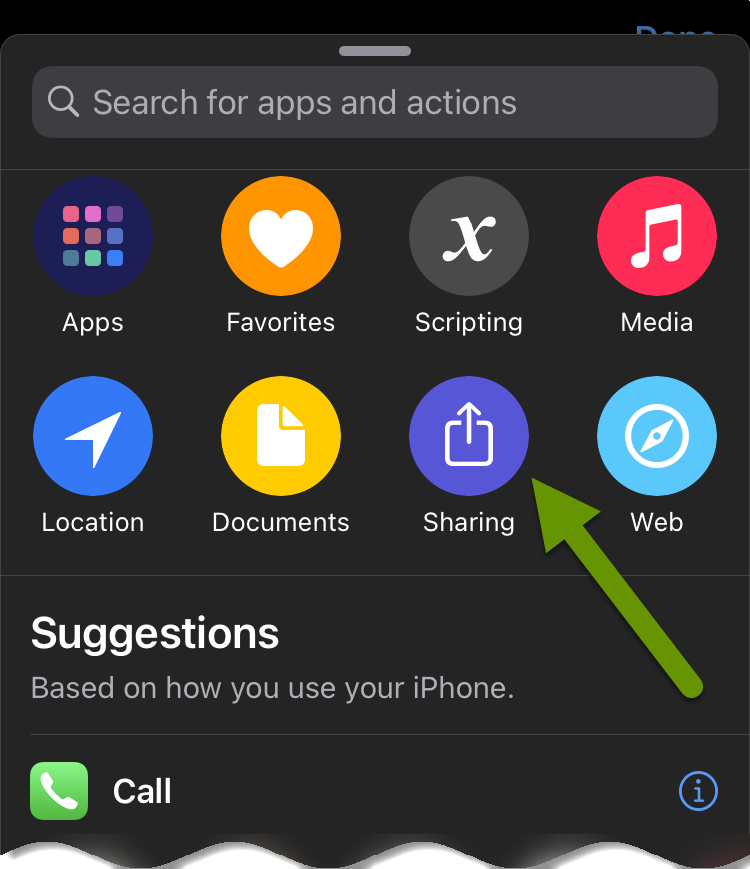
- Click the blue + button to add an additional action.
- For our example, we will click the Sharing button this time.
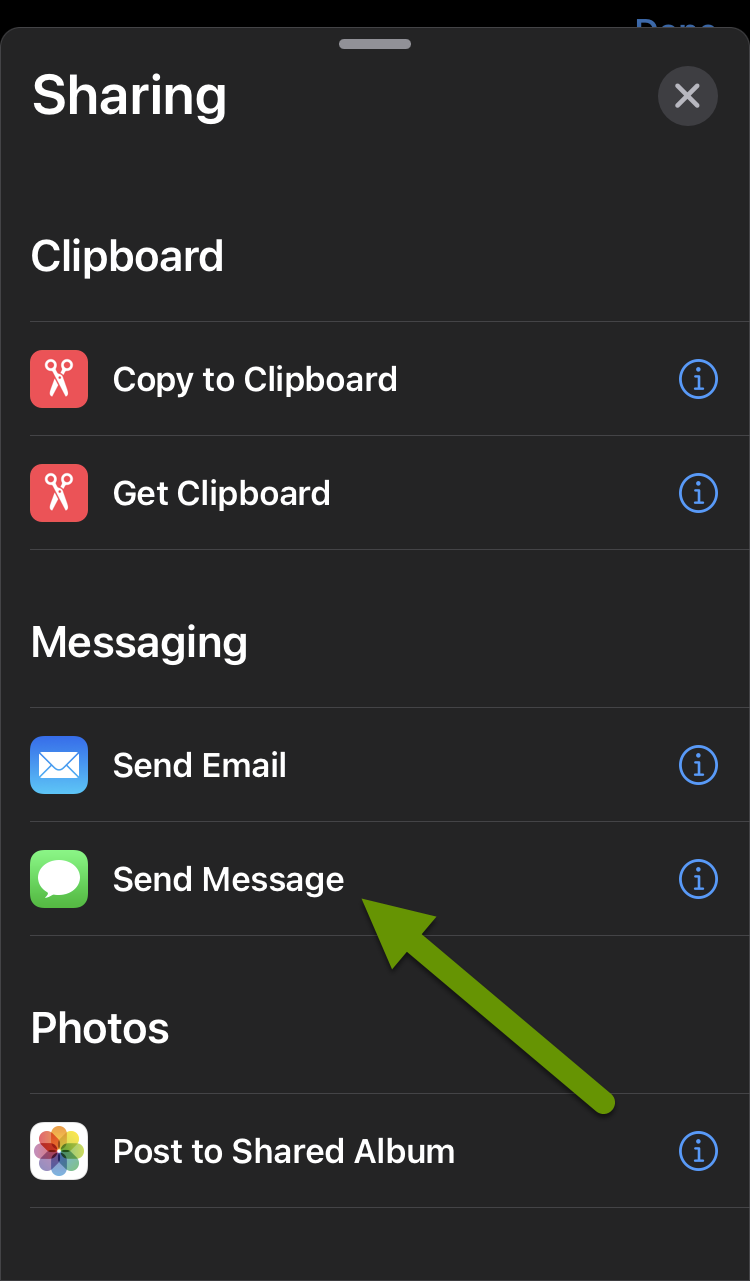
- In the Sharing menu, click "Send Message" as the way to share the latest photos with people in your contacts via Messages.
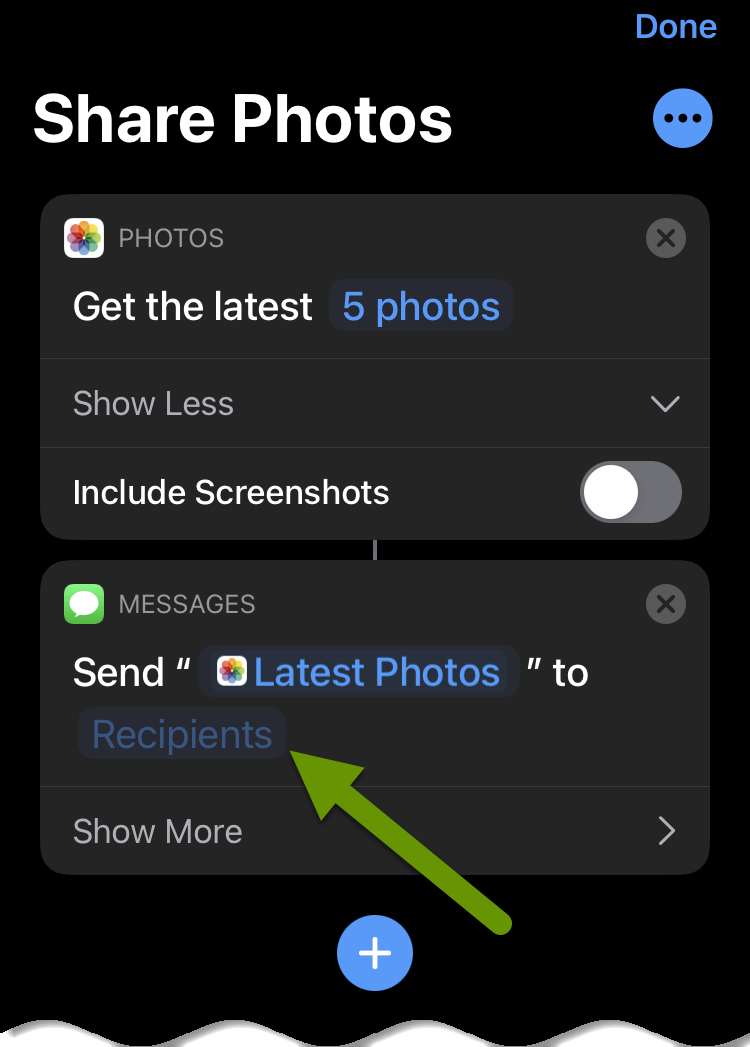
- This brings up the shortcut summary. Click on "Recipients" in the Messages action to add the people you want to receive photos when this shortcut is used.
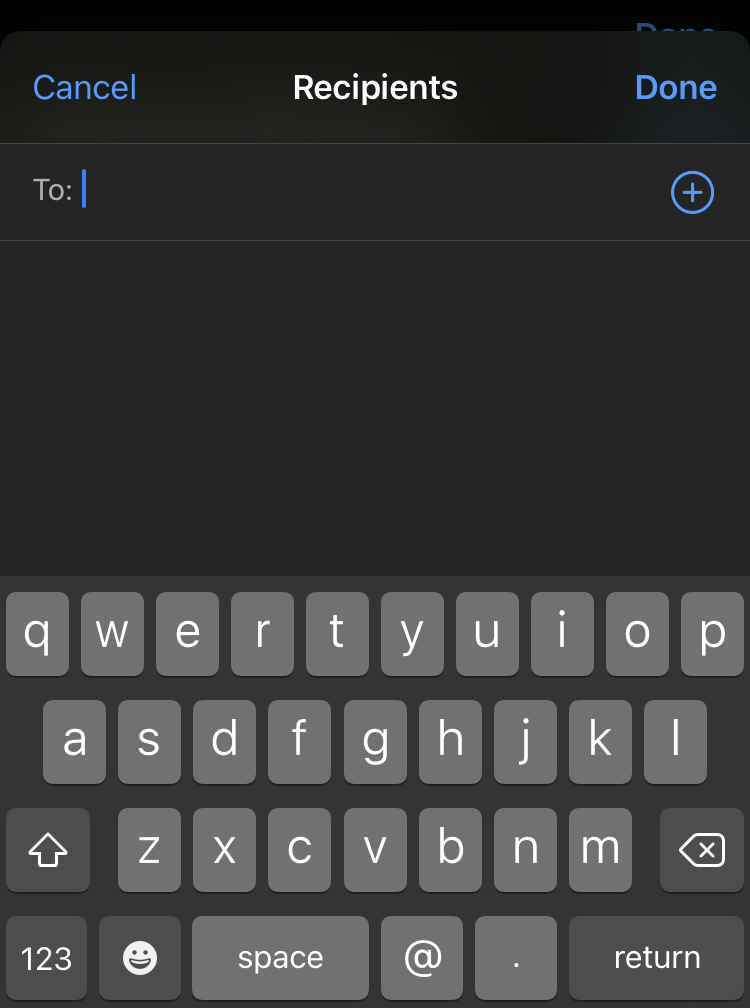
- In the Recipients menu you can type the numbers of recipients, type names of people in your contact list or click the + button to add people.
- Once you have added everyone to the recipient list, click "Done".
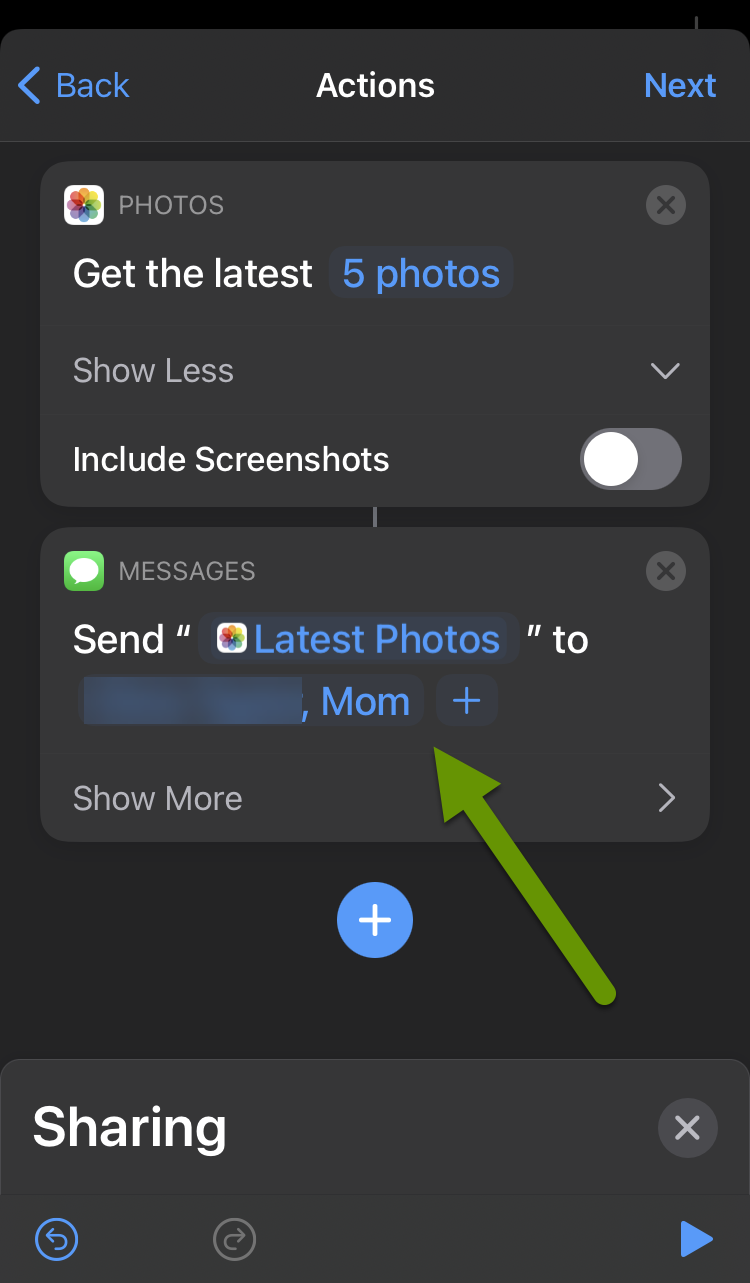
- When the recipient window closes you will be back at the Actions menu for the shortcut. You should see the recipients you added in the previous step. From here, if you forgot someone, you can click the + again and continue to add recipients.
- Continue adding actions as needed.
- If desired, you can test the shortcut by pressing the play button in the lower right corner.
- Click "Done" to save the shortcut.
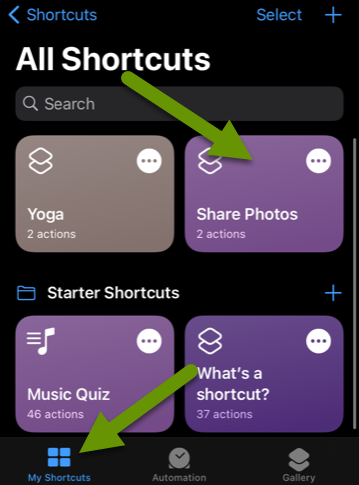
- Anytime you want the actions in this shortcut to execute, go to the My Shortcuts tab in the Shortcuts app and click on the shortcut icon. Note: You can also add the shortcut to the home screen by toggling this feature on in the same menu where you named the shortcut.
Creating an automation
Creating an automation is similar to creating a shortcut, but follows a slightly different process. To create an automation:
- Click on the "Automation" tab in the Shortcuts app.
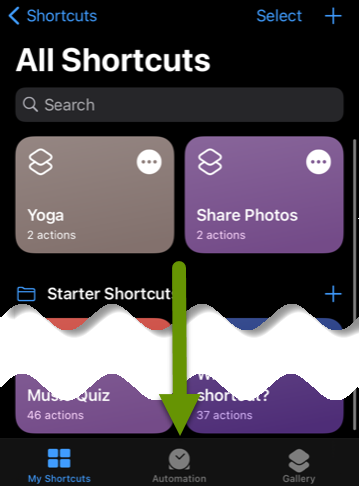
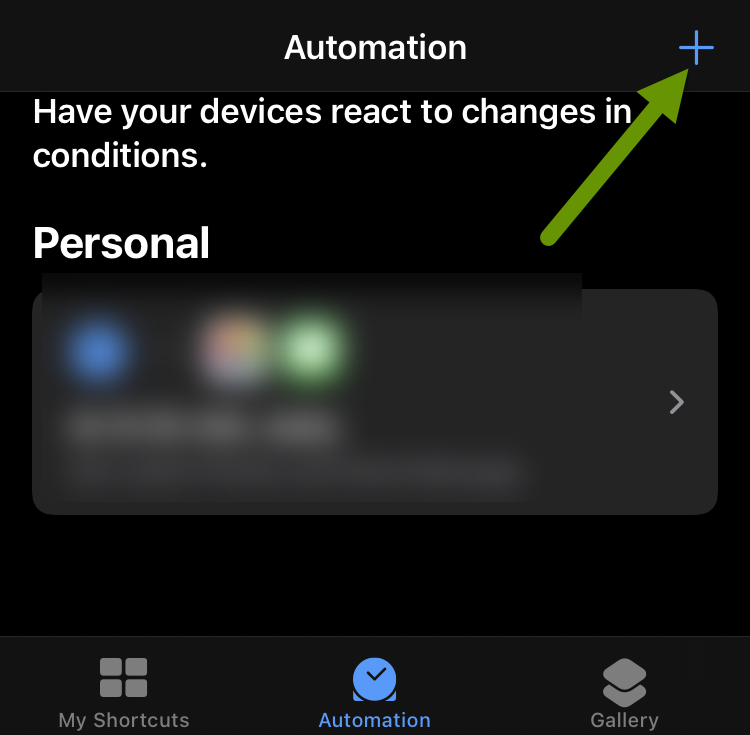
- On the Automation tab, click the blue + in the upper right corner to create a new automation.
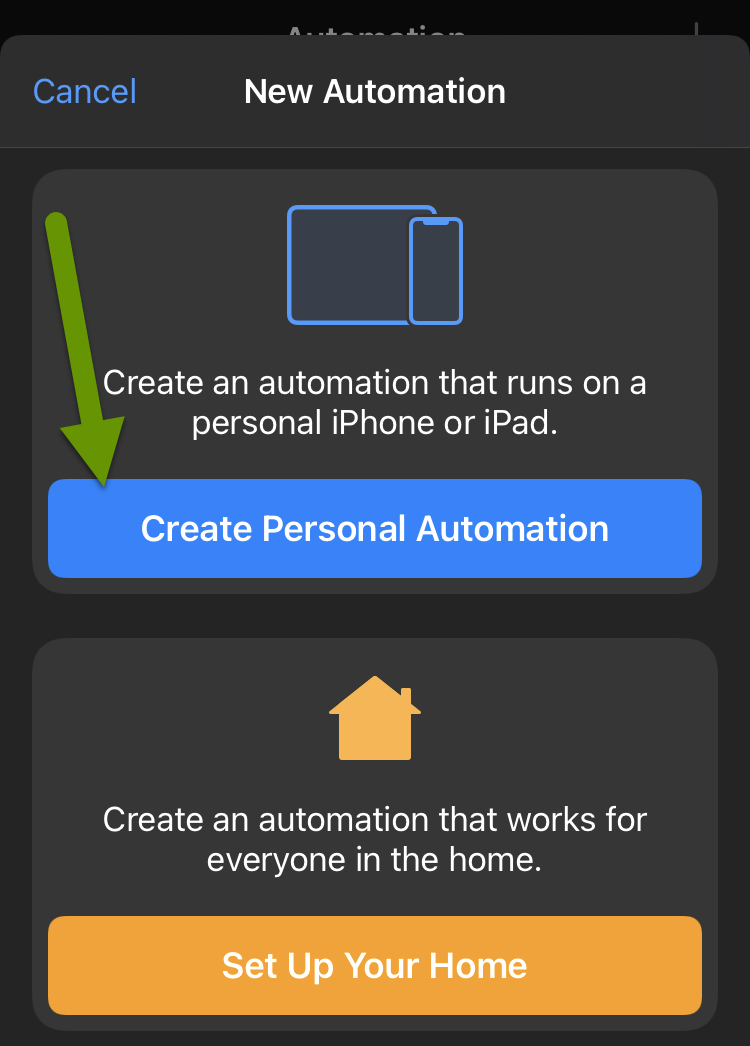
- In the New Automation popup, click the "Create Personal Automation" button.
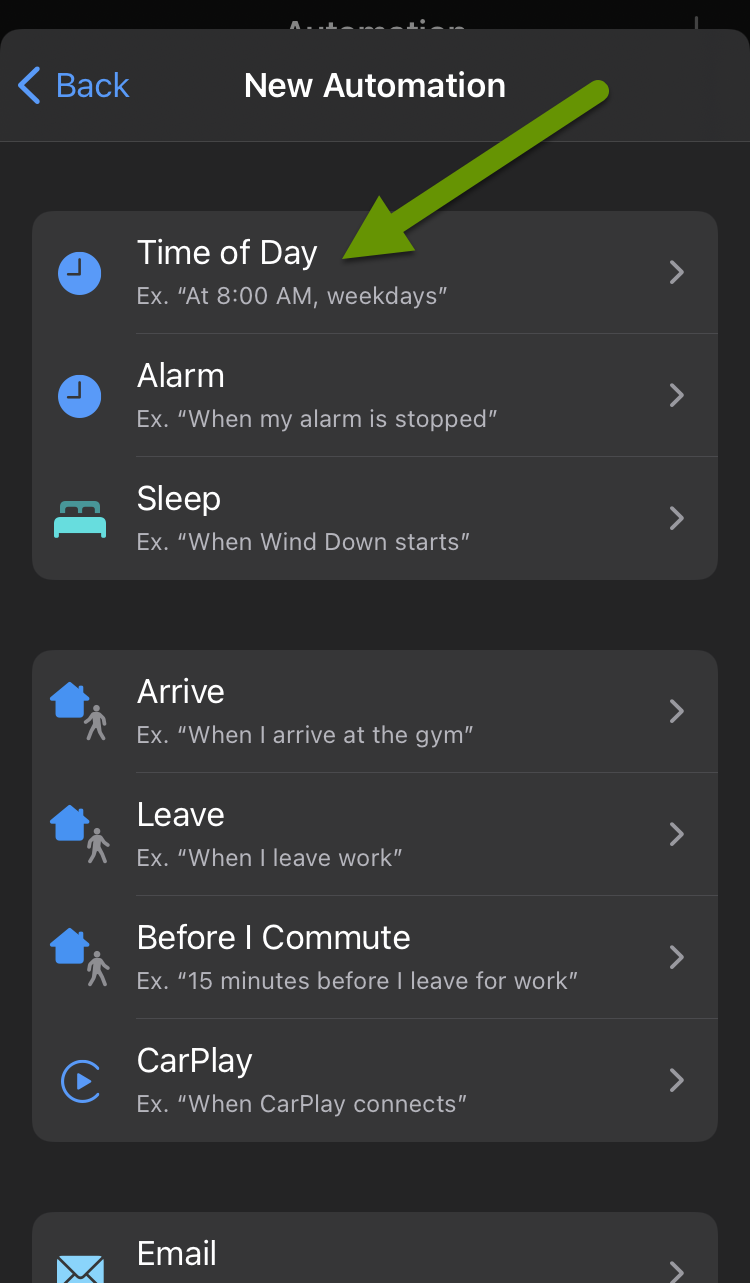
- In the next screen, choose what will trigger the automation. This can be any of several types of triggers.
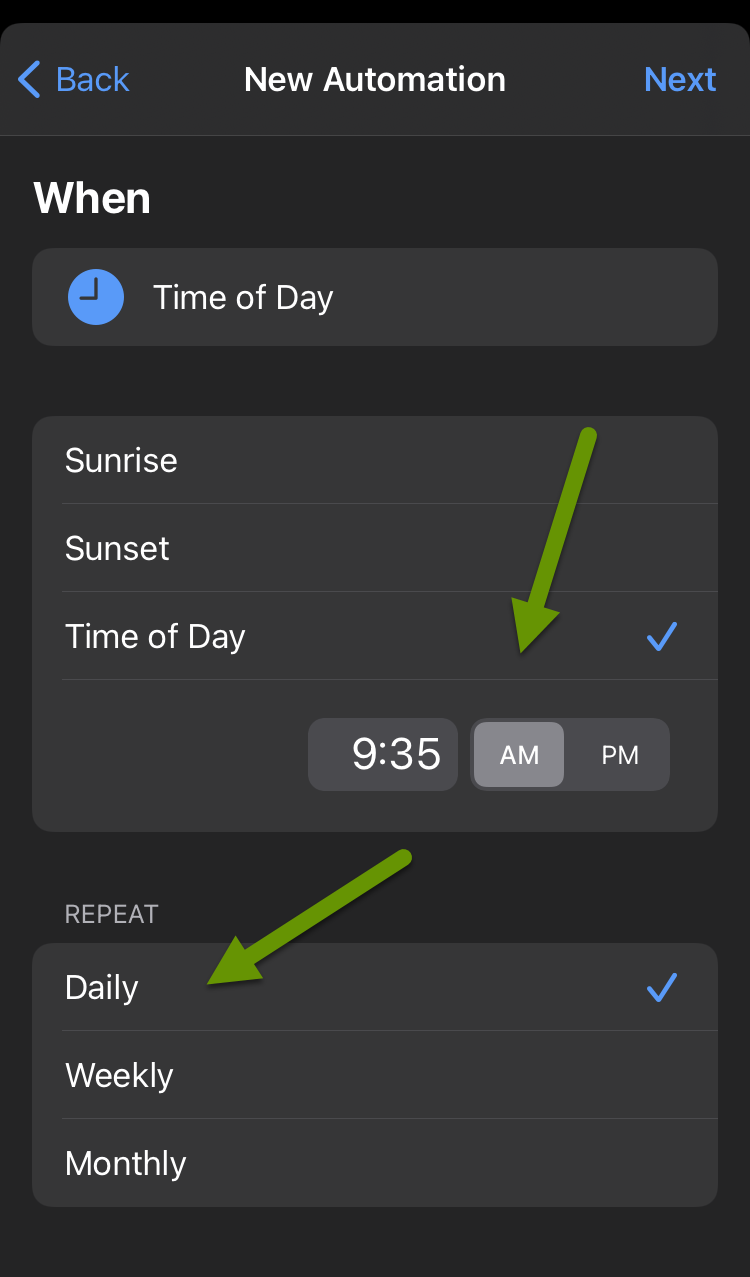
- In this example, we want the automation to happen every day at a certain time so we will choose "Time of Day".
- In the When window, chose the time of day, and the repeat interval for the automation.
- Once the time triggers have been set, click "Next" in the upper right corner.
- In the next window, add actions to the automation. The adding actions menu is exactly the same as the one for creating shortcuts.
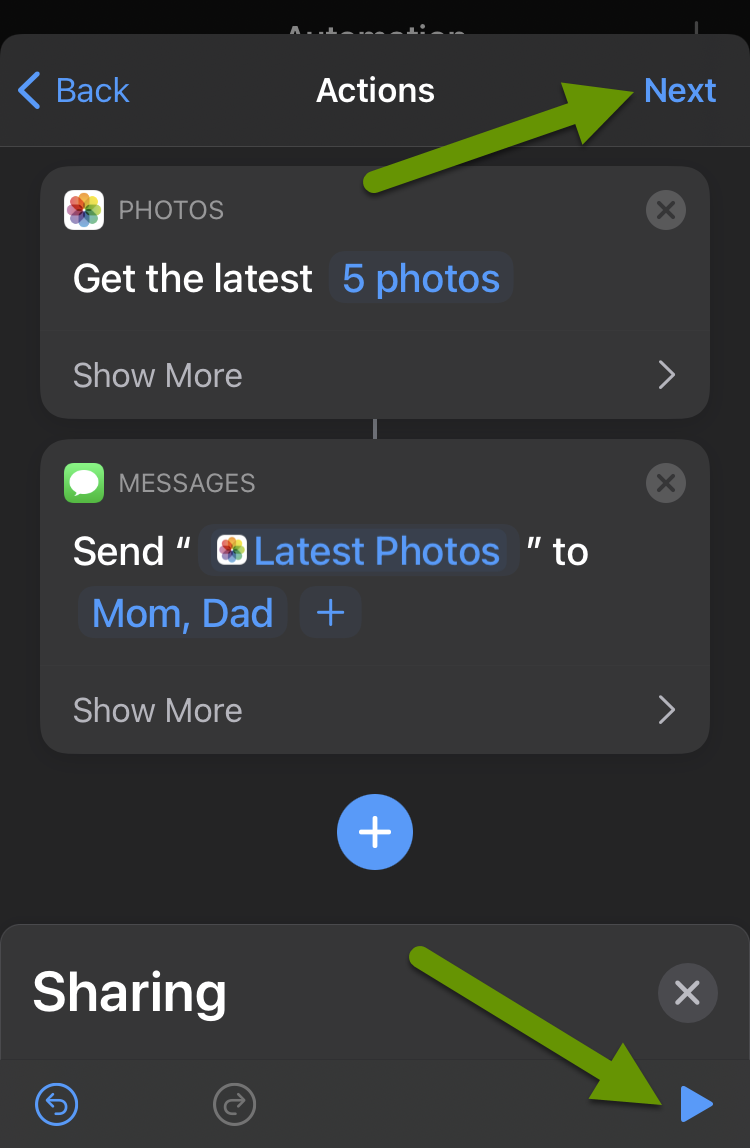
- Add the actions for the automation. In this example, we have added the same actions as we did for the shortcut: sending our latest photos using messages to certain contacts.
NOTE: If you are adding multiple actions at once, you may notice that the last item you added is the default action when you choose to add a new action. For example, you may open up to Pandora or Photos in the Apps menu when you want the Sharing menu. All you need to do is click the X in the corner of the popup window to go to the menu above. Continue to do this until you are at the original menu showing eight icons at the top that include: Apps, Favorites, Scripting, Media, Location, Documents, Sharing, and Web.
- Similar to creating a shortcut, you can test the actions in an automation at any time by clicking the play button in the lower right corner of the Actions menu.
- Click "Next" in the upper right corner once all actions have been added.
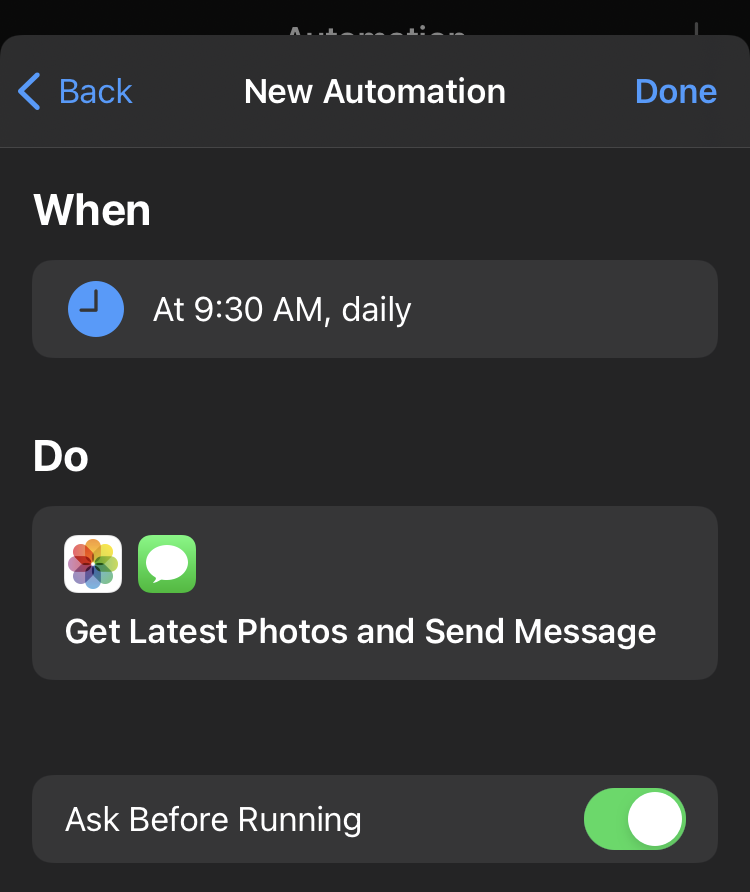
- This brings up the summary screen for the automation.
- Click "Done" in the upper right corner to save the automation.
Shortcuts and automations are similar in that they both follow a set of actions you have defined. A shortcut is something you set and use when you need it, like a keyboard shortcut that is always available, but only executes when you press the right key combination. An automation is something that happens when a set of conditions you identify are met. This is comparable to an email rule - where some emails are handled a certain way because they meet defined criteria. Both are useful but can be used very differently!
As always, finding new ways to save time can be super helpful!