
How to Track File Deletions on Windows Server Shares

Consolidating documents and files on a server provides many benefits. Servers reduce data duplication, help ensure everyone has access to the most recent versions of files and perhaps most important of all, keeps track of business content. A recent post, 4 Ways to Detect if your Business Benefits from a Server, covers the many benefits of having a server in greater detail.
However, like most things, there are also issues that can arise. The main flaw of storing files on a server and sharing them is caused when files are deleted. Whether your organization consists of 3 people or 300, files inside shared folders are processed differently than files outside the folder shares, even on the same device. This post explains why these differences matter and how you can track file deletions.
How to Track File Deletions on Windows Server Shares
The big difference
The difference between shared files and files stored in unshared folders is that when files are deleted from a share, they DO NOT go into the recycle bin. Instead, these files are permanently deleted. As a result, these files are at greater risk of being removed from your organization, whether intentionally or accidentally.
This is another reason why having regular backups of your business files is integral to the continuity of every business. Secondary to the ability to restore the deleted file, knowing who deleted the file is also useful. This information can help focus training efforts, and ideally, prevent the issue in the future. Tracking file deletions for shared files is a 3-step process.
First - Enable file deletion auditing for shared files
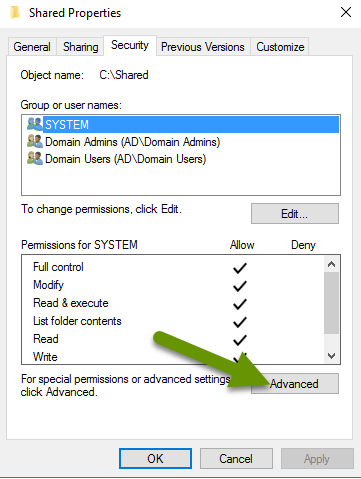
- Navigate to the folder being shared.
- Right-click the folder and select "Properties" from the popup menu.
- Click on the "Security" tab.
- Click on the "Advanced" button in the bottom right.
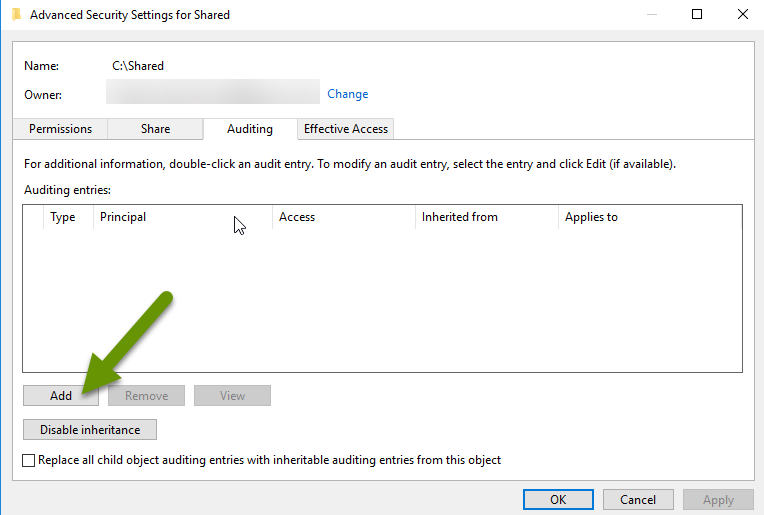
- In the Advanced window, click on the "Auditing" tab.
- Click the "Add" button in the bottom left to add an auditing entry.
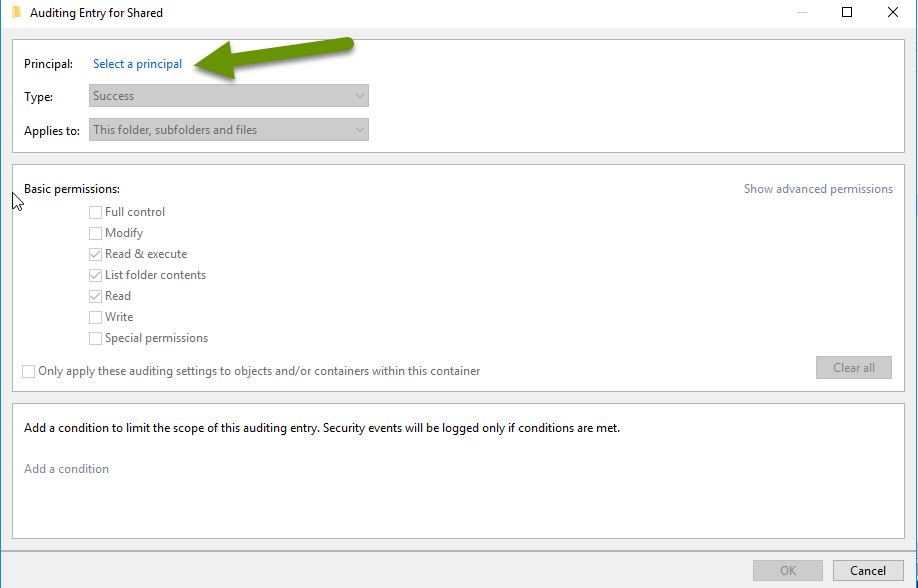
- In the new Auditing entry, click the "Select a principal" link at the top.
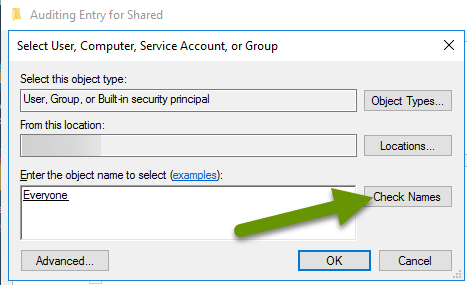
- In the Auditing Entry box, type "Everyone" in the box under the heading "Enter the object name to select".
- Click the "Check Names" box to verify it. It will underline once it has been verified. NOTE: If the item does not verify, check the object spelling.
- Click the "OK" button to save.
- In the drop down menu next to type, select "All".
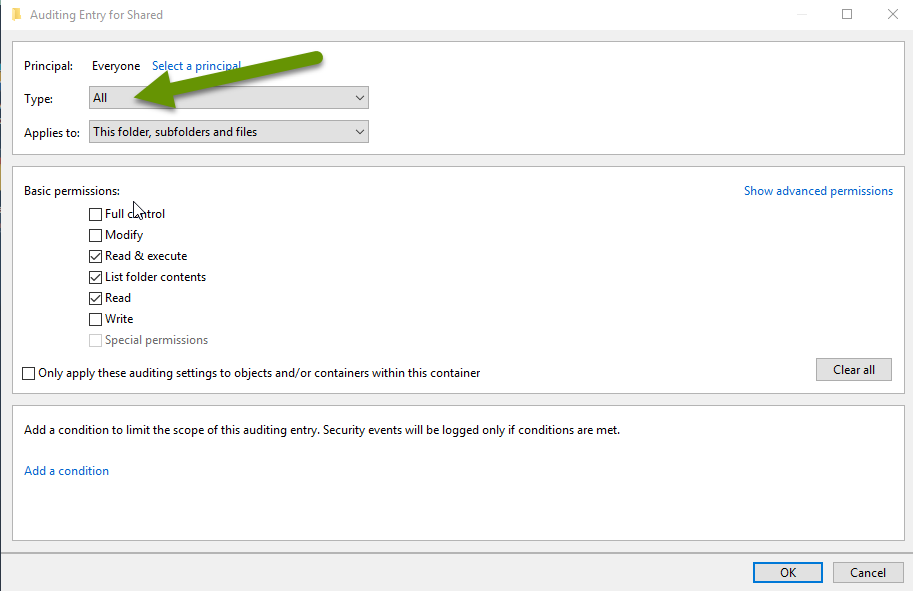
- Click the "Show advanced permissions" link on the right side in the Basic Permissions box.
- Click the "Clear all" button to remove any checkbox selections.
- Select the boxes next to "Delete subfolders and files" and "Delete".
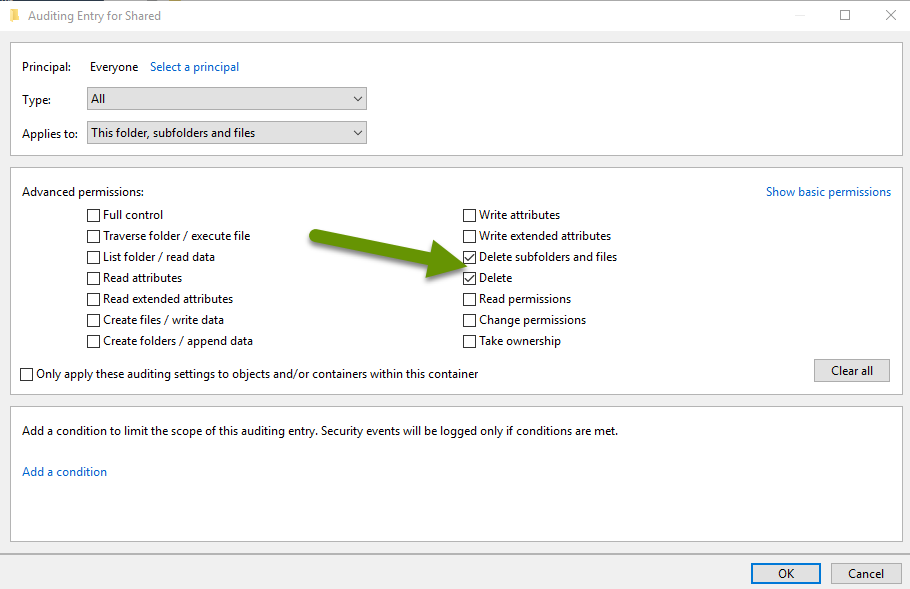
- Click "OK".
- Click "Apply".
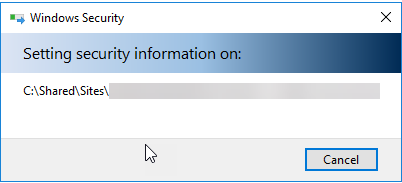
- You may see a Windows Security box applying the new security settings.
- Click "OK" two more times to close the remaining dialog boxes.
Second - Enable auditing in the Group Policy editor
- Click the Start menu and type "gpedit.msc".
- Select "Group Policy Editor" to open it.
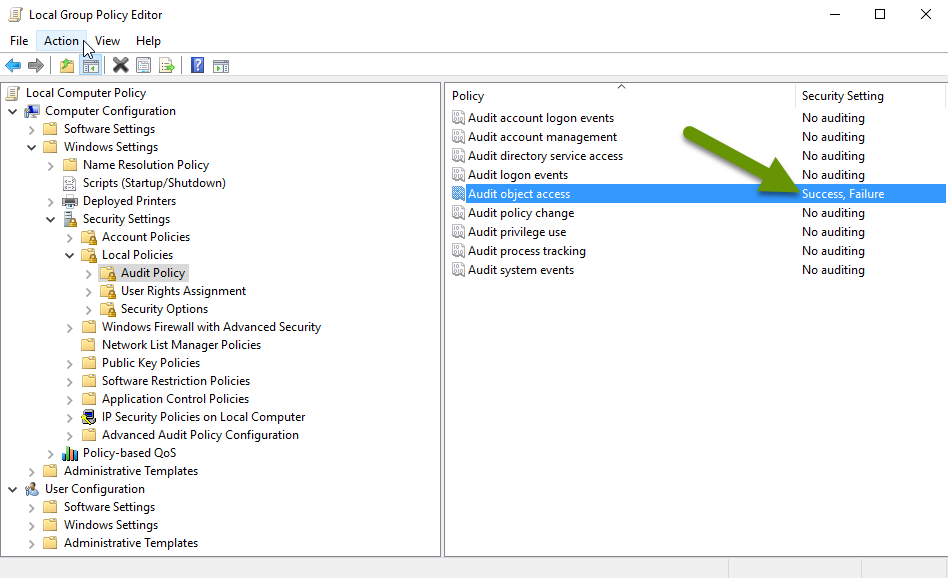
- Expand to navigate to the following folder: Computer Configuration, Windows Settings, Security Settings, Local Policies, Audit Policy.
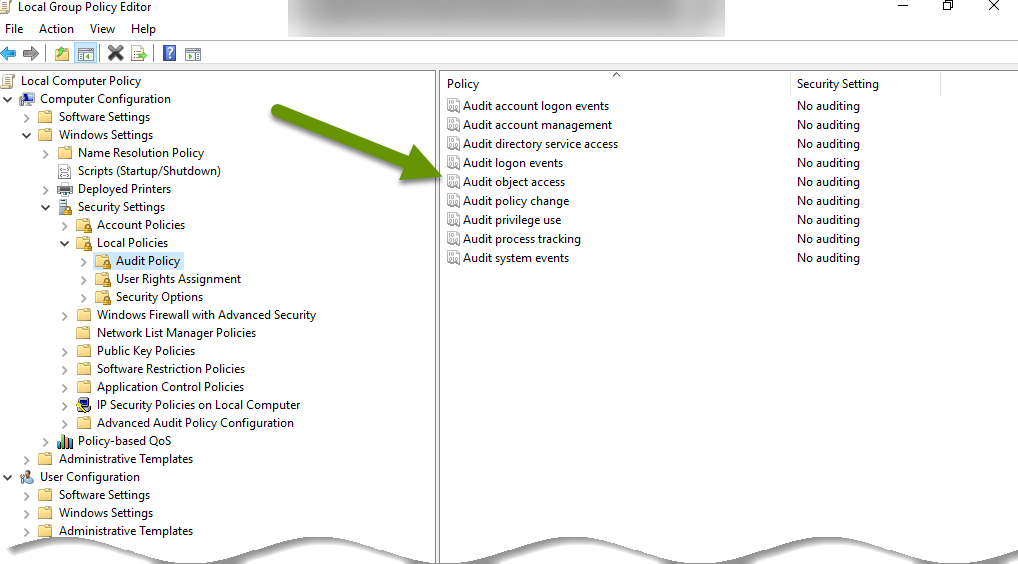
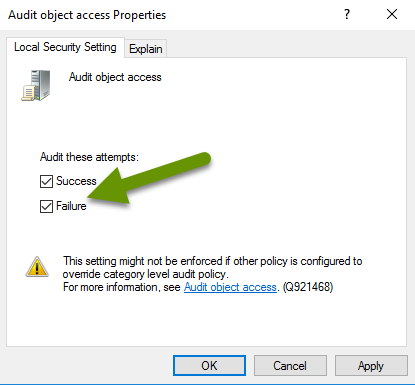
- In the popup, check the boxes to enable "Success" and "Failure" attempts, then click "Apply" and "OK" to close this object.
The policy shows the new security settings.
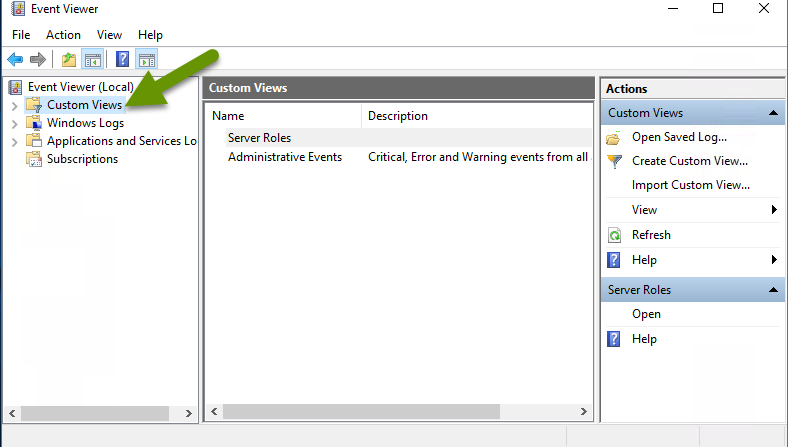
Third: Create a custom view Event Viewer using a filtered view
- Click Start and type "Event".
- Select the "Event Viewer" app to open it.
- Right-click the "Custom Views" folder and select "Create Custom View...".
- In the Create Custom View box, select "Event logs:" from the drop down menu.
- Expand "Windows Logs" and check the box next to "Security"
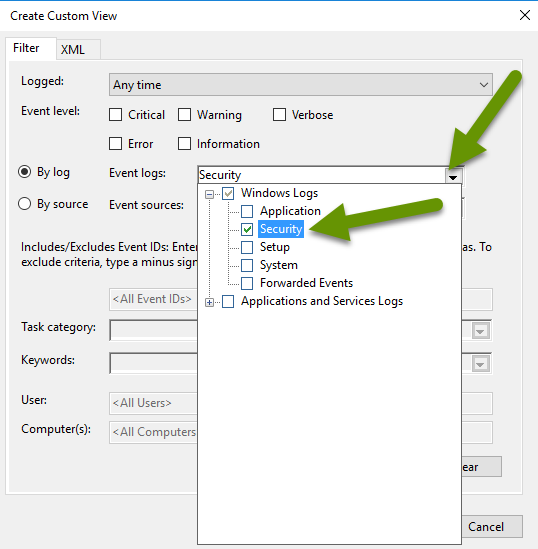
- Click the drop down menu again to collapse it.
- In the box with "<All Event IDs>", type "4656".
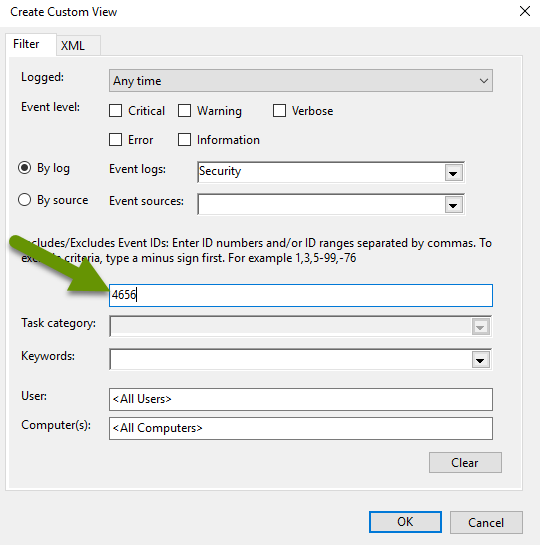
- Click "OK" to save the settings.
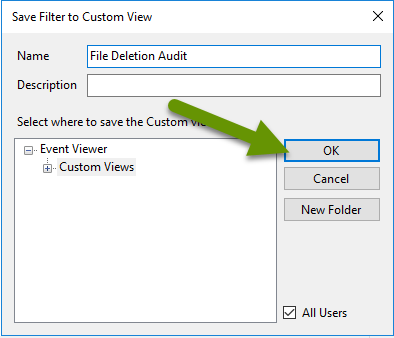
- Change the name of the view to something you will remember, like "File Deletion Audit", then click "OK".
The custom view is now listed in the Event Viewer.
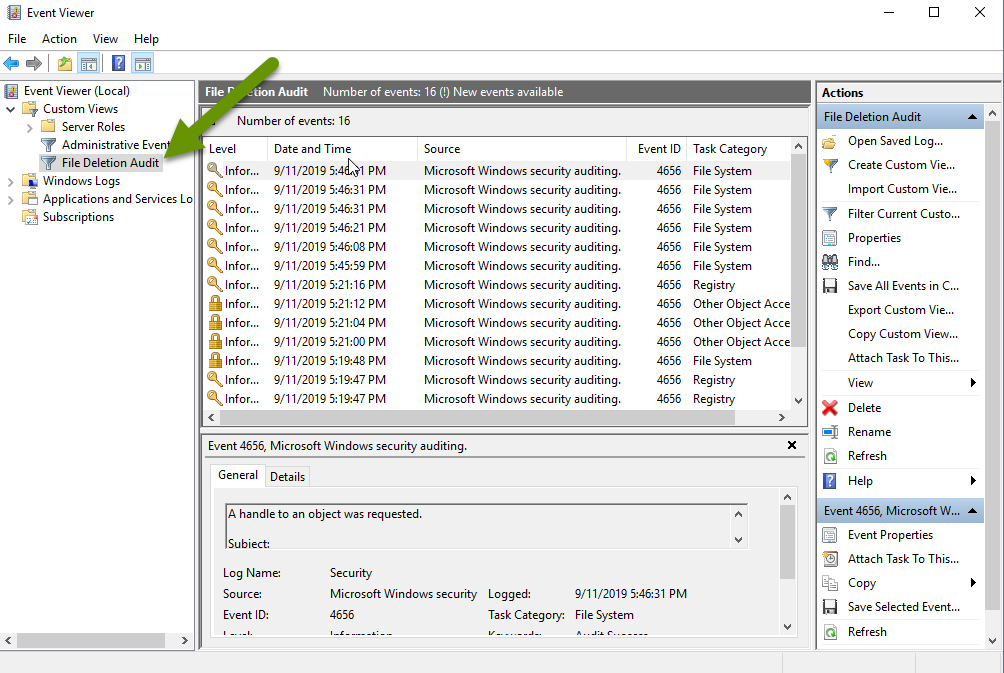
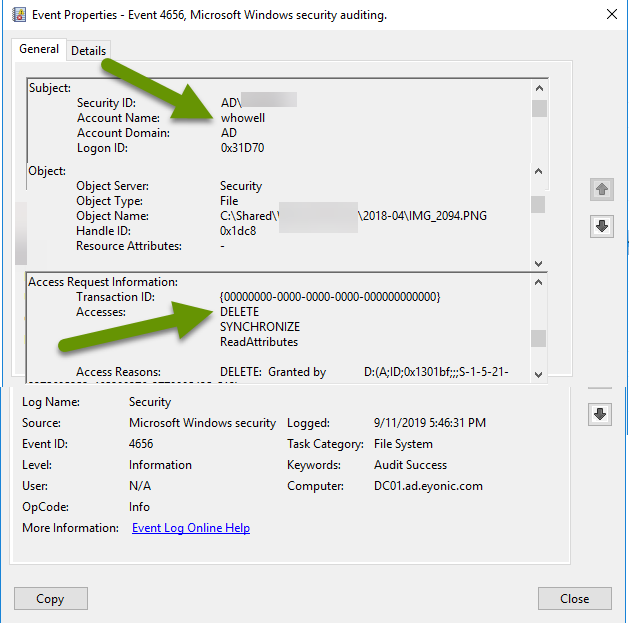
Using the filtered custom event viewer, access information about all files deleted from the shared folder. Created events will include the following information:
- The account (user) that deleted the file.
- The date and time the file was deleted.
- The name and location of the file deleted.
Consolidating files so they can be shared to multiple users is a great way to provide access to those files without suffering file duplication or version issues. However, files deleted from shares are permanently deleted with no way to recover those files unless a backup system is in place. To track who deletes shared files, follow the 3 steps above. With this information, you can direct further education about how shared files work and caution users about deleting shared files.
As always, the more information you have the better you can protect your business and your data!