How to Set the Out of Office Message in Outlook with IMAP Mail
An out of office (OOO) automatic reply is a great way to let people know you are not going to be available for a period of time. Out of office messages can be used for many purposes, such as letting people know you are on vacation, that your business is closed, that you are out ill, that you are busy with a big project and responses will be slower, that you are traveling and your access to email will be limited, or any number of other reasons.
This post demonstrates how to set an out of office message in Outlook when you use IMAP email, which is several more steps than if you are using an Exchange mailbox which has a one-click menu for creating an OOO message and specifying when it should be in effect.
How to Set the Out of Office Message in Outlook with IMAP Mail
Setting an OOO message when you have an IMAP mailbox is a two-step process. These include creating the out of office message and creating a rule to use this message.
Create the automated message response
- In Outlook, open a new email.
- Enter a subject for the email as well as the message you want automatically sent back to anyone who has emailed you.
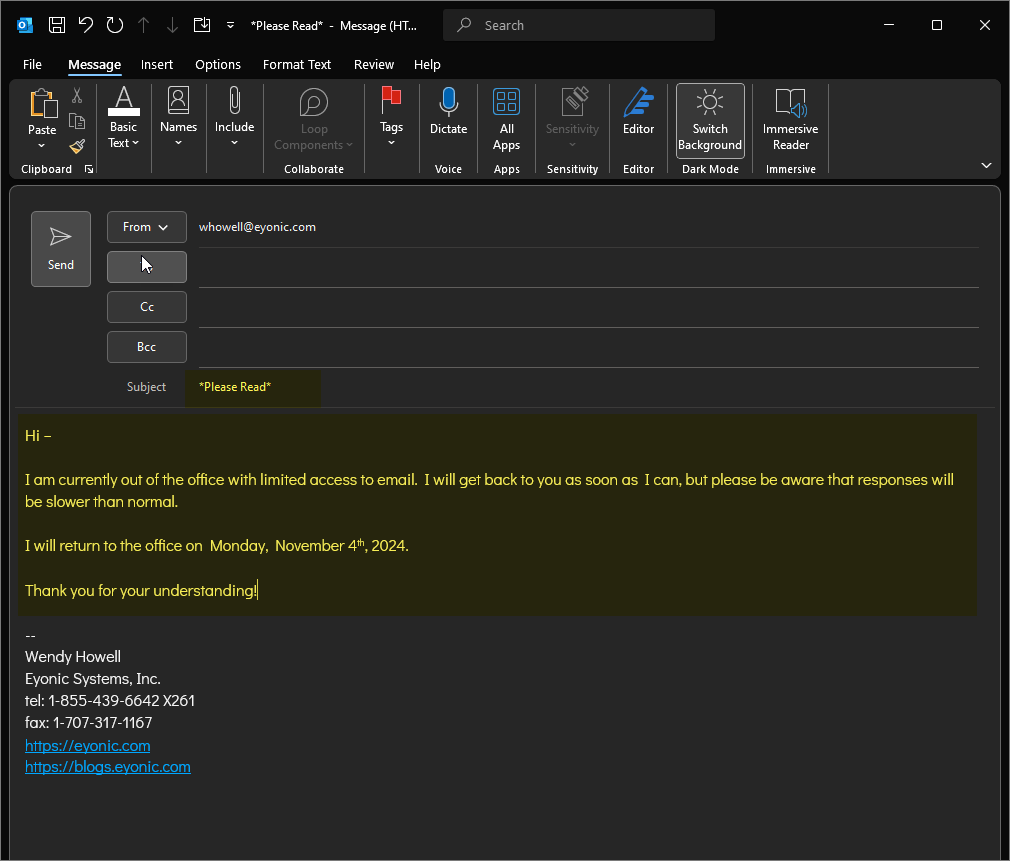
- When you have finished creating your auto-response email, click "File" and "Save As".
- In the Save As window, select "Outook Template (*.oft)" from the "Save as type:" drop-down. This should update the save to location to a Microsoft Templates folder.
- Give the template a name and click the "Save" button.
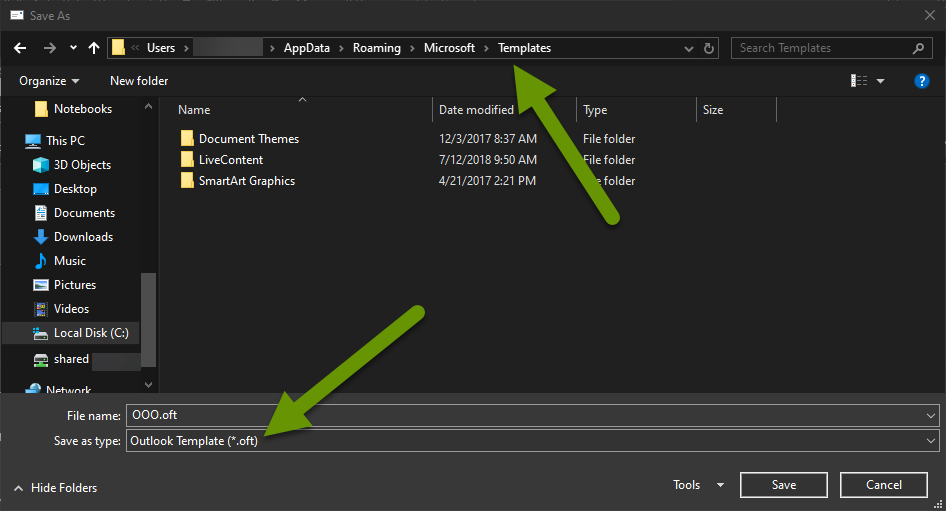
Once you have saved the email as a template, you can close it without saving.
Create the rule that will use the Outlook template you created
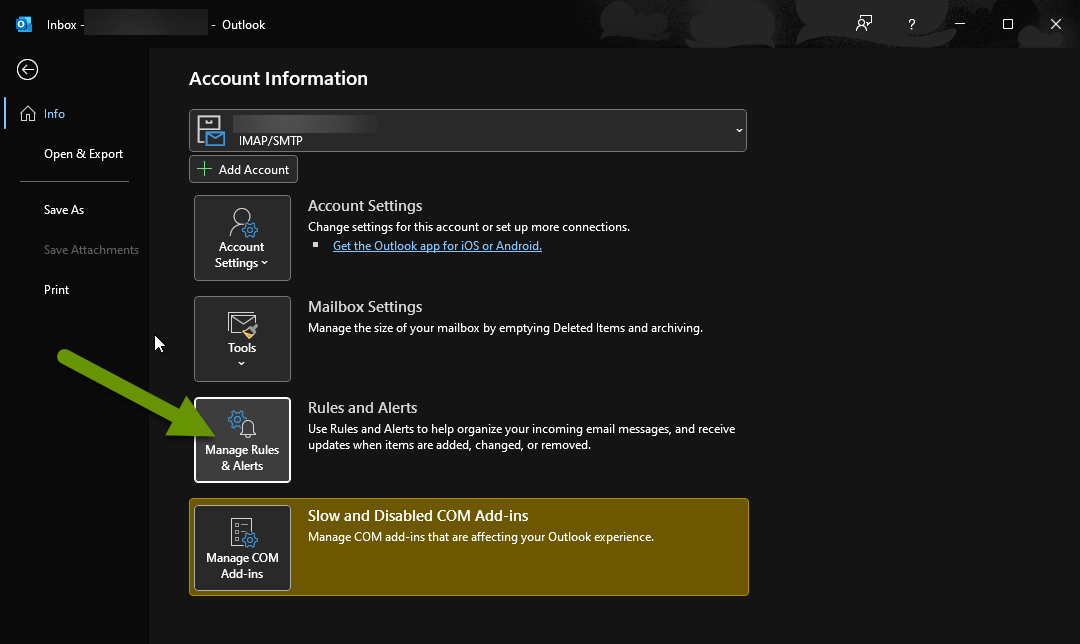
- In Outlook, click on "File" and select "Manage Rules & Alerts" to create a rule to use your Outlook template email as an auto-response to incoming email messages.
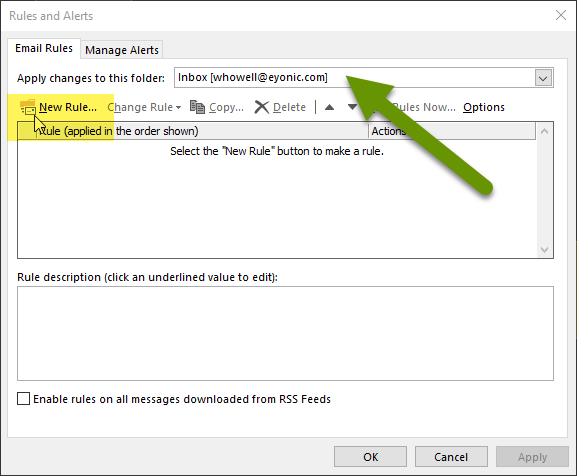
- In the Rules and Alerts window, make sure your email is selected in the box next to "Apply changes to this folder" and click on "New Rule".
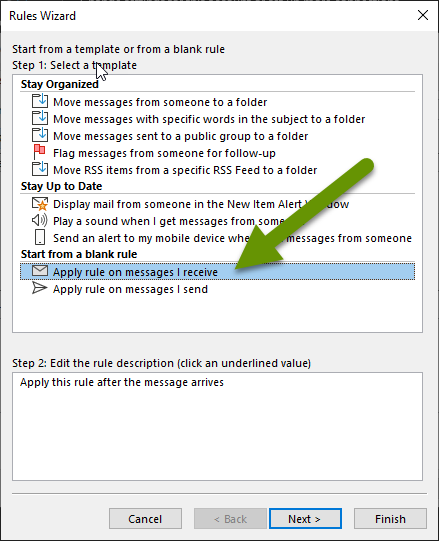
- In the Rules Wizard, click "Apply rule on messages I receive" under the Start from a blank rule heading, then click "Next".
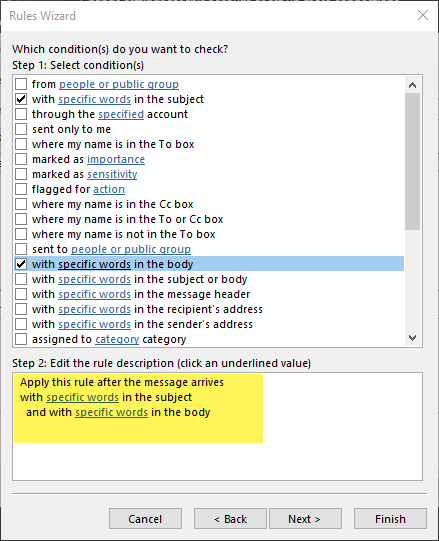
- If you want the rule to apply only to specific people or for specific projects, etc., you can select from any of the many conditions by checking the box next to it. Once selected, you can click underlined words in the box at the bottom to edit those conditions if available.
- Click next to save these conditions.
NOTE: Conditions can also be stacked so be careful what you choose and in which order you choose to apply conditions or you may end up with unintended consequences.
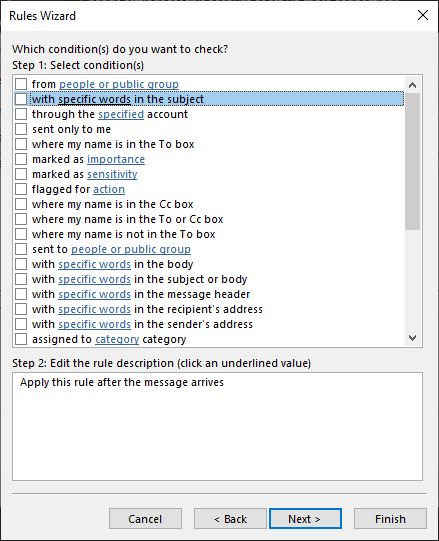
- Otherwise, if you want everyone to receive your automatic response, click next when prompted with the conditions of who the rule should apply to and leave the selections blank.
- When prompted to confirm if you want the message to apply to every message you receive if this is what you selected, click "Yes".

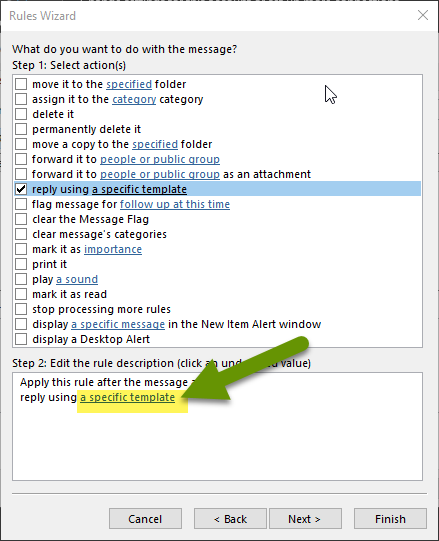
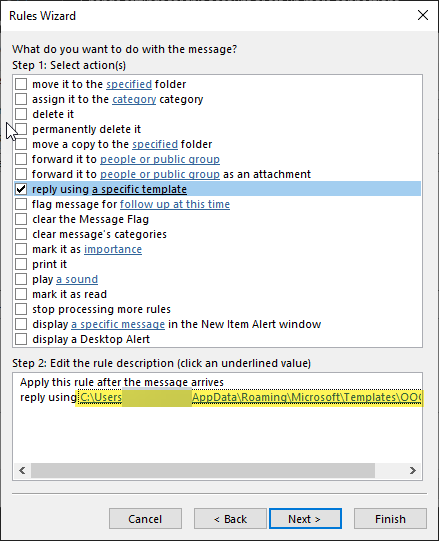
- In the actions box, click the box next to "reply using a specific template".
- Click "a specific template" in the box at the bottom to pick the template you created in step one.
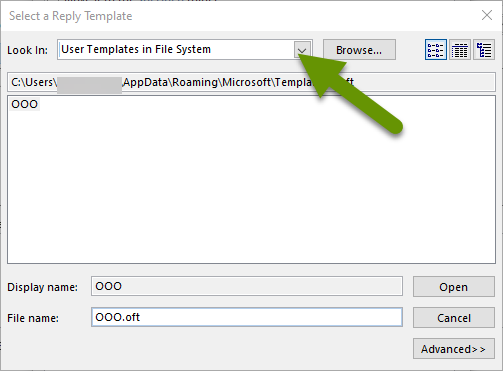
- In the drop-down next to "Look In:" at the top, select "User Templates in File System".
- Click on the template you created in step one and then click "Open".
- Verify the template you selected shows up in the box at the bottom of the rule, then click "Next".
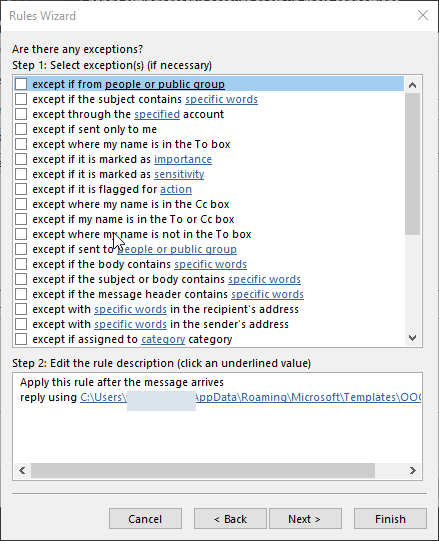
- Set any exceptions then click "Next".
- Choose if you want to apply the rule to existing email, enable it, set it for all accounts, or simply save it.
- Click "Finish" to save the rule.
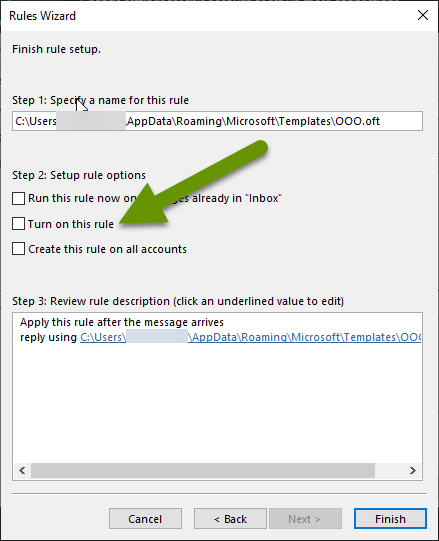
NOTE: Saving the rule without enabling it is a great way to create it in advance so that when it is time for you to use it, it only takes a few minutes to activate.
Setting an out of office auto-response for incoming email is a great way to communicate with anyone who has emailed you, and you are not going to be able to get back to them the way you normally would. OOO messages are great when you need to communicate with a large group of people and it would be inconvenient to email them all, or if you simply want a few people to know you are currently out. If you have an Exchange mailbox, setting an OOO message is done at the click of a button. When you have an IMAP mailbox, an OOO message requires a couple of steps, but this can still be done within 10 minutes.
As always, knowing what tools are available, and how to utilize them, is key in saving time and reducing the need for additional third-party applications!

