
How to Separate Items in One Column into Multiple Columns

One of the biggest challenges of collecting and organizing data starts before you even have any data. This of course is deciding how to best organize the information you plan to track. Excel is a powerful spreadsheet tool that tracks all kinds of data. The reason Excel is so incredibly powerful is that it has built-in tools like filters which allow you to narrow the focus of data, sorting which helps find specific information, formulas to make computations, and charts and tables to track trends and much more.
Unfortunately, if you are not careful how you set the data up for collection, or you are exporting the data from another application, it might not be in the best format. For example, when multiple pieces of data are in the same column, it can be much more challenging to effectively and easily manipulate the data.
This post discusses how to separate items in a single column into multiple columns so you can format the data to your unique needs.
For a video of this being demonstrated:
How to Separate Items in One Column into Multiple Columns
One of the most common mistakes people make when setting up data in Excel is including too many pieces of information in the same column or row. There are many examples where consolidating more than one piece of data into the same column can turn out to be less than ideal. Two of the most common examples of where too much data is placed in a single column are:
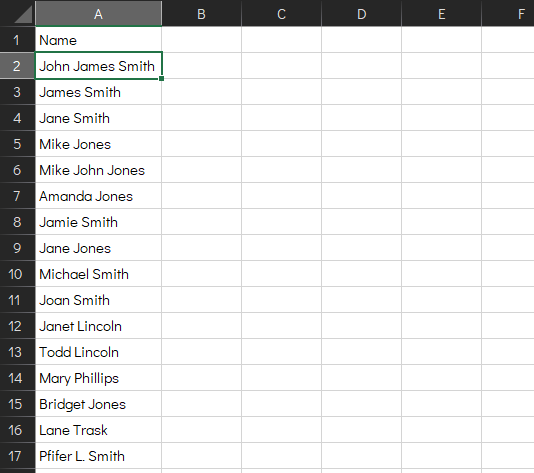
- Names - first and last names should always be separated. This makes it much easier to sort later when you have more than one person with the same last name, etc.
- Addresses - always keep the city and zip code in their own columns independently of the street and number. There are so many reasons why you might want to sort by zip code or drill down futher by city when looking at your data and this is far easier to do from the beginning.
However, sometimes you are not in control of how the data is available to you, most commonly because you exported the data from an application or program. When this is how you acquired the data, the format of the data is usually far more limited. Luckily, the data does not need to remain this way because there is a quick and easy way to separate the data out so that it is much more usable for you.
To split the data in a single column into several columns:
- Open the spreadsheet with the data.
NOTE: In this example there is no data to the right of the column that has information that needs to be broken out. However, if there is data directly to the right of the data you are splitting out, you will first need to add blank columns to make room for the data you are splitting. If you don't, you can accidentally replace existing content.
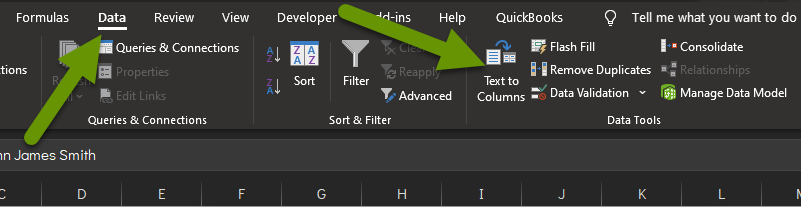
- Click on the Data tab.
- Highlight the rows with the data to extract.
- Click on "Text to Columns" in the Data Tools section of the Data tab.
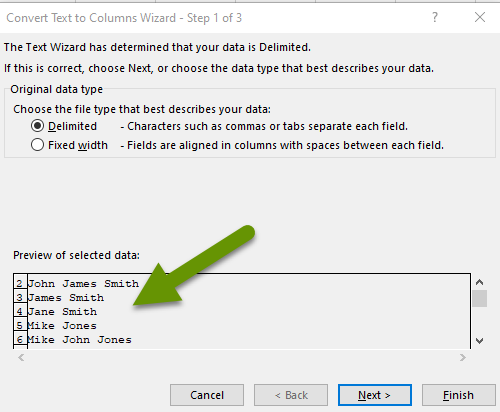
- In the first step of the convert text to columns wizard, check the radio button for the option that most closely resembles the format of your data. The preview at the bottom shows how your data can be split. Most of the time delimited works best for what I am doing, but fixed width can also be used.
- Click "Next" to move to step 2.
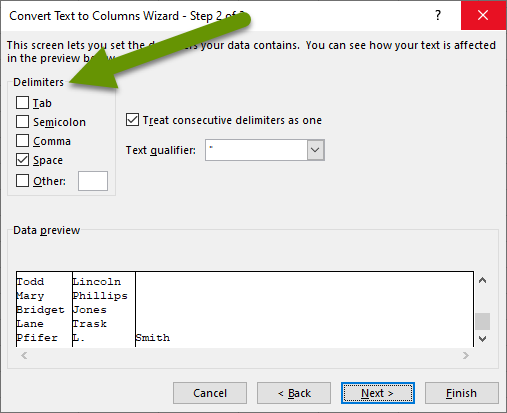
- Check the boxes next to each delimiter that your data has. Delimiters are used to separate the data, in essence defining what is considered a break in the data so the data can be split.
- Once all your delimiters have been selected, and the data preview of how the data will be split looks correct, click "Next".
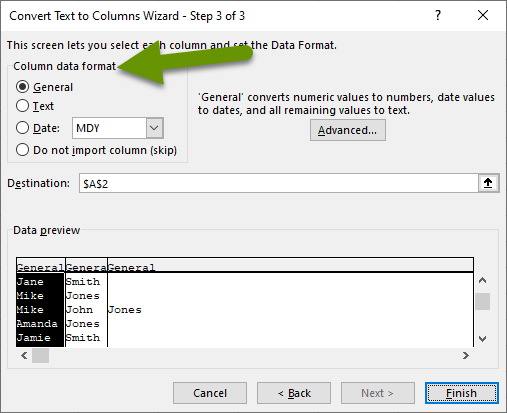
- In step 3, choose the data format.
- Again, look at the data preview at the bottom of the box to verify it looks correct, then click "Next".
This will split the data into columns just as it showed in the preview window at the bottom of each step.
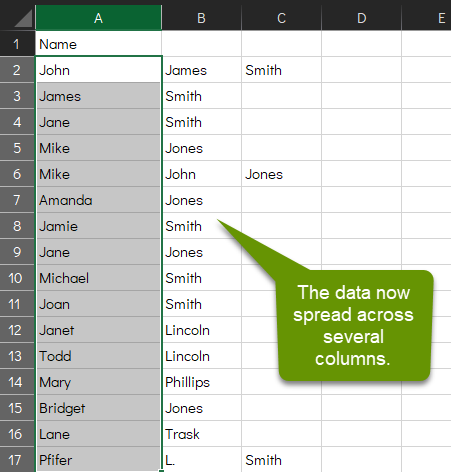
The data is being split into several columns to the right of the original data. This is why it is so important to add empty columns before starting the wizard which will prevent existing data from being replaced. Whatever data you are splitting, be sure to add more than enough columns for the data just in case you miscounted the number of columns as this ensures other data is not overwritten.
Keep in mind, once the data has been split, you can remove any items you do not want or need. For instance, in the example above, you might not care about middle names or middle initials, so we could easily remove that column. This is true of any information that you split into separate columns.
When you have multiple pieces of data in a single column in Excel, it can seem overwhelming to try and get useful statistics and information from it. Luckily, there is an easy way to split up content so it is in a more usable format. Excel can separate information into different columns so you can better use it as well as allowing you to remove information you do not need. Using the text to columns utility is quick and easy and can save tons of time that might otherwise be spent re-entering data.
As always, any shortcuts that make it faster to get information into a usable format are helpful!