
How to Send Files in Emails as Attachments NOT as Links to Uploaded Files

If you use a newer version of Microsoft Office you may have noticed within the last year some changes to adding attachments. Originally adding an attachment simply required clicking the paperclip icon in an email and navigating to the file to attach. An even easier way to attach a file was possible if you had an explorer window with the file open, you could drag the file over into the body of the email to attach it.
However, recently Microsoft has made changes to how attachments are handled in email, uploading them to the cloud and putting a link to that file in the email. Luckily, there is a way to add attachments the old way if that is your preference.
How to Send Files in Emails as Attachments NOT as Links to Uploaded Files
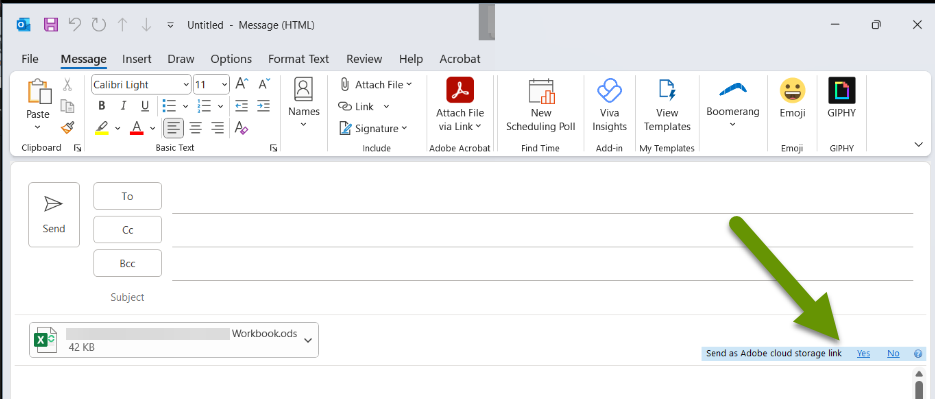
There are several different places your files can end up if you add an attachment to an email in newer versions of Outlook. If you only have Outlook, your files will upload to OneDrive and then the email will include a hyperlink to that file that your recipients can click to access the file. If you also have Adobe, and the Adobe plugin is added to Outlook, you may also be prompted by Adobe to send the attachment as an Adobe cloud storage link rather than as an actual attachment.
One of the benefits of using this method is that it can prevent the size of the email and the recipient mailbox from growing too large. Another benefit of this method is that if you need to make a change to the file, you simply make the change and anyone accessing it will have the most up-to-date version without you having to resend the email.
Most likely there will still be times when you want to send the attachment without using the cloud as a proxy. If you mostly want to send attachments as a link, then you can simply say no when prompted (see image above). However, if you want files to attach by default, use the instructions below to modify Outlook's settings.
To send an email and attach a file in Outlook:
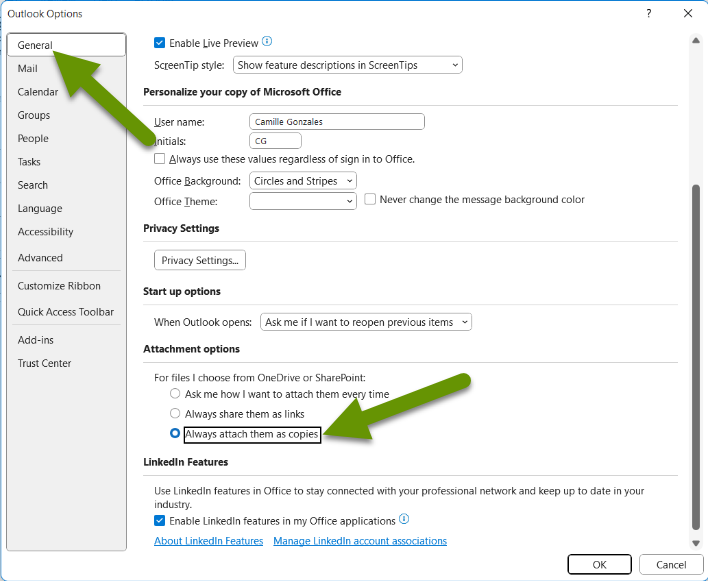
- Click on "File" and select "Options".
- In the Outlook Options box, click on the General tab if it is not already selected.
- Scroll down to the "Attachment options" section.
- Under the "For files I choose from OneDrive or SharePoint" option, select the "Always attach them as copies" radio button.
If you also have Adobe and the plugin was installed in Outlook, you will also get prompts from Adobe when attaching files to use cloud storage. Adobe will use their own cloud storage, not OneDrive.
To modify the Adobe attachment setting in Outlook:
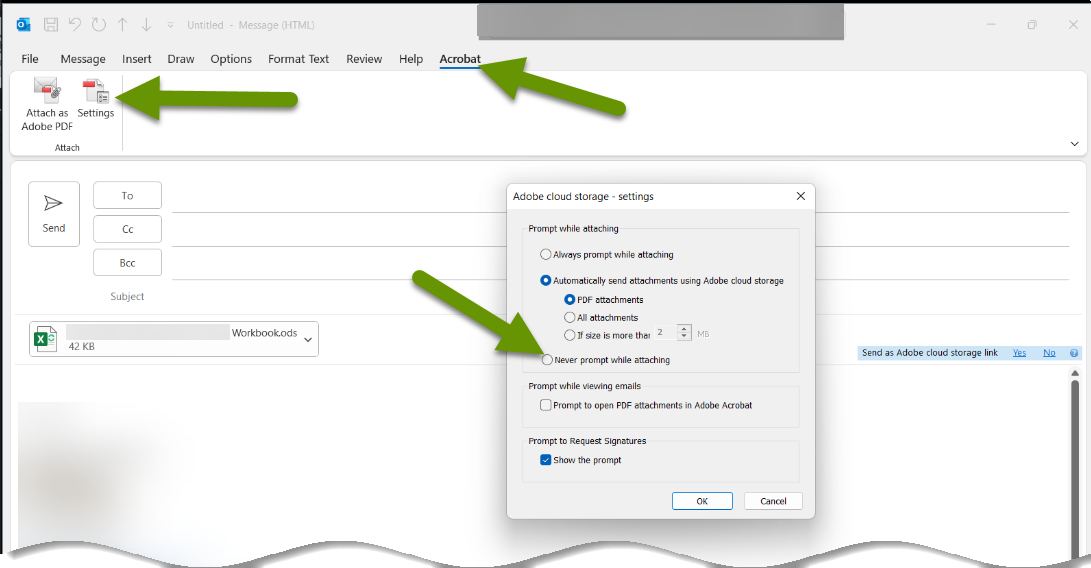
- Open a new email and click on the Acrobat tab.
- Click on Settings button.
- In the Adobe cloud storage - settings box, click the radio button next to "Never prompt while attaching" from within the Prompt while attaching section.
Both of the options above will prevent you from being prompted to send attachments as links to either OneDrive or Adobe cloud storage when adding them to emails in Outlook. You can always change this later, but if you prefer to actually attach files to emails, turning off these prompts will definitely be less frustrating than saying no to them every time you try to attach a file to an email.
As always, sometimes changes are welcome and other times they are not!