
How to Save Time by Creating a Poll in Microsoft Teams

Gathering input from multiple people can be tedious and overwhelming. From contacting people directly, to sending emails, to gathering information and synthesizing it, and even having people's schedules change because you have taken too long. Getting feedback from or scheduling something for multiple people can feel daunting. Luckily, if you have an office subscription that includes Teams, you can easily create a poll to gather information, schedule items and more.
How to Save Time by Creating a Poll in Microsoft Teams
Most Office subscriptions come with Microsoft Teams. If you have not used Teams and it is not installed, you can download the app to your local machine from Microsoft's website, then enter your Microsoft credentials to log in.
Once Teams is installed and running:
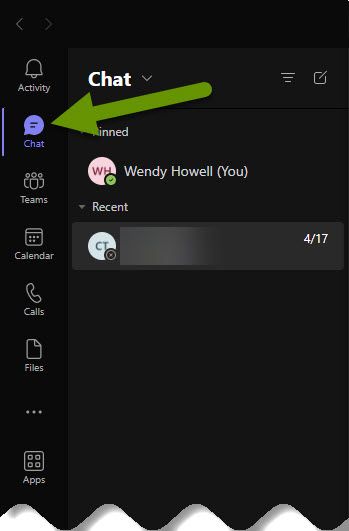
- In the left menu, click on Chat.
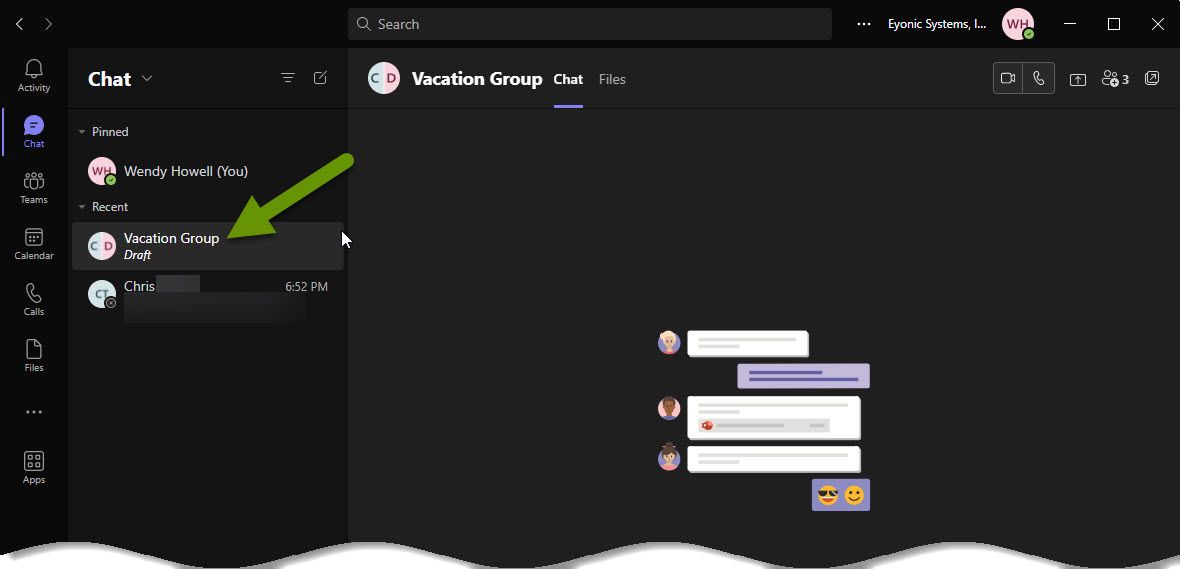
- In the middle pane, click on the chat that represents the person or group you want to respond to the poll.
- At the bottom of the chat window on the right side, click the 3- dot ellipsis below the chat box.
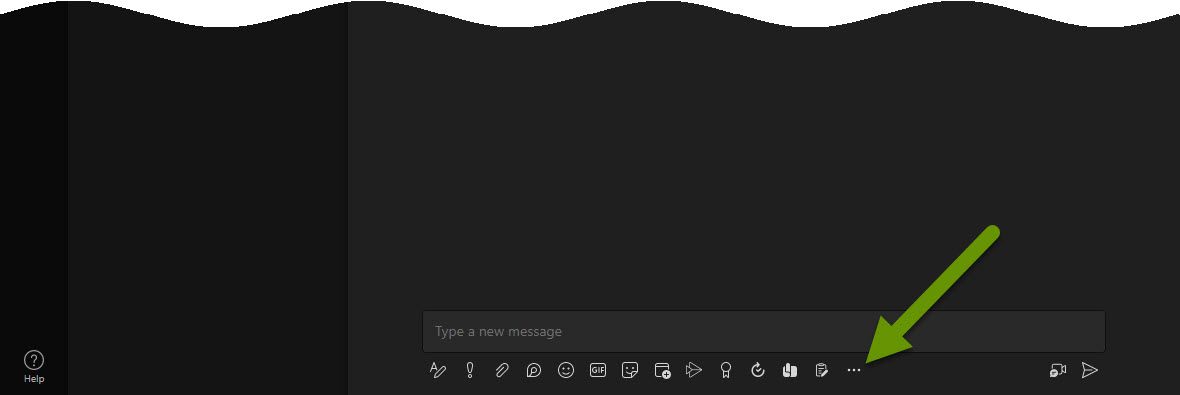
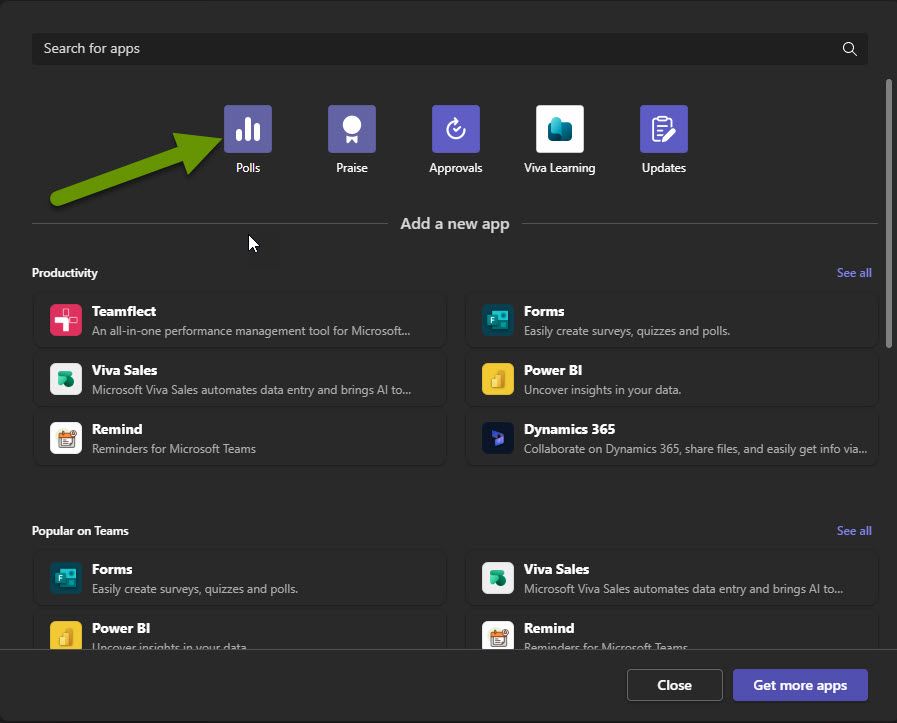
- This will bring up the "More Apps" pop-up window.
- Click on the "Get more apps" button at the bottom.
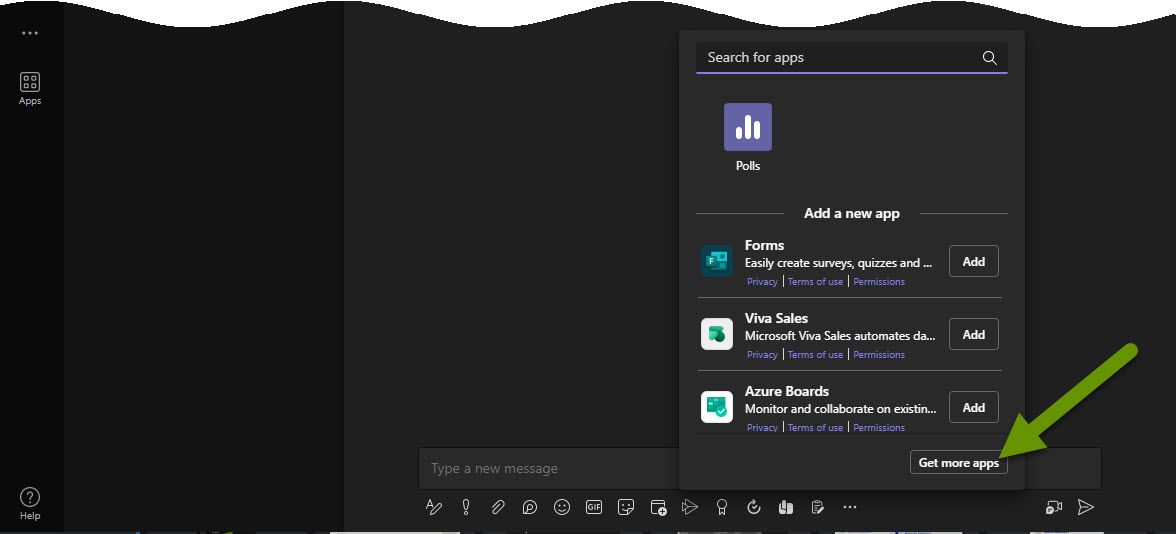
- In the larger apps window, click on "Polls" at the top, or search for it if it does not appear.
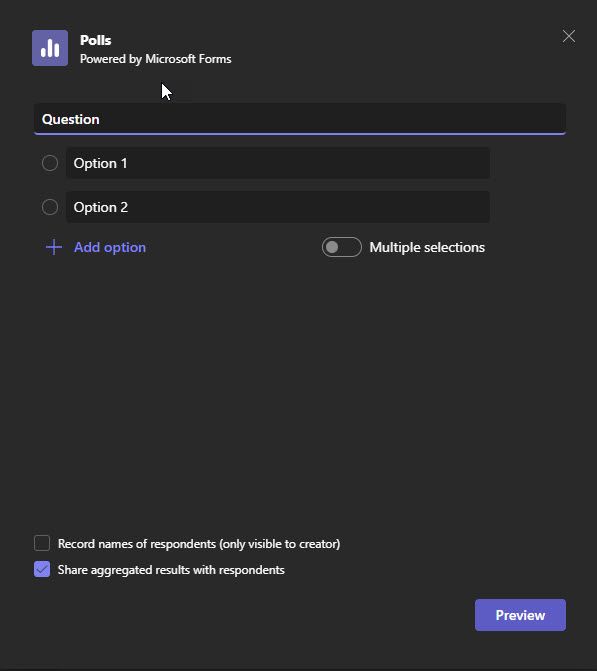
- This will bring up a Polls window where you can begin entering questions and possible answers.
- As you type, some possible answers may show up automatically based on your question. You can choose to use some, all, or none of these options. For example, my question has to do with months so all months in the year showed up as options without me typing them.
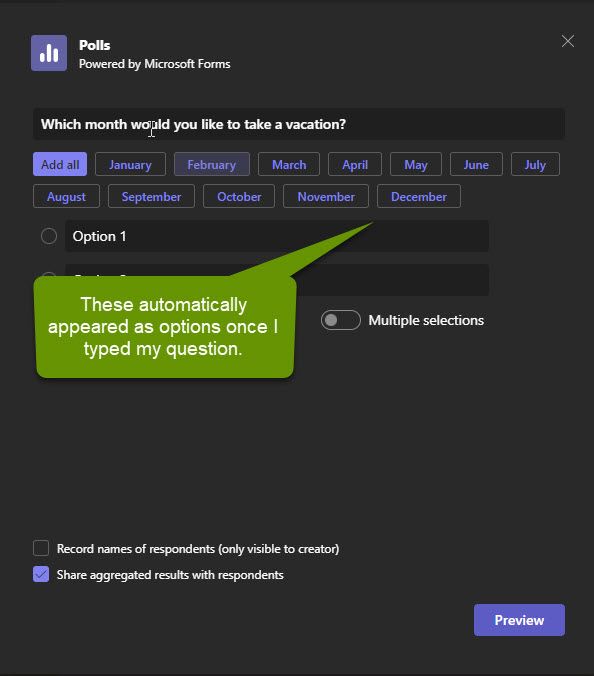
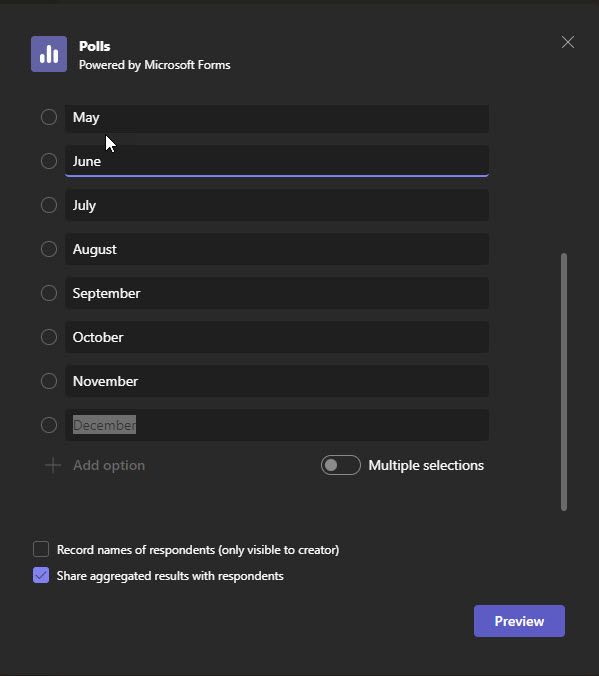
- Choose to add answer options from the auto-populated list, add your own answers, or use a combination of both.
- If you want to allow people to select more than one response, toggle on "Multiple selections".
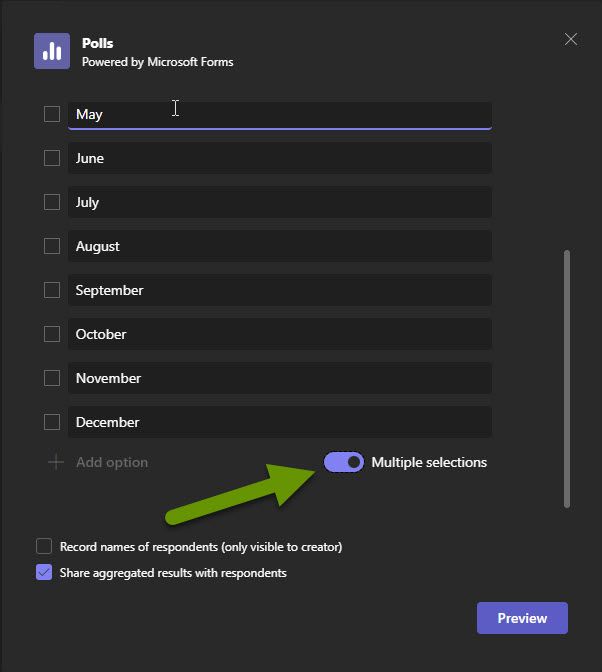
- Decide if you want to record the names of respondents and/or share aggregated results with respondents by checking or unchecking the boxes next to these options.
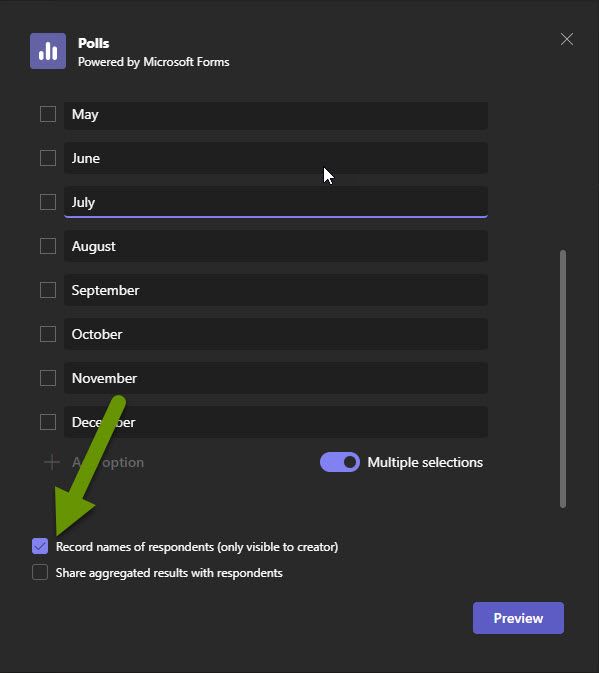
- When you have finished modifying all settings, click the "Preview" button.
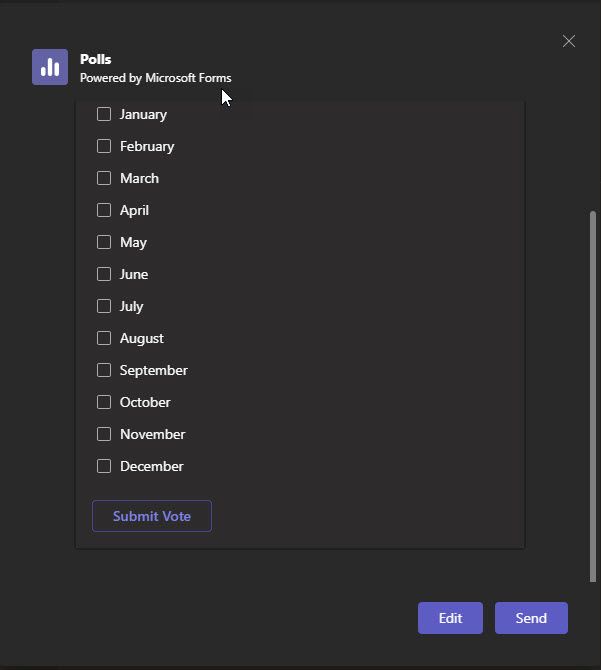
- Once you are happy with the preview, click the "Send" button.
- This will immediately add the poll to the chat person or group you originally selected.
As results are entered into the poll, you will get notifications in Teams and see the totals of the respondents' answers.
Gathering people together or getting personal opinions of a group, for any purpose, can be overwhelming and time consuming. Luckily, Microsoft Teams has a built-in Poll app that makes this much easier to accomplish. Simply open the chat for the person or group you want to gather information from, use the Polls app to create a quick and simple question with an answer set and send it. Answers are tracked by Teams which makes this a great tool for information gathering and scheduling.
As always, knowing all the capabilities available in existing software, and how to best use them, is key in getting things done efficiently!