
How to Save Locally by Default in Newer Office Versions

When new versions of software are released, they typically include a mix of changes, added features and also security patches. Sometimes the changes are subtle, other times the changes are dramatic. When Microsoft implemented the infamous Ribbon menu, which was probably over a decade ago, I don't remember finding anyone who liked it at first.
Sometimes interface changes can be reverted back to "Classic Mode" if you do not like them, but keep in mind this will probably end up being the standard eventually. With time, users typically adjust to new changes, learning where things have moved and how to once again feel proficient in the application. Unfortunately, sometimes a change, which is meant to make things easier, actually makes things more tedious for users.
This blog discusses one such change in Office 2019 and Office 365, where the default save location is OneDrive rather than the local device, as well as how it can be fixed.
How to Save Locally by Default in Newer Office Versions
The process of saving in Office 2019 and Office 365 applications is quite a bit different from previous versions. Like before, whenever you close an unsaved file or save a new file, you are prompted to save the document. The difference though, is that the default location to save is now set to OneDrive, rather than the local device.
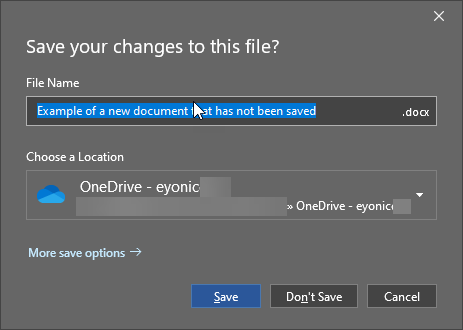
Closing a new file without saving will bring up a window prompting the user to save the file, like this:
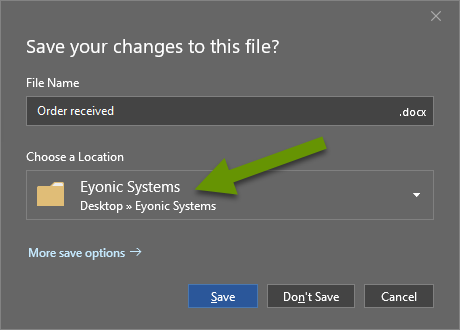
Similarly, when a user initiates saving a new file for the first time, they are prompted with the following window which has the same default save location of OneDrive.
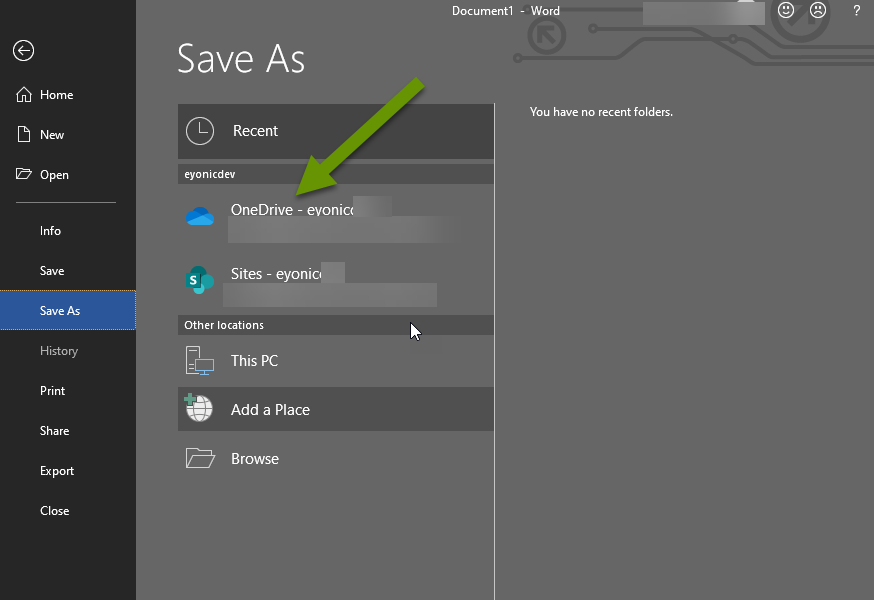
In both examples above, accessing other folders to save files locally is several clicks away unless it is listed under the recent folders section. As you work within multiple folders, the recent folder list can be less useful and browsing to folders is required. Unfortunately, navigating to the desired folder grows tedious the more documents you create and can be a time waster.
Note: If recent folders and recent documents do not appear in your application, the setting controlling this has probably been set to zero. This can be changed by going to File, Options, Advanced, and scrolling to those settings under the Display heading from within the application.
Luckily, there is a way to change the default location for saving documents and files. Keep in mind, the default location can be set to a folder on the local drive as well as a mapped drive on a server or other device. It is also important to mention that this setting can be changed at any time based on changing needs. For instance, if you work out of an annual folder that changes at the beginning of each year, this may be something you want to change when a new year begins.
Changing the default location for saving files
To change the default location for saving files in Office 2019 or Office 365:
- Open the application where you want to change the default save location. This is important because this is unique to each application. In the example below I am modifying the default location in Microsoft Word.
- From within the application, click "File" to open the settings window and select "Options" at the bottom of the left pane.

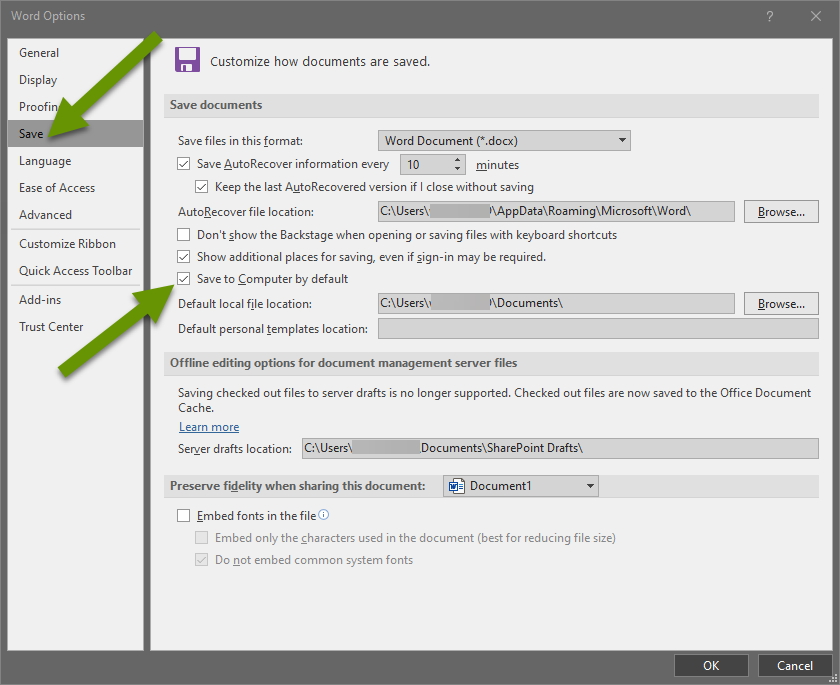
- Inside the Options window popup, click on "Save" in the left panel.
- In the right panel, under the "Save documents" heading, put a check in the box next to "Save to Computer by default".
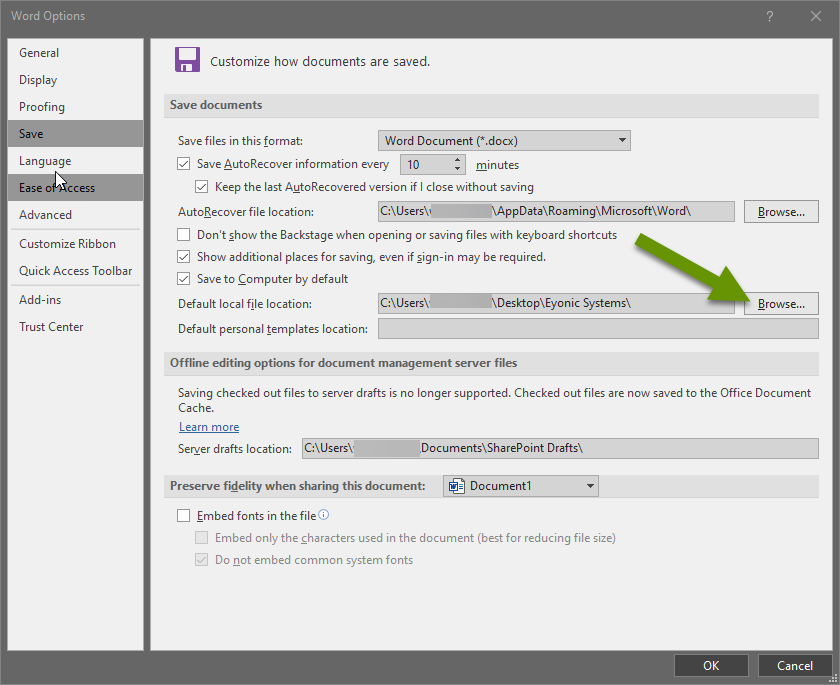
- The default local location listed just under saving to the computer by default is preset to the current user's Documents folder. If you want this set to something else, click the Browse button next to the setting for "Default local file location". Navigate to the desired folder then click the "OK" button to close the browse window and select that folder.
- Once all necessary changes have been made, click "OK" to save the settings.
Once the default folder for saving files has been changed, saving locally is easier. Closing a file without saving it, or saving a file for the first time, brings up the save file window with easy access to saving to the newly set default folder.
While the newer versions of Office applications default to prompting users to save new documents in OneDrive, this setting can be changed. The default folder can be set to any folder on the local computer or a mapped drive. Also, the default save location is unique to each Office application. This makes it easier to set the default folder that makes the most sense for documents, then another folder for presentations, and yet another for workbooks. Taking the time to update the default folder for saving all new documents created in each application saves a tremendous amount of time for those users who create several documents each day and are not saving their documents in OneDrive.
As always, knowing where to set defaults is a huge time saver!