
How to Remove Already Deleted Printers that Still Show up in Programs

It is truly challenging to have only those printers that are necessary installed on a computer or laptop. This is partly because the longer you have had the device, the higher the likelihood printers have come and gone, many of which you no longer use. Keeping printers well managed is even more challenging with laptops because of their greatest feature: mobility. They are often used at multiple locations and it is common to add printers while at those locations. Unfortunately, even if you take the time to remove a printer no longer being used, sometimes it still appears as an option in local applications.
This blog discusses how to remove a printer that has already been deleted so it stops showing up as an option in programs and applications.
How to Remove Already Deleted Printers that Still Show up in Programs
It is easier than you think to end up with more printers installed than you realize or intended. For example, many multi-function printers show up as two printers in the printer settings by default. One device is the traditional printer while the other is the fax device. Another way printers double up is by showing up as multiple printers simply because the printer port is different: attached USB cable and IP address or multiple IP addresses.
Lastly, if you use a laptop and connect remotely to a network, sometimes all the available printers on that network will attach to your device. When you disconnect, they are supposed to disappear, but this does not always happen. All these additional printers being available only makes it more challenging to find the printer you actually want.
Luckily, if you delete a printer but it still manages to show up in applications as available, there is a way to remove them permanently so they no longer show up anywhere.
First, it is important to state that the steps in this post are only necessary if you have already deleted a printer and it still shows up in applications. If you delete a printer and it no longer appears anywhere - you do not need to follow the steps below.
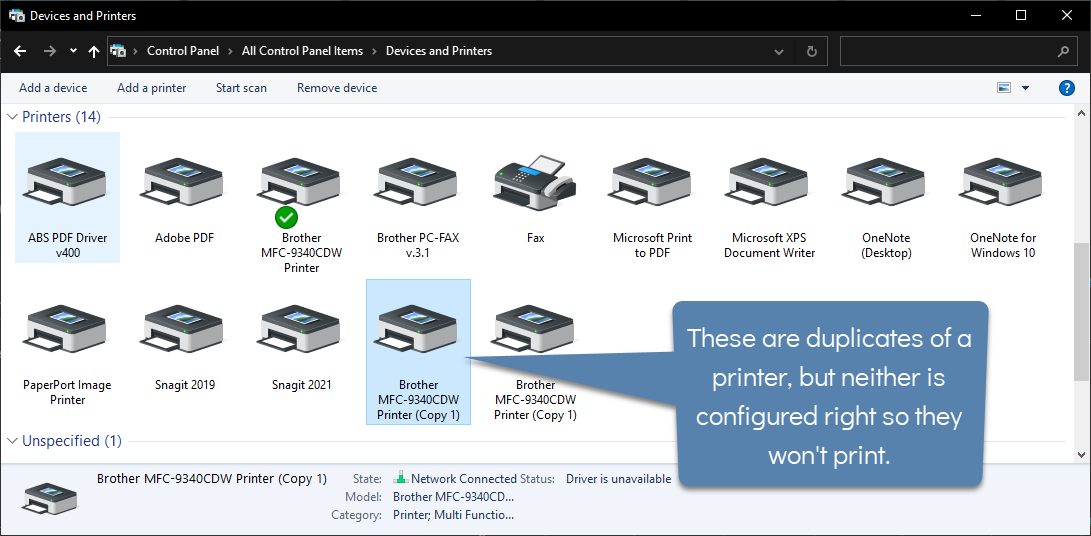
In our example, we have multiples of the same printer, but the duplicates do not work. This would also be appropriate for individual printers you no longer use.
In this situation, we start with removing the duplicate printers by:
- Clicking on the Windows start button and selecting "Settings".
- In the Settings window clicking on "Devices".
- In the Devices window, clicking on "Printers and Scanners" in the left menu.
- Clicking on the name of the printer to remove and then clicking on the "Remove device" button.
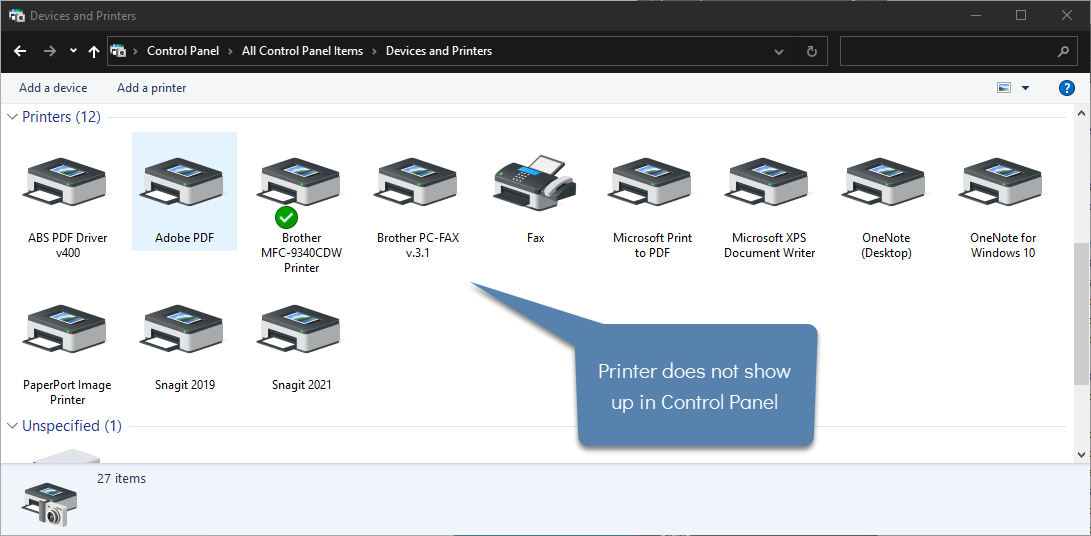
- After removing the appropriate printers, check to be sure they no longer appear in the Printer menu.
NOTE: If you are not sure which printers to remove, click on a printer name and select "Manage". Click the link for "Printer Properties" in the left pane and check the connection type. If you are not sure how you are connecting to a printer, test printing until you find the ones that do not work and document their details so you will know which ones to remove.
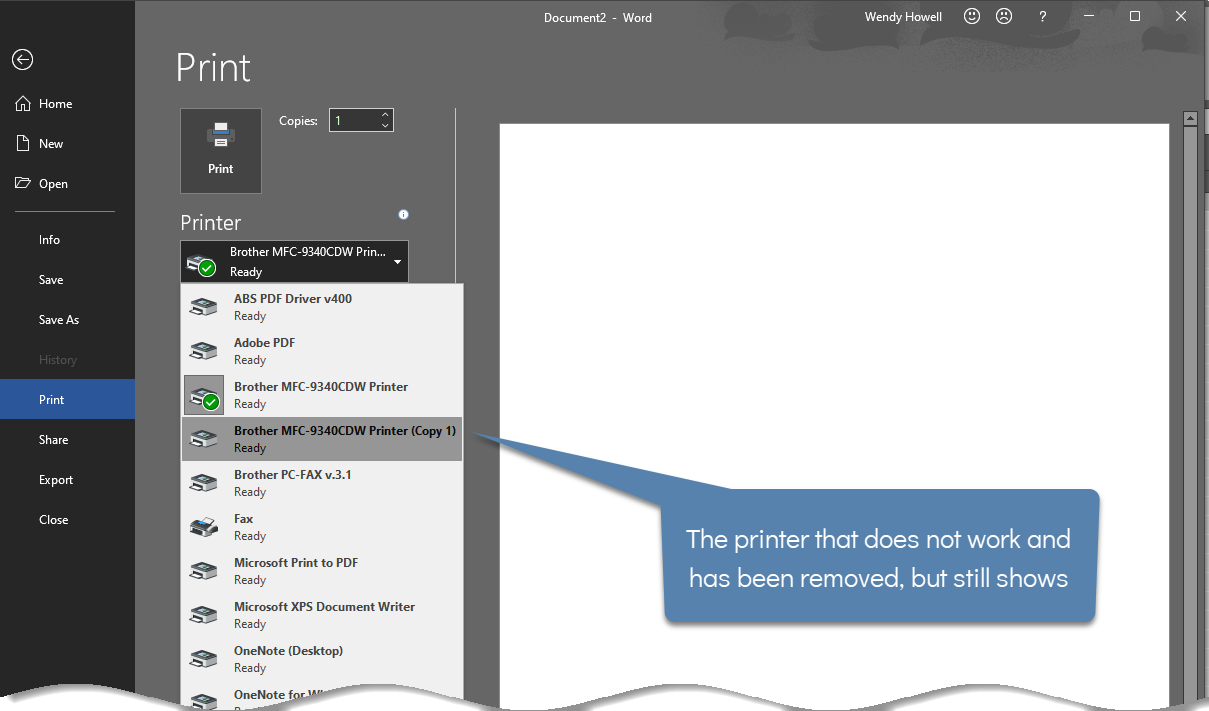
If after you have removed the printers they still show as an option when printing from applications and programs, there are additional steps you need to take to remove them.
When a removed printer still appears in applications, you need to remove them from the registry on the local device so they stop showing up as options from within applications.
NOTE: Do not modify the registry on a device if you are not familiar with it or feel comfortable doing so. Making the wrong changes can have devastating effects on the device.
To remove the devices from the registry:
- Search for "Reg" and click on "Registry Editor".
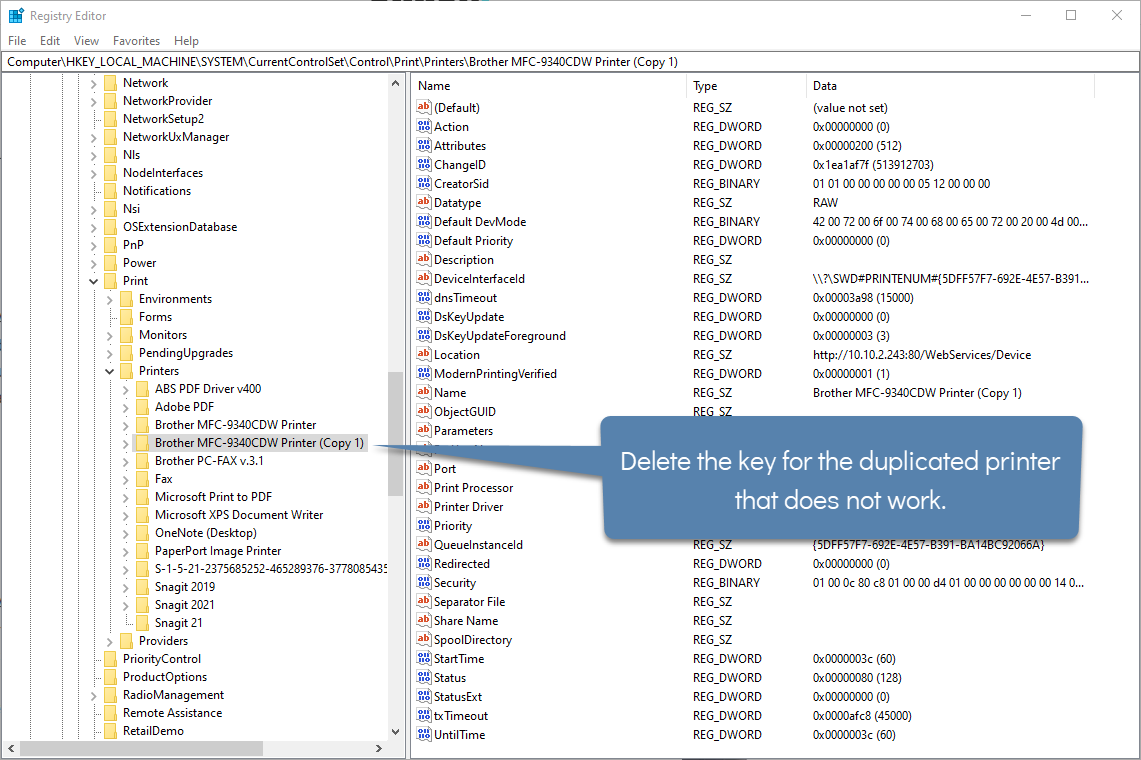
- In the registry, navigate to the following folder: HKEY_LOCAL_MACHINE, then System, CurrentControlSet, Control, Print, and finally Printers.
- Click on the Printers folder in the left pane to expand it.
- Click on one of the removed printers in the left pane and then click the Delete button.
- In the Confirm Key Delete popup, click "Yes" to permanently delete the key and all of its subkeys.
- Continue this process for all printers listed in the registry that were already removed.
- When all desired printers have been removed from the registry, click on the X in the upper right corner to close the registry editor.
- Open an application that was previously showing removed printers and verify those printers no longer appear as available options.
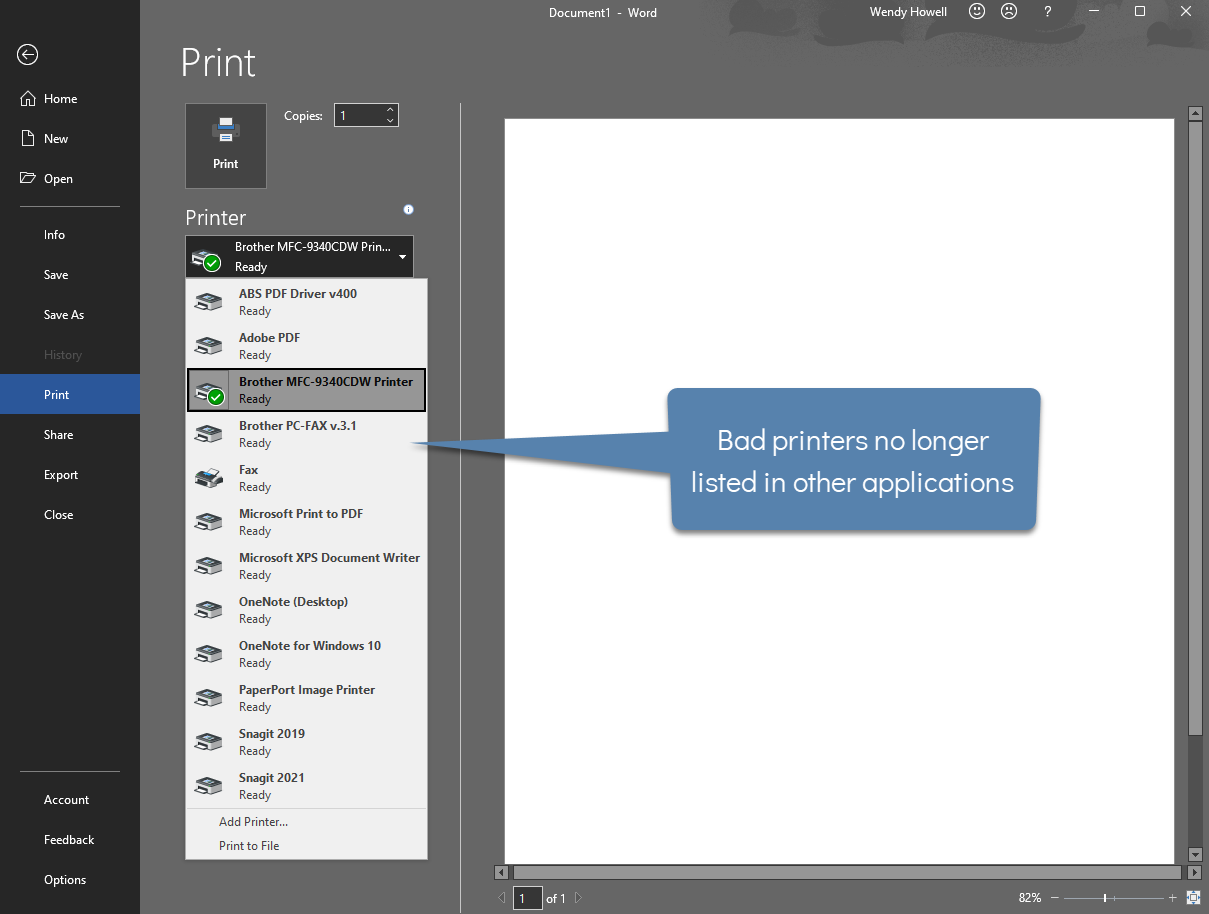
Much of the time we forget to remove non-working printers or printers we no longer have access to. However, sometimes even when you spend the time removing a printer, it still shows as an available print option in several applications which is frustrating. When this happens, remove the printers from the registry which prevents them from appearing as an option in any application on that device.
As always, sometimes software does not operate the way you expect, luckily there is usually a way to get around these kinds of issues!