
How to Modify Styles in Word You Never Knew Existed

There are hundreds of objects in Microsoft Word whose styles can be modified to meet your unique needs. An example from the Styles section of the Home tab is normal, which is applied to the general section of every new document. Other styles in this section include:
- No Spacing
- Heading 1
- Heading 2
- Title
- Subtitle

This section provides quick access to some commonly used objects, like a title or heading, and allows you to modify things like font, font size and paragraph styling. This post discusses styling for dozens of objects within Word that can be accessed by expanding the Styles menu. These include objects like bullet lists, lists, envelope return addressing, and much more.
Here is a video discussing this topic:
How to Modify Styles in Word You Never Knew Existed
Accessing all of the styles objects
To access styles for objects you probably never knew existed:
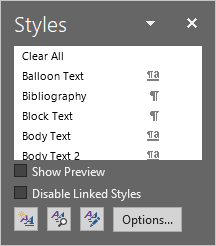
- Click on the expansion arrow at the bottom of the Styles section on the Home tab in Word.

- This will bring up the Styles menu which will look something like the image below, but will likely have some differences.
- Click on the "Options..." button to open the Style Pane Options window.
- Under the "Select styles to show:" drop-down, select "All styles".
- Choose how to sort the list using the drop-down under "Select how list is sorted:". I chose Alphabetical because it makes it far easier to find something specific, but choose what works best for you.
- If desired, check the box next to specific formatting styles under the "Select formatting to show as styles" heading.
- Optional: If you want the changes you have made to the style pane options to apply to all new documents, click the radio button next to "New documents based on this template".
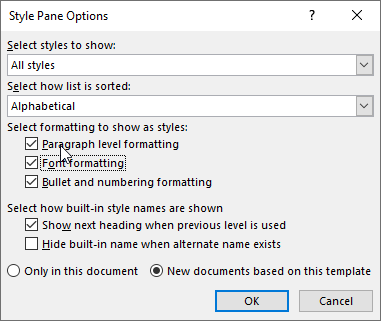
- Once all changes have been made, click the "OK" button.
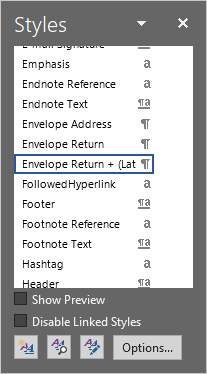
- The Styles pop-up will now show the changes you made applied to it.
How to modify a style
In the example below, we will modify the styling of envelope return addressing. Luckily, while some objects may have different options, the process of modifying an object is the same for all objects.
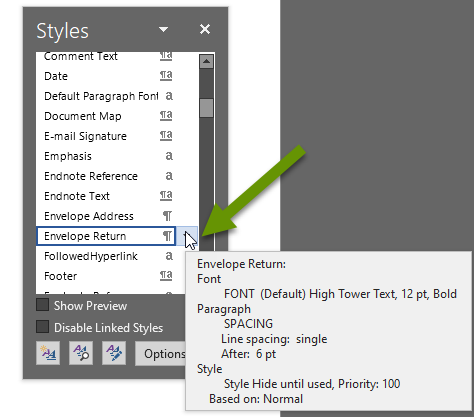
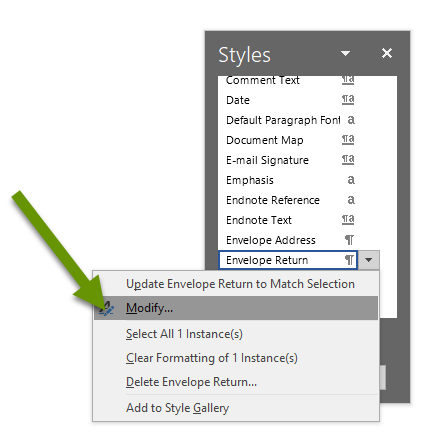
- Hover over the item you want to modify and click on the drop-down arrow that appears to the right.
- In the pop-out menu, select "Modify...".
- In the Modify Style window for that object, make the desired changes. You can change the font, the font size, the font style, indentation, alignment and much more.
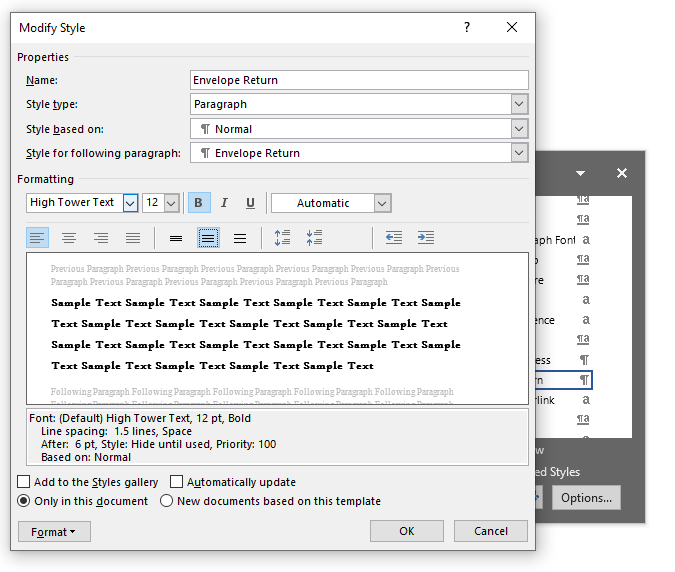
NOTE: Some changes are available in the Modify Style and using formatting windows while others are only available using a format window. Click on the drop-down Format menu to select one of the following windows: Font, paragraph, tabs, border, language, frame, numbering, shortcut key and text effects.

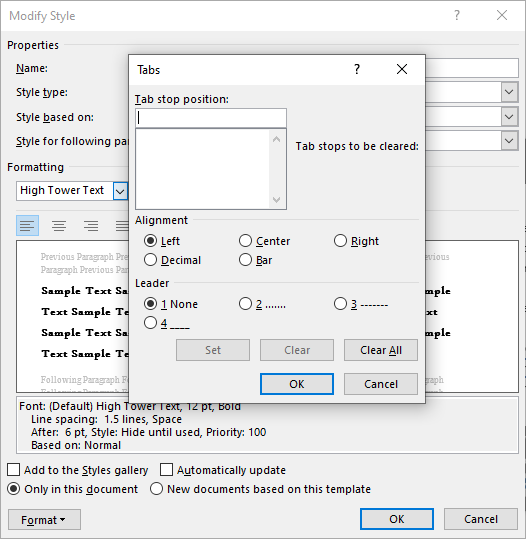
For example, if you clicked on the Tabs menu, you would be able to modify tabs in the additional window.
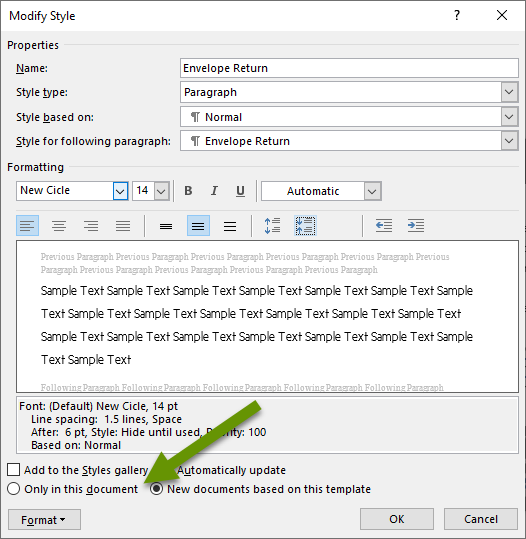
- Make all the modifications desired, whether in the main Modify Style window, or using separate Format windows, or a combination of both.
- Once all style changes have been made, be sure to choose whether or not you want these changes applied only to the current document, or to all new documents by selecting the radio button next to the appropriate choice at the bottom of the Modify Style window.
- Click "OK" to save the changes.
- Repeat this process for any other objects whose styles you want to modify.
- Once finished, close the Styles pop-up.
Once you have saved the styling for an object, when you use that object you will be able to see the changes you made be implemented. For instance, if you set quotes to use size 14 font and be bold, as soon as you select the quote object, those styles will be in effect. Similarly, if you set an envelope return address to be size 10 font, italicized and bold, that's exactly what will be applied to the return address once you create an envelope in the Mailing tab.
There are dozens of different objects you can modify to suit your unique needs using the expanded Word styles window. It would not be time effective to modify all of the objects, but if you stick to those that you use more regularly, and set them up so they best meet your needs, you will end up spending much less time on formatting which can be a big benefit!
As always, taking the time to set something up in advance will save you time and help prevent frustration!