How to Create Email Aliases and Merge Email Addresses
An email alias is a secondary email address that accepts email the way your primary email address does, without the hassle of maintaining a separate email account. For instance, a primary email account might be jane@company.com. Later, if the company expanded, they might want to use janesmith@company.com or jsmith@company.com or perhaps if she married it might be janehodges@company.com.
The last thing anyone wants to do is monitor 3 email accounts for the same job. However, changes happen, and when they do, it is important to have an easy way to maintain email addresses and prevent email loss.The best way to handle this type of issue is to create email aliases. This consolidates additional email addresses so all email sent to those addresses are received rather than being lost.
To consolidate multiple email addresses, email aliases are created inside the primary email account. This process ensures all emails received by each email address are funneled to the primary email. When the recipient responds, the primary address is the sending address.
How to Create Email Aliases and Merge Email Addresses
There are many reasons why people would benefit from email aliases. Some examples are:
- When someone changes their name - for instance after getting married.
- Company change in standard practice - small companies often start by creating email accounts based on employee first names. Once two employees with the same name are hired, this becomes a problem. This is when organizations often switch to using the "first initial last name" or "first name last name" for accounts.
- Employee changes - when an employee leaves and someone replaces them, it is easy for email accounts to be orphaned. Rather than having the new employee check multiple email accounts, create an alias for the new employee with the old employee's email address. This prevent emails from the original employee being missed or rejected.
- Merging companies - while there are common email formats, every company chooses the way that works best for them and so it can vary. As a result, merging companies often end up with different email standards. One company may have used "first name last name" while the other chose "first name.last name". This can be very confusing to employees, clients, and business associates and it is best to choose one standard for the new company. To prevent email loss, create email aliases for any existing non-standard email addresses and assign them to each employee. This ensures everyone recieves emails sent to them, regardless of the email format.
Creating an alias in Office 365 (simple)
- Log into your O365 account at portal.microsoft.com.
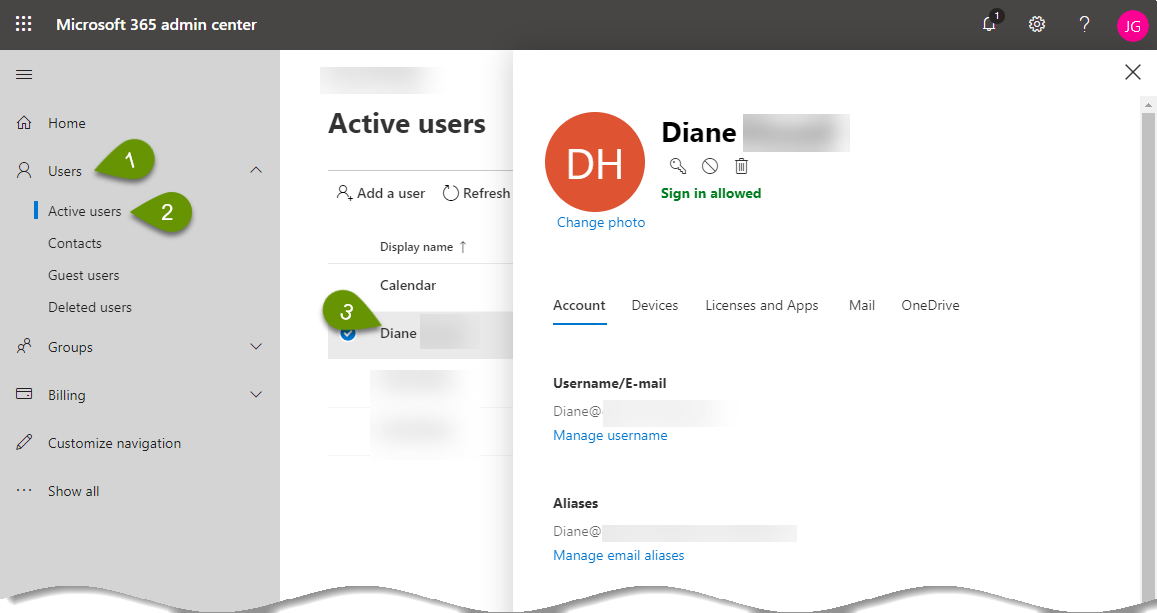
- In the left pane, click on "Users" to expland then click "Active users".
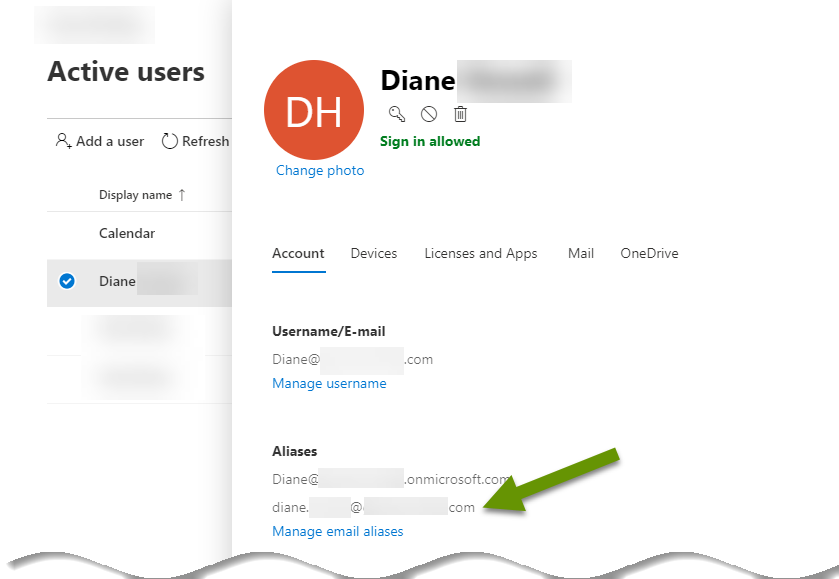
- In the right pane, click on the name of the user where you are addding the alias. This brings up a pop-up menu of user attributes.
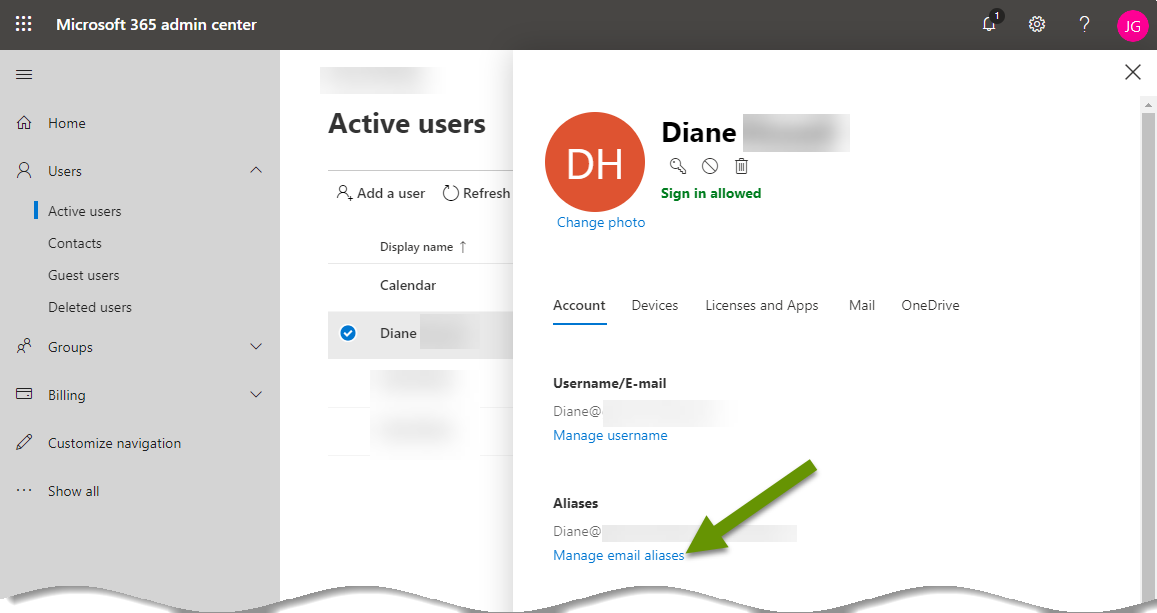
- Click the "Manage email aliases" link listed under the Aliases heading in the user details window.
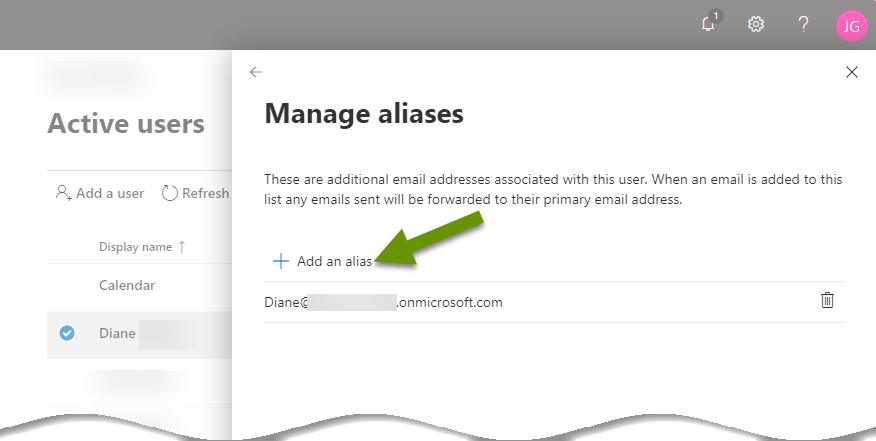
- In the Manage aliases window, click the plus next to "Add an alias".
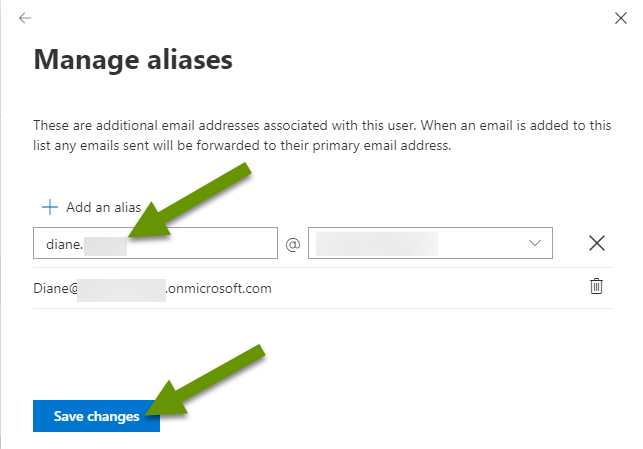
- Type the alias into the left box, the right box is for the domain.
- Continue until all aliases have been added.
- Click the "Save changes" box at the bottom.
The new alias is listed under the Aliases heading in the user settings.
Adding aliases when Active Directory is synced with Office 365 (slightly more complicated)
If you have Windows servers onsite, then you likely have user accounts stored in Active Directory, or AD. Many companies sync local AD with Azure directory services, which is cloud-based and part of Office 365. If this is the case, the steps below are how you would create an email alias for a user.
- Log onto the AD server.
- Open the "Active Directory Users & Computers" utility.
- Under the "View" tab, make sure there is a check next to "Advanced Features" to be able to access the necessary features in user details.
- Double click the name of any user to add an alias to them.
- Click on the "Attribute Editor" tab and scroll down to the proxyAddresses attribute.
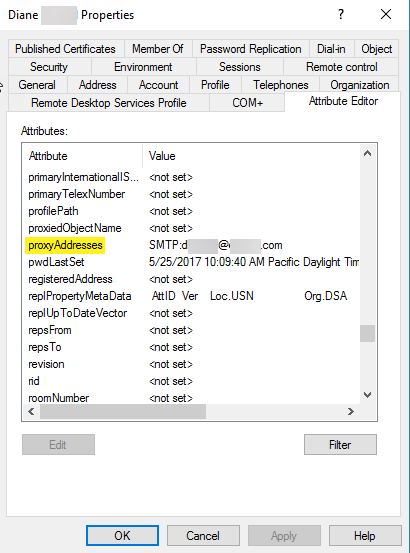
- Click on "proxyAddresses" to select it.
- Click the "Edit" button at the bottom.
- NOTE: If the list in the Multi-valued String Editor box is blank, be sure to add the primary email address first using the following format "SMTP:user@domain.com".
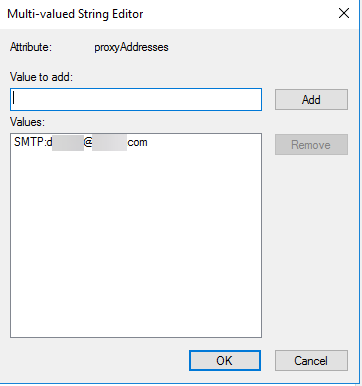
- Add aliases to the user by typing them into the box under "Value to add:" and clicking the Add button.
- Use the format "smtp:alias@domain.com".
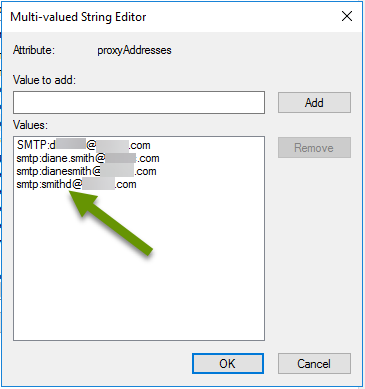
- Once all aliases have been added, click the "OK" button at the bottom of the window.
- The additional aliases are listed next to the proxyAddresses attribute.
- Click the "Apply" then "OK" buttons to save these settings.
- If desired, run the Azure AD Connect directory sync, or simply wait for these changes to synchronize automatically.
Email aliases are helpful for many organizations and users. From supporting secondary emails to taking over a new position, getting married or having two companies merge, aliases are a great way to manage email addresses. Aliases allow multiple email addresses to be merged, all while keeping a single primary email. Aliases work seamlessly in the background, funneling multiple email addresses into a single account without user interaction. Best of all, they prevent email from being lost or rejected.
As always, knowing what is possible and how to implement these features is key to getting the most out of the technology you use!

