
How to Manage Field Lengths in an Access Database

Access is a Microsoft database application used to track larger groups of data that would be challenging to track in a spreadsheet. The benefit of using Access, and any database application, is that they allow you to create a number of tables, each collecting unique data, that tie together to provide a more comprehensive view of the data.
Each table can collect different information, but they must have a field that relates to another table to tie the information together. Unfortunately, when tables are first set up, fields are often created without leaving enough room for growth. As a result of growth and other needs, users often need to change the length of fields in a table.
Changing a field length requires following a series of steps you will likely break the linked connections between tables, rendering some of the data useless. This post is part one of two discussing the process of changing field lengths, as well as how to bypass a common error occurring when you attempt to save a changed field.
How to Manage Field Lengths in an Access Database
Having multiple tables in a database that are all interconnected is helpful in many ways. One of the best aspects is being able to spread out the data amongst multiple tables to break up the data into organized chunks that are easier to manage instead of using one overwhelming table. Another benefit is that database applications can compare data and create more reports than most users need.
Setting up a database takes planning if it is going to be effective. However, even with the best planning, there are times when changes need to be made. For instance, maybe you collect customer zip codes. When originally setting up the zip code field, a five-digit length would probably seem adequate for the field.
After using the database for some time, you may decide you want full nine-digit zip codes instead of standard five-digit codes. This is a simple example of why a field length might need to change over time.
The biggest obstacle to updating a field is linked tables. If you try to update a field and receive a warning about breaking relationships, you have a linked table. Additionally, if the field you want to update exists in multiple tables, you will need to update the field identically in each table. Any linking associated with these tables will need to be broken to accomplish this.

Updating a field length or type requires the following steps:
- Creating a copy of the database to manipulate.
- Documenting any linked relationships related to the field you plan to change. This includes all tables the field exists in and their linked connections.
- Breaking the linked relationships between those tables where the field exists.
- Updating the field length identically in all tables where the field exists.
- Saving each table where the field was changed.
- Recreating all linked relationships between tables.
Creating a backup copy
Before doing anything, be sure to create a copy of your database. Never work with the original database in case you make a mistake along the way. Also, do not attempt the steps below if you are not comfortable with them.
Documenting linked relationships
Next, document any linked relationships affected by the field change you need to make. To find the linked relationships between tables, open Relationships. In this example, we are using a template database with dummy data.
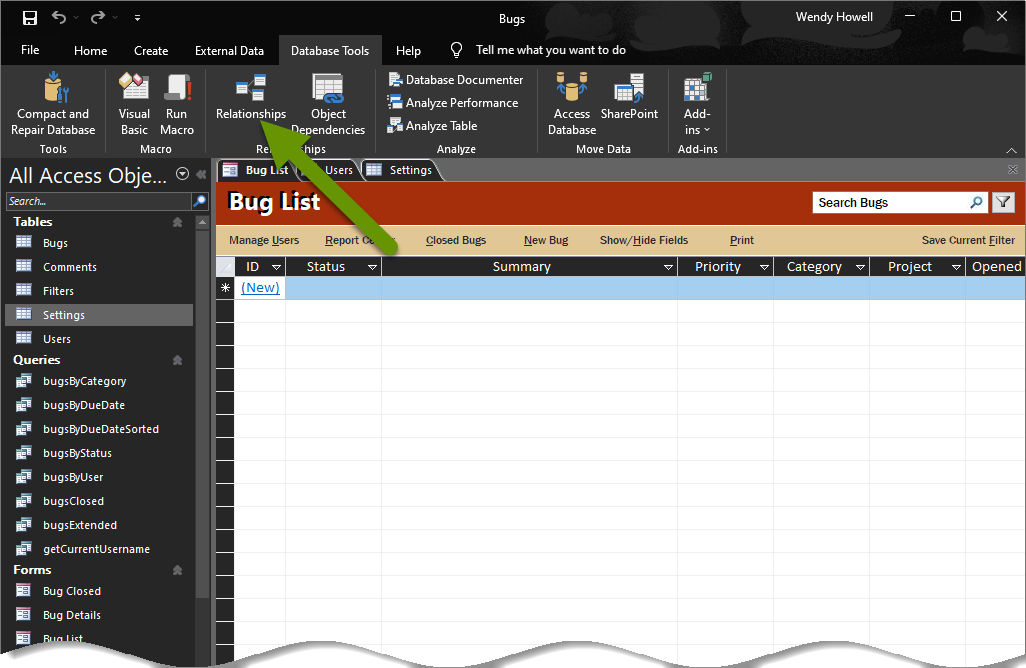
- Open the database.
- Click on the "Database Tools" tab and click "Relationships".
This opens the relationships table which show all the tables and their links as well as providing what you need to document the fields linked between tables.
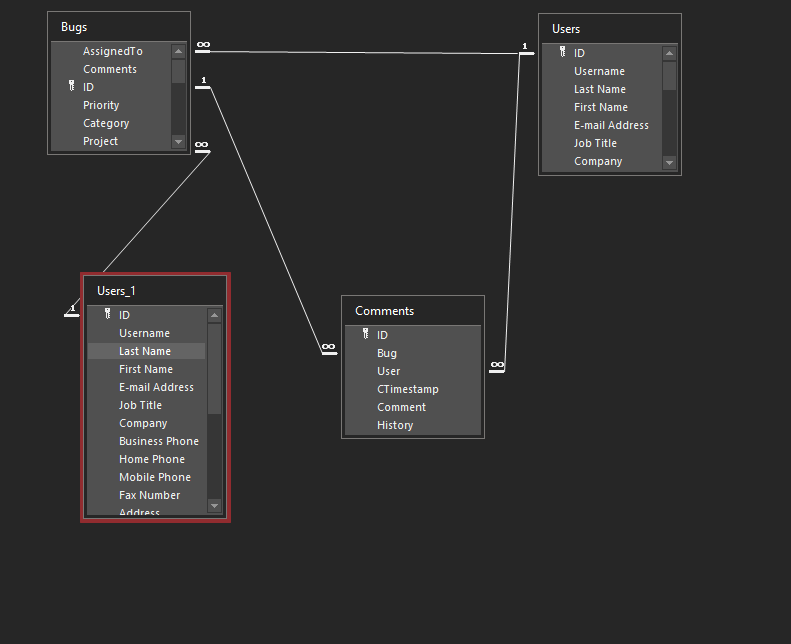
For this post, we are going to change the length of the Bug field, which is in the Comments table and is linked to the Bugs table. This means we will need to document any relationships for those tables.
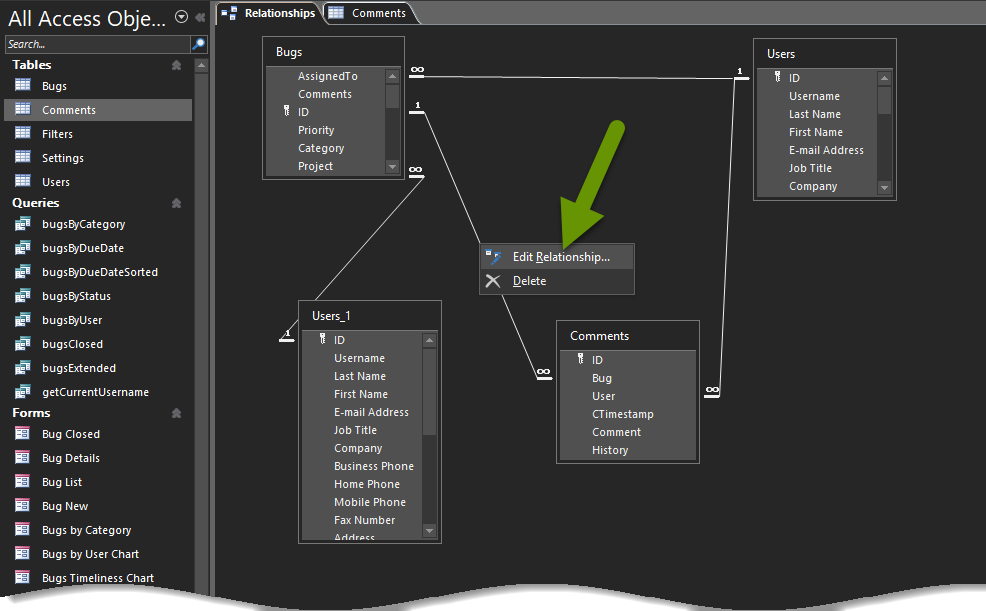
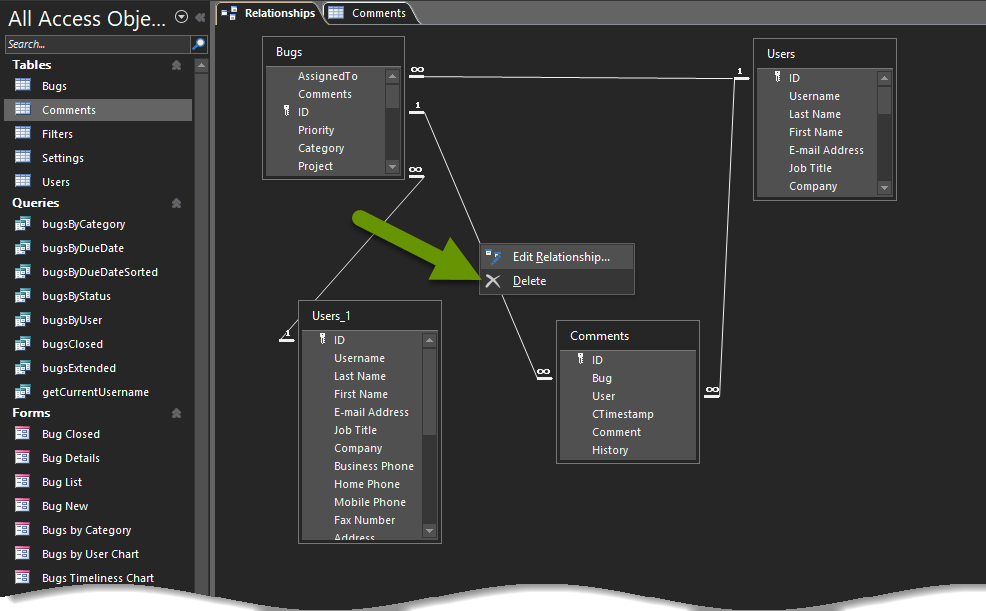
- Right-click on the line(s) connecting two tables where one of the tables has the field you want to change.
- Click on "Edit Relationship" in the pop-up. NOTE: If you do not get this option, you did not successfully click on the line linking the two tables.
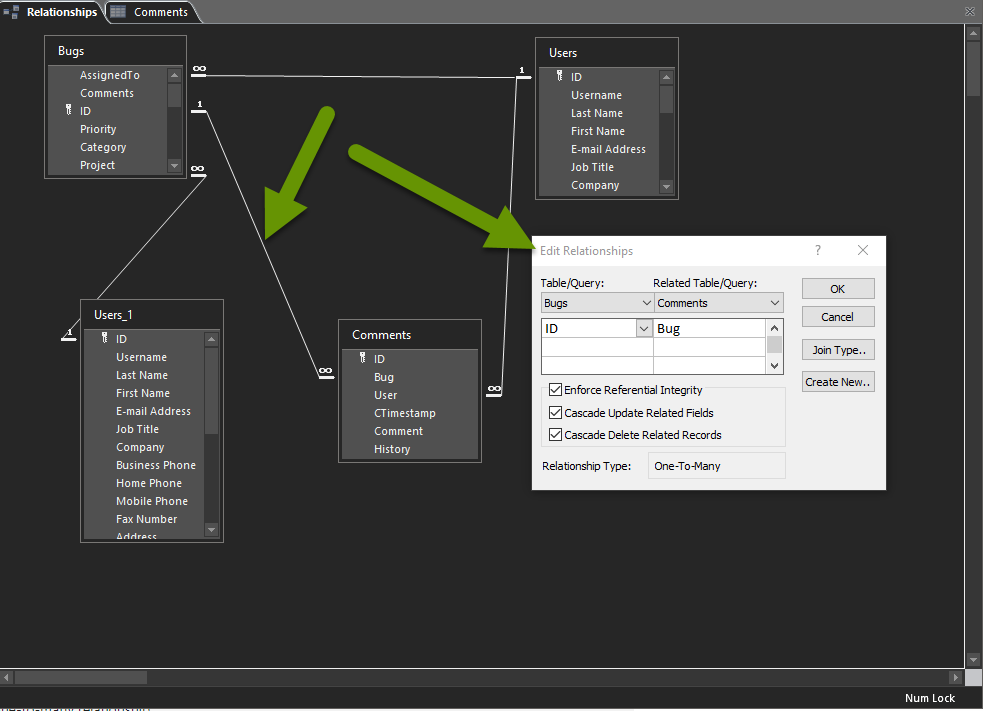
- This brings up the relationship between the two tables, showing the associated fields, the relationship type and the corresponding data intregrity.
- If possible, screen shot the relationship and save it in a place where you can easily find it later.
- Repeat this process for each linked relationship between tables where the field you plan to change is in at least one of the tables.
Breaking linked relationships
Once all of the linked relationships between tables with the field you plan to change have been documented, you must break the relationships.
- Right-click on the linked relationship and select "Delete" to remove the relationship.
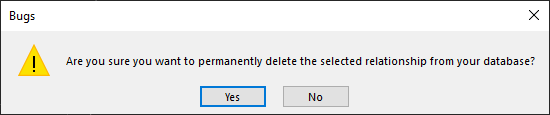
- When prompted, click "Yes" to permanently delete the relationship. NOTE: Once the field length or type has been changed, we need to recreate this relationship which is why we documented it first.
Once the relationship has been deleted, it will no longer appear in the Relationships tab.
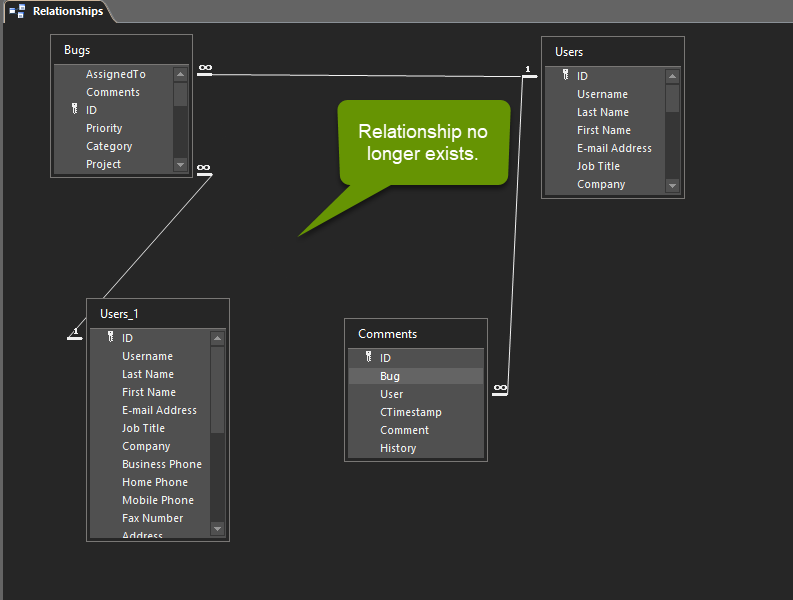
Continue this process until all necessary relationships have been deleted. Remember, you only need to remove relationships between tables where one of the two tables contains the field you plan to modify.
Updating the field length or type
After removing linked relationships, you can update the field length.
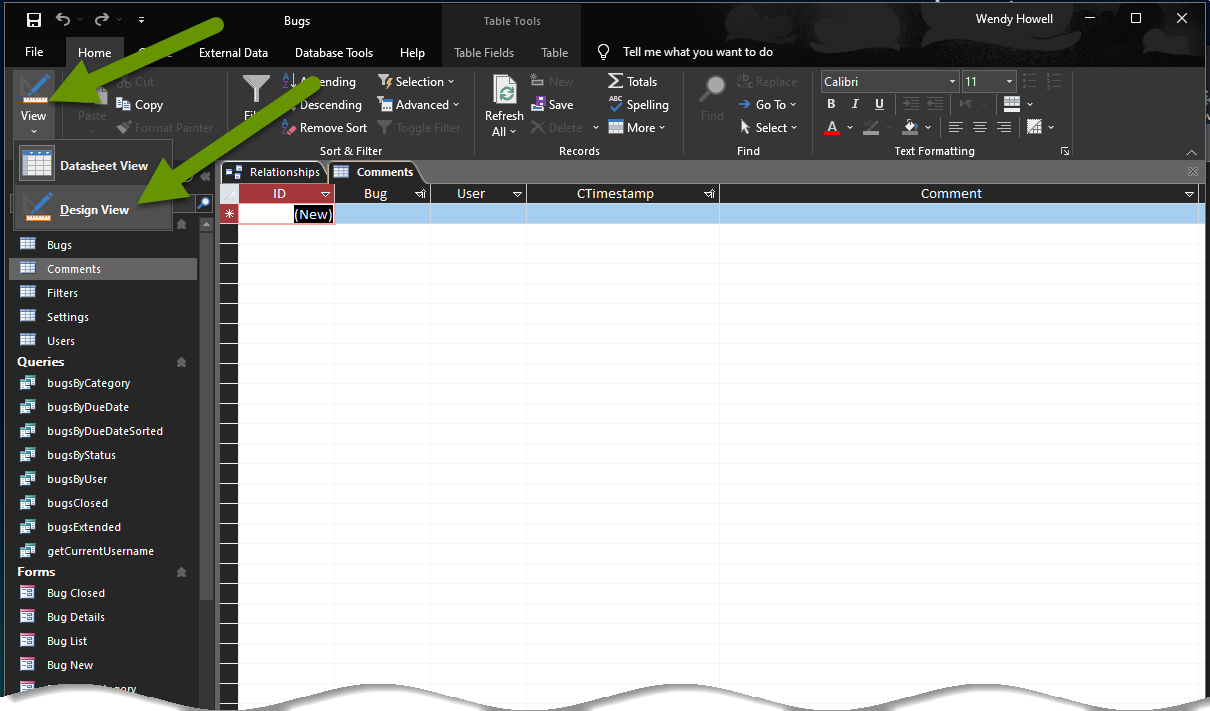
- Double-click on the table(s) with the field you want to modify.
- Toggle the view to "Design View" by clicking on the arrow below "View" located on the very left on the Home tab.
- Select "Design View" from the list.
- Click on the field in the list you want to modify.
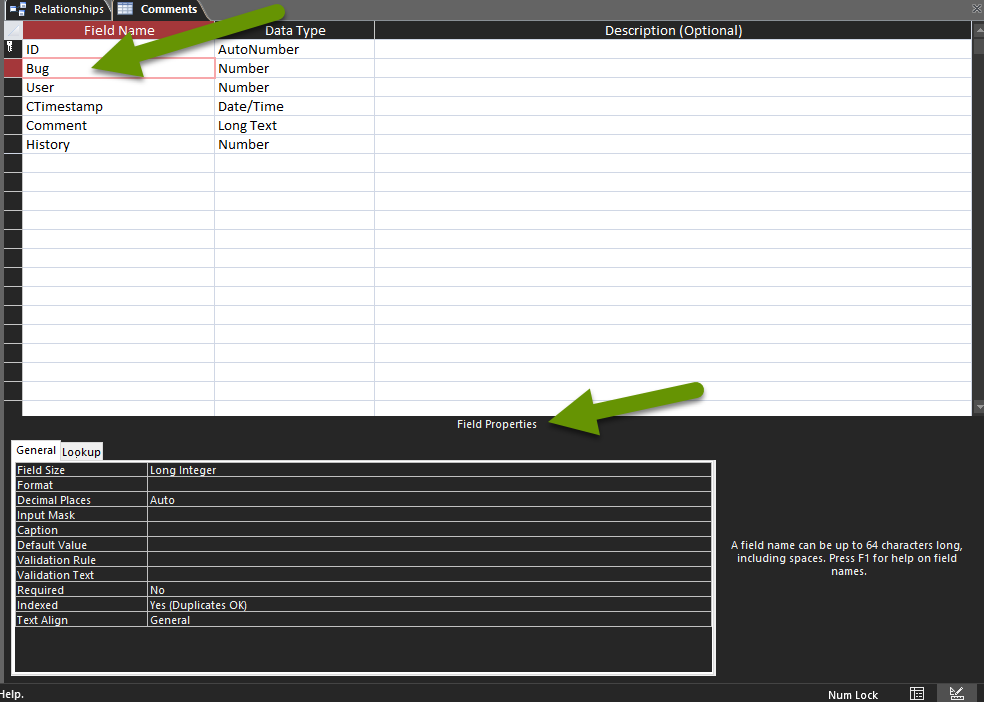
- In the section under "Field Properties", make the necessary changes to the field length.
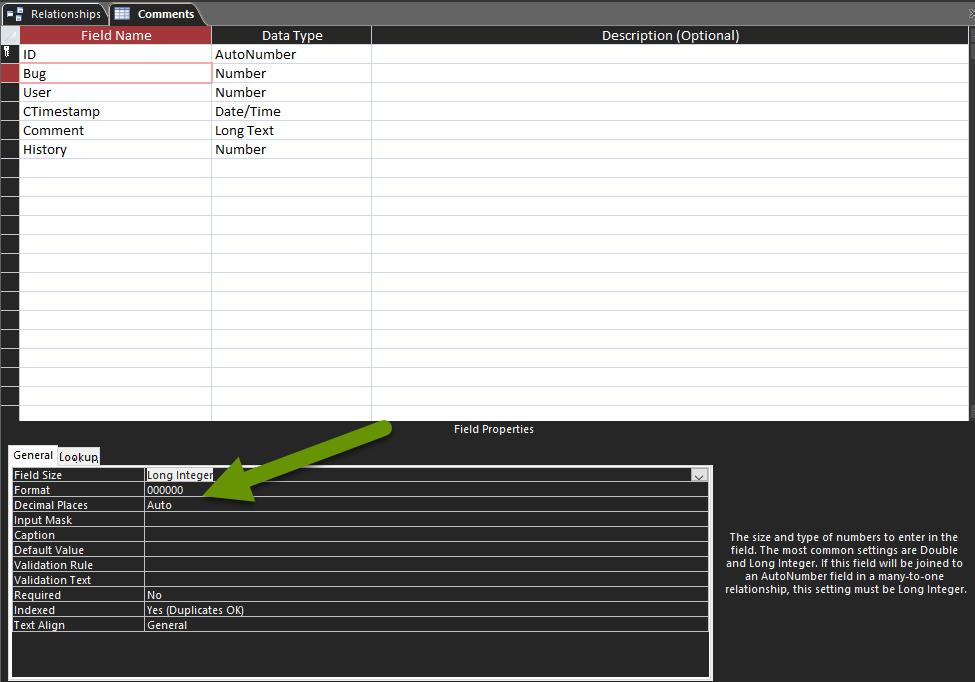
Continue to make changes to the field in all tables it appears in, being careful to make sure the changes are consistent across all tables.
Save any modified tables
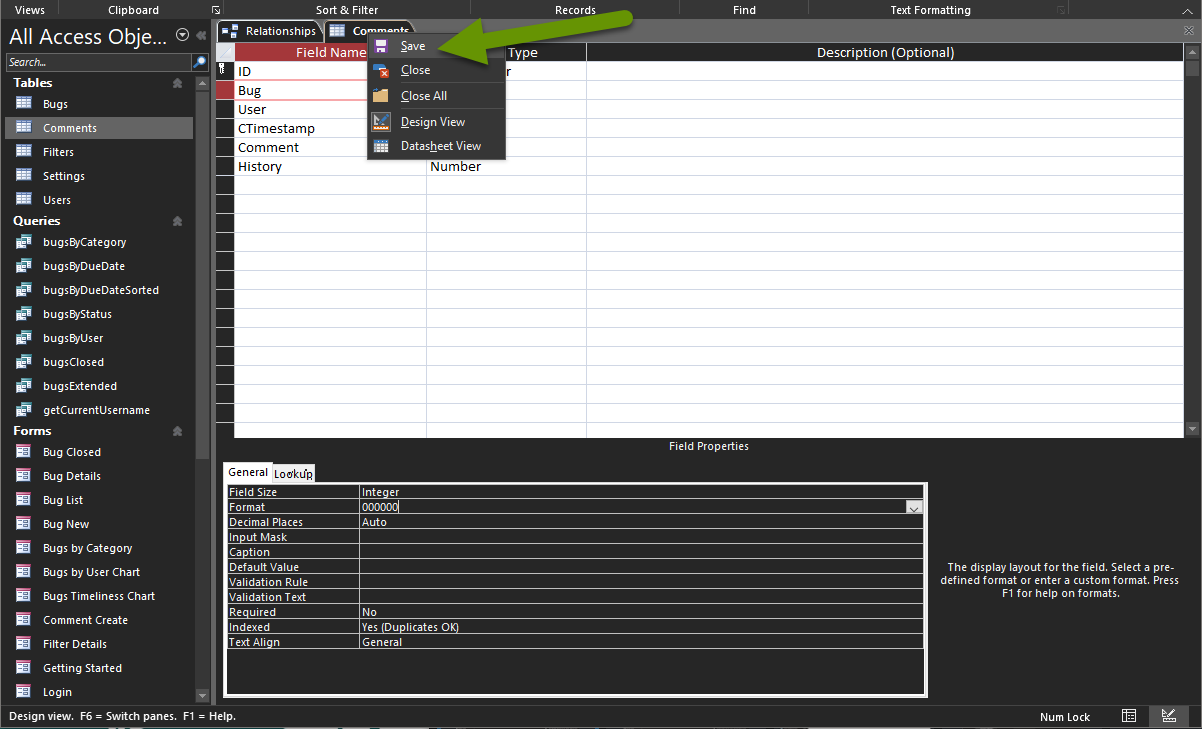
Once you have modified the field in all tables, save those tables.
- Right-click on the name of the table and click "Save".
If the table saves without issue, you can move on to recreating the linked relationships that you documented in step two, which will be covered in the next post.
If you run into a save error stating you do not have enough memory or storage to commit these changes, you will need to make a change to the registry on your local device. The next post demonstrates how to do this, in addition to recreating the linked relationships between tables.
Access databases can handle large amounts of data, process them into reports, provide forms to enter data, and much more. One of the biggest benefits of a database is how quickly it processes data into usable reports. Unfortunately, if you ever need to make changes to the length of a field, modifying it is a process that requires a series of important steps.
As always, a tool is only useful if you can customize it to do what you need when you need it!