
How to Manage Column Fields in All Outlook Folders

Outlook is a powerful application that manages your email account(s), calendars, contacts and tasks all in a single application. However, like any app, it is most effective when you take the time to properly customize it. Customizing an application can include enabling certain features, creating shortcuts, organizing the app for your unique style and much more.
This post discusses how to manage the column fields in all Outlook folders, which can be different, as well as the order of their appearance and their styling.
How to Manage Column Fields in All Outlook Folders
Some easy ways to get the most out of Outlook is to:
- Set the default columns for all folders
- Modify the columns in a specific folder
- Set the default sort column
- Set the column font type, style and sizing
Set the default columns for all folders
The next section discusses how to modify columns for specific folders only. If you find yourself consistently adding the same column, add it to the default column setup instead, which is far more efficient.
Keep in mind, when changed, the default column setup is applied to all folders. This is very efficient, unless you have a bunch of uniquely set folders. Once the default column set has been created, modify columns in individual folders when a different view is needed for only a few folders.
To set the default columns for all folders:
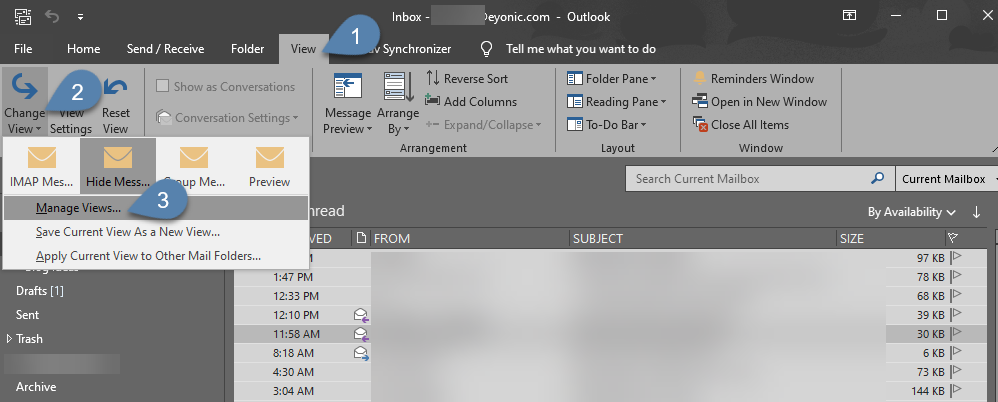
- In Outlook, click on the "View" tab and click on "Change View" in the far left.
- Select "Manage views" in the drop-down menu.
- In the Manage All Views window, be sure "Current view settings" is highlighted and click the "Modify..." button.
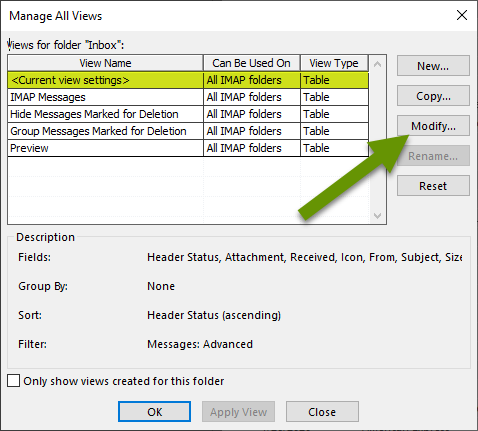
- This will pull up the default settings for the view you are using.
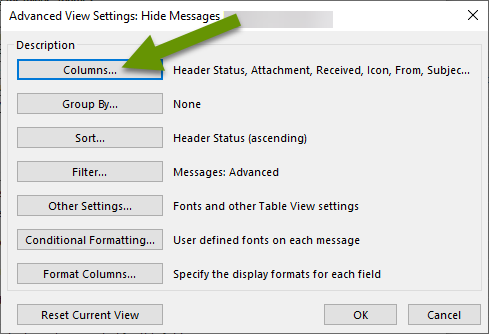
- Click "Columns..." to change the default columns to display, and to set their order.
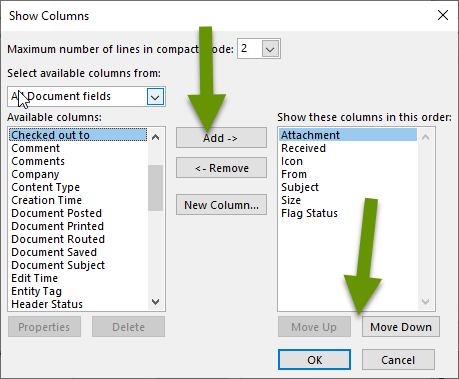
- Click on columns in the left pane and click the "Add ->" button in the middle to add them to the default view.
- Click on columns in the right pane and click the "<- Remove" button to remove a column from the default view".
- To reorder the columns, click on any column and use the Move Up or Move Down buttons to get the columns in the order you desire. Keep in mind, the columns will be displayed from left to right in Outlook per the order of columns listed from top to bottom respectively.
- Once all the desired changes have been made, click the "OK" button at the bottom. This will save the newly defined default set of columns for every folder.
NOTE: Because this applies to all folders when saved, it is best done before a bunch of unique changes are made to specific folders.
Modify the columns in a specific folder
Modifying columns for a specific folder is very similar to setting the default columns. The main difference is how you access the columns list for modification.
To modify the columns for a specific folder in Outlook:
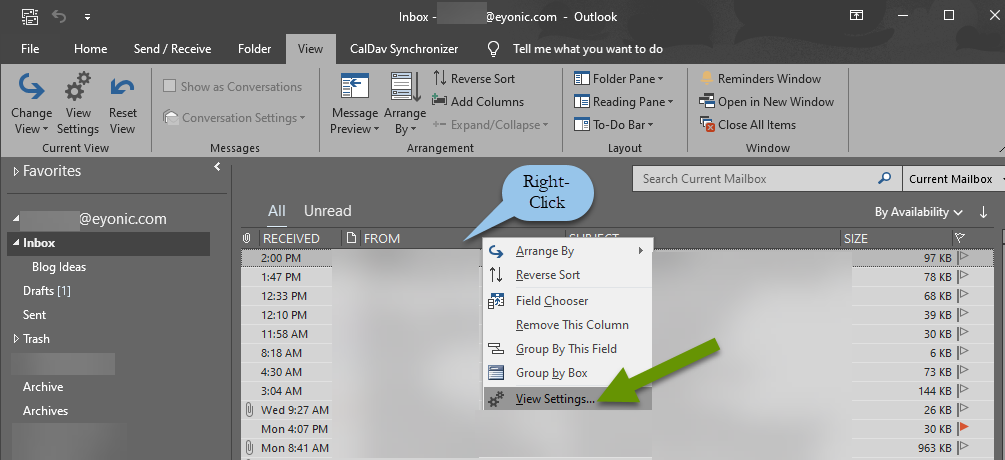
- Click on the folder you want to change.
- Right-click in the title bar for the columns and select "View Settings" from the menu.
From here, changing and re-ordering the columns is the same as the process above.
- Click "Columns..." to change the displayed columns and set the column order for this specific folder.
- Click on columns in the left pane and click the "Add ->" button in the middle to add them to the default view.
- Click on columns in the right pane and click the "<- Remove" button to remove a column from the default view.
- To reorder the columns, click on any one column and use the Move Up or Move Down buttons until the columns are listed in the order you desire.
- Once all the desired changes have been made, click the "OK" button at the bottom. This will save the newly defined default set of columns for that folder.
Set the default sort column
A default or individual sort column can also be set. Like the above examples, the only real difference between the two is in where you access the setting.
To set a default sort column:
- In Outlook, click on the "View" tab and click on "Change View" in the far left.
- Select "Manage views" in the drop-down menu.
- In the Manage All Views window, be sure "Current view settings" is highlighted and click the "Modify..." button.
To set the sort column for a specific folder:
- Click on the folder you want to change.
- Right-click in the title bar above each column and select "View Settings" from the menu.
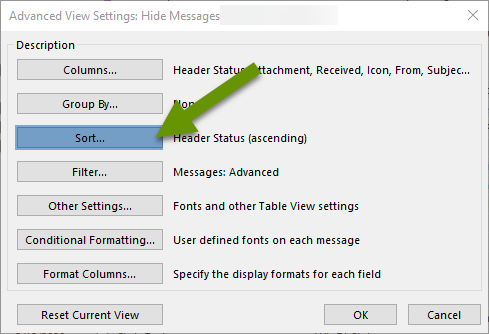
From this point the process is identical for setting a default sort and a specific folder sort.
- Click the "Sort..." button.
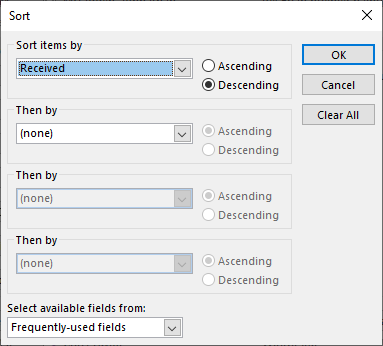
- Choose a column to sort by, and select the ordering.
- Add additional sorting parameters as desired.
- Once all sort items have been set, click the "OK" button.
- Click the "OK" button to close the settings view window and apply the setting.
Set the column font type, style and sizing
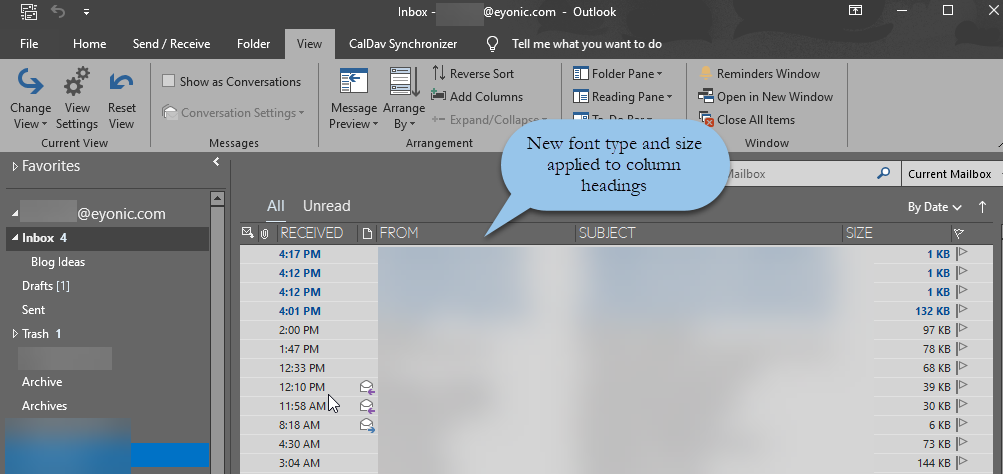
Last but not least, if you struggle to read the column headings, you can change the font type, style and sizing at any time. This is typically best set by modifying the default settings in Outlook, but can also be done at the folder level using the same steps above to access the settings for a single folder, and following the steps below.
To change the default font type, style and size of column headings:
- In Outlook, click on the "View" tab and click on "Change View" in the far left.
- Select "Manage views" in the drop-down menu.
- In the Manage All Views window, be sure "Current view settings" is highlighted and click the "Modify..." button.
- In the Advanced View Settings window, click the "Other Settings..." button.
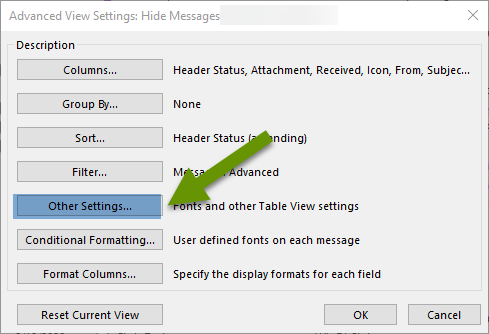
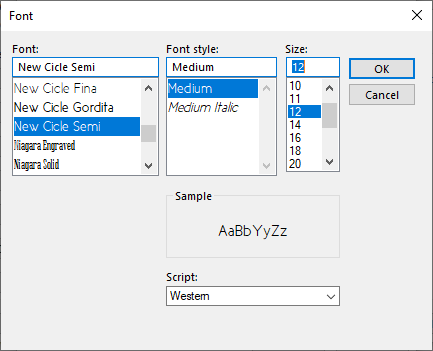
- In the Other Settings window, click on the Column or Row Font buttons to update their type, style and/or size.

- Change the font type, style, and size as desired.
- Click the "OK" button for all open windows to apply the changes.
Outlook can be a helpful application since it manages single and multiple email accounts in the same interface. It also integrates calendars, tasks, and contacts. However, it is most useful when you take the time to customize it to best meet your unique needs. This post discusses how to set column default views, how to modify column views in specific folders, as well as setting the sort column and how to set the column font type, style and size.
As always, the time spent customizing an application to meet your unique needs is typically recouped in a very short period of time!