
How to Make Sense of Spreadsheets - Filters & Sorting

I'll be honest, I love spreadsheets. I find their functionality useful for tracking and managing several things for my business and personal life. If you have not found ways that spreadsheets can be useful, or are perhaps overwhelmed by the software's possibilities, read on for real world examples of some ways they can be used, many of which are easy to create.
Using spreadsheets saves time, consolidates information and helps manage important information. This post covers the use of filters and data sorting to make spreadsheets easier to navigate and find what you need. These are especially helpful when looking at a spreadsheet someone else created.
Below is a video for adding filters and sorting followed by the step by step process.
How to Make Sense of Spreadsheets - Filters & Sorting
There are several ways spreadsheets can consolidate and organize data, as well as perform complex functions. Here are some simple examples of how spreadsheets could be incorporated into your daily routine (and ones I use often):
- A week at a glance sheet to manage tasks I need done when I am on vacation (including pet meds, etc.)
- A year at a glance maintenance sheet for automobile and home maintenance (things like oil changes, washing solar panels, etc.)
- A year at a glance housecleaning sheet
- A year at a glance inventory of annual billing to clients
- An annual projected income sheet and expense sheet
- A monthly recurring and one-time task sheet
- Attendance sheets for business groups
- A year at a glance payroll tax payment and reporting overview
The more information in a spreadsheet, the more helpful the filtering and sorting tools become. Filtering and sorting data are quite different, but both have their uses and neither changes the actual data. Filtering data hides unnecessary data from view to make it easier to focus on the data you need. Sorting data changes the way the data is displayed, but without hiding the data.
Using filters
Applying a filter is exactly what you would think, it filters the viewable data by removing information you have chosen not to display. For example, if you are looking at a large spreadsheet with data for multiple states, but only care about one state, you can remove all other states easily by filtering the other states out. This is a simple example, but you can see how effective this can be.
You can add the ability to filter information to each column or specific column(s). I typically apply the filter ability to all columns since it is done easily and if I decide I want a filter on a second column, it is already ready. Keep in mind, adding the filter ability does not change the data in any way. All data is displayed until you apply a filter and even then the data still exists, it simply isn't displayed.
To add a filter to a spreadsheet:
- Highlight the column(s) to add the filter to. In my example, I have highlighted the entire row of data titles.
- Click the "Data" tab at the top and select "Filter".
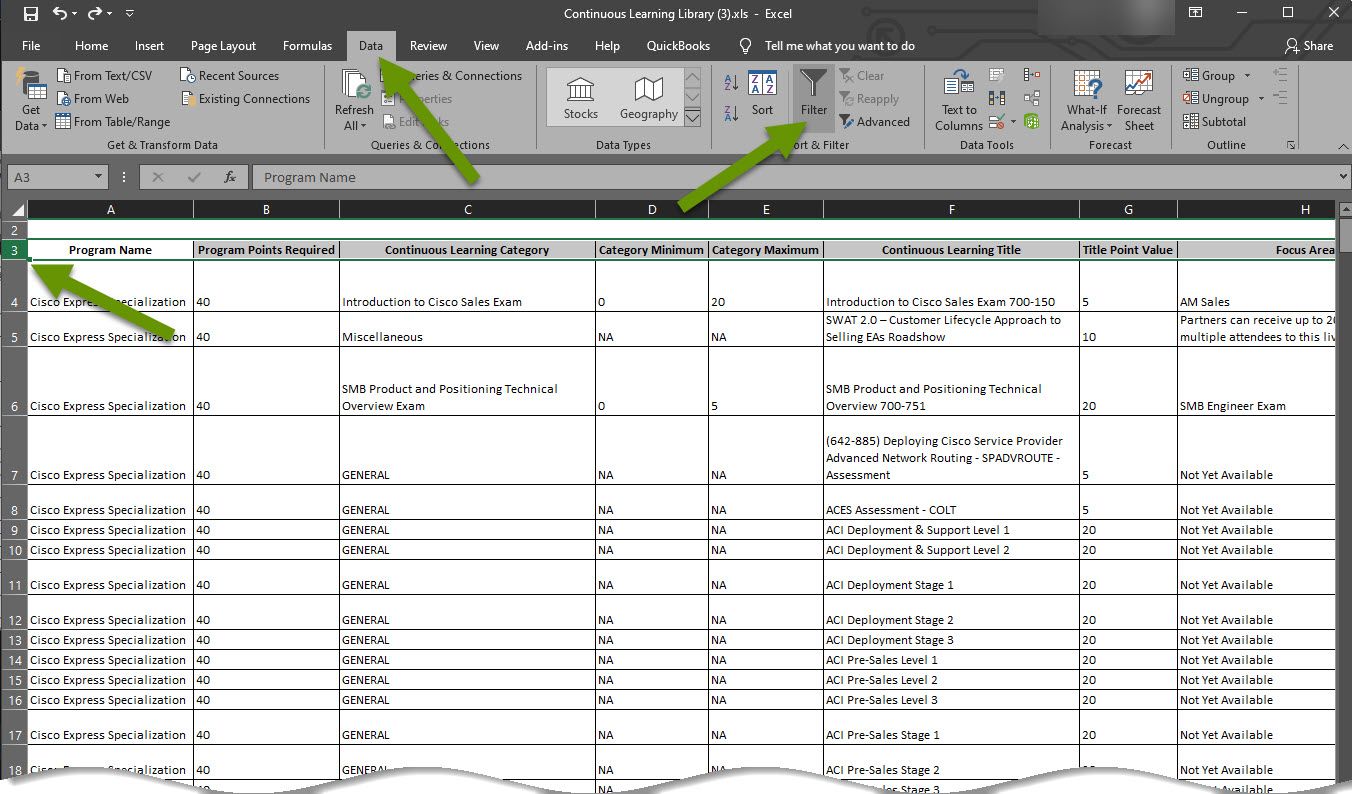
Each selected column will now have a down arrow next to it showing a filter can be applied.
To filter data
- Select a drop-down menu from any column with the filter feature enabled.
- Checked boxes mean the data is included, unchecked boxes mean the data is hidden. Uncheck boxes next to any data items you do not want to see.
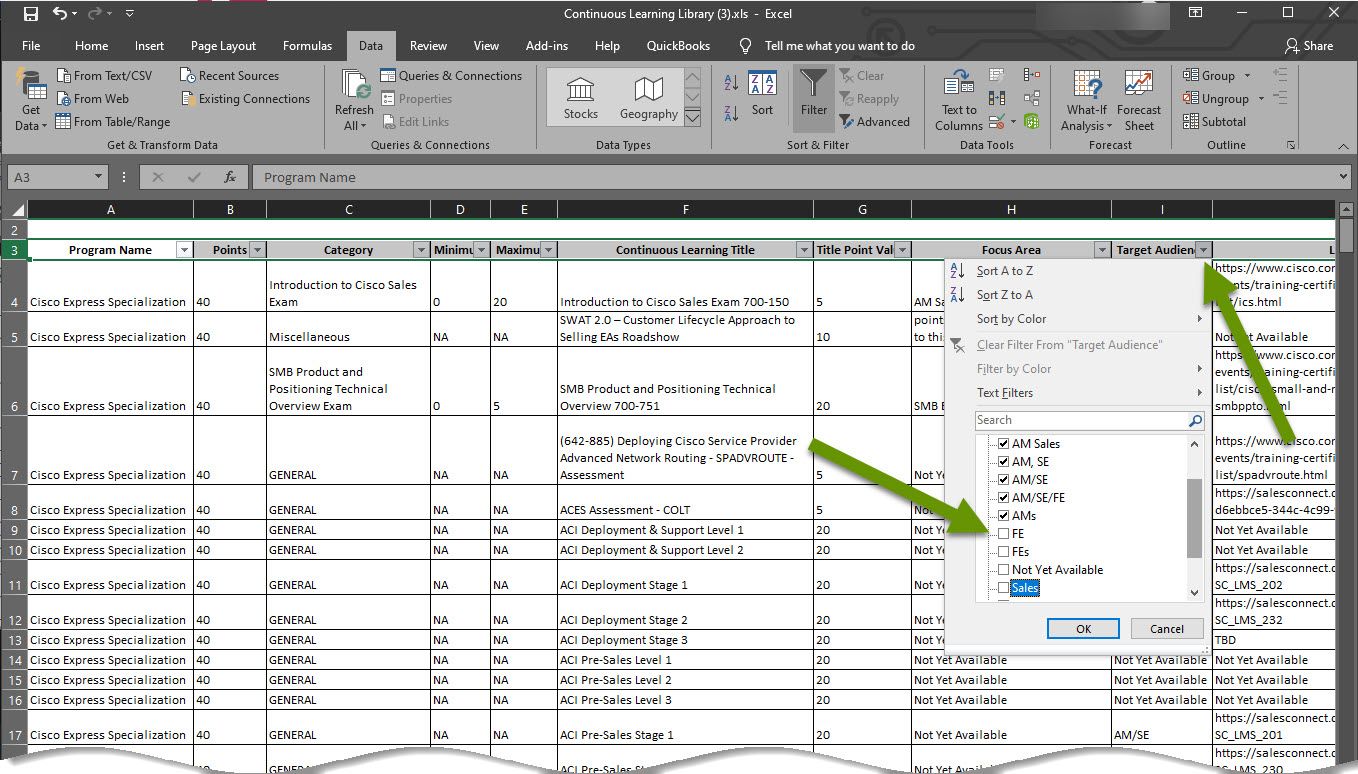
- Filtered views can be changed at any time, so if you want the data to be more granular, filter out more data. If you feel like you are missing important data, remove some filters.
- Continue filtering data until you have the desired view.
To sort data
- Click the "Data" tab and click the "Sort" button.

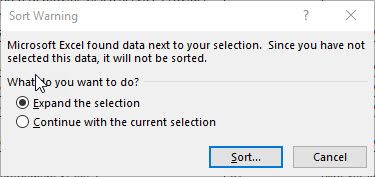
- If you did not select which data to sort, you will be prompted with a Sort Warning with two options: expand the selection or continue with the current selection.
- NOTE: Typically you would select all the data in the sheet so when you sort by one column, the corresponding data in each row stays together. The risk of not selecting all data is ending up with jumbled data.
- Select an option and click the "Sort" button.
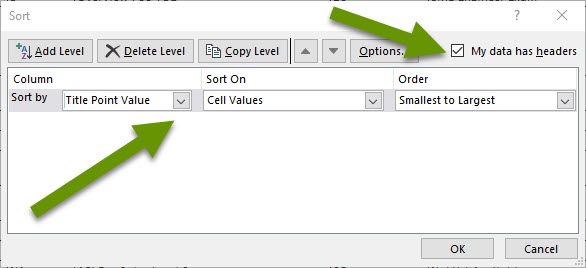
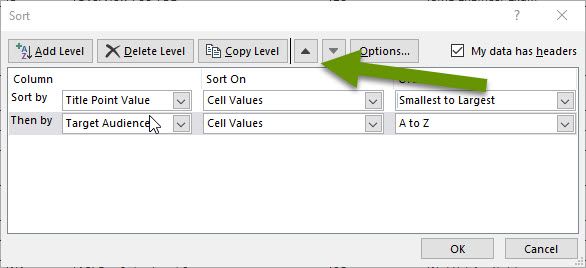
- In the next window, you will chose which values you want to sort by.
- If you have column titles, the "My data has headers" box should already be checked. If not, simply check the box.
- Click the drop down next to "Sort by" to select which column you want to sort by. The titles you have created for each column will be listed here.
- If desired, select from the secondary menus to modify what to "Sort on" and in what order for each sort item.
- If you want to further sort the data, add additonal sort levels.
- Keep in mind sorting is done one level at a time, from top to bottom.
- If you want to change the order of sorting, simply click on a sort item and use the up and down arrows at the top of the window.
Spreadsheets can be helpful in a variety of ways including organizing data, tracking information and performing complex functions. Unfortunately, spreadsheets can also be overwhelming, especially when they were created by someone else. Filtering and sorting data within spreadsheets are two great ways to change the way the data appears so you can find what you need more easily. Additionally, because these only change the way the data is displayed, the original data remains intact.
As always, knowing how to get the most out of software features saves time and makes our lives easier!