
How to Fix Remote Desktop Permissions that Microsoft Broke

Remote desktop is an application that allows users to connect from one computer or device to other devices. The benefit remote desktop provides is it allows you to connect to another computer without physically being at that device. This is extremely helpful for IT staff who can connect to computers they are responsible for maintaining, even if they are not in the same building or state as the device.
Unfortunately, recent Microsoft updates may have caused remote desktop to fail. This post discusses how you can work around the permissions causing the issue.
How to Fix Remote Desktop Permissions that Microsoft Broke
Some history
The greatest benefit of using the remote desktop application is that it provides quick access to devices that would otherwise take far longer to connect to, or be altogether inaccessible. Like any technology though, there can be security risks involved with using remote desktop, and it should both be used with caution and by only experienced users who are aware of the risk.
Many organizations have switched to using VPN connections for remote access to devices. VPNs, which are encrypted and private, are often used to safely connect to a server or other device from outside the network. Once a secure connection has been established, remote desktop can more safely be used to connect to devices within the network.
The ability to connect to other devices using the remote desktop application requires permissions that are controlled and not allowed by default. In this post we will cover the issue as it exists within networks that have a Windows Server which controls the remote desktop users group.
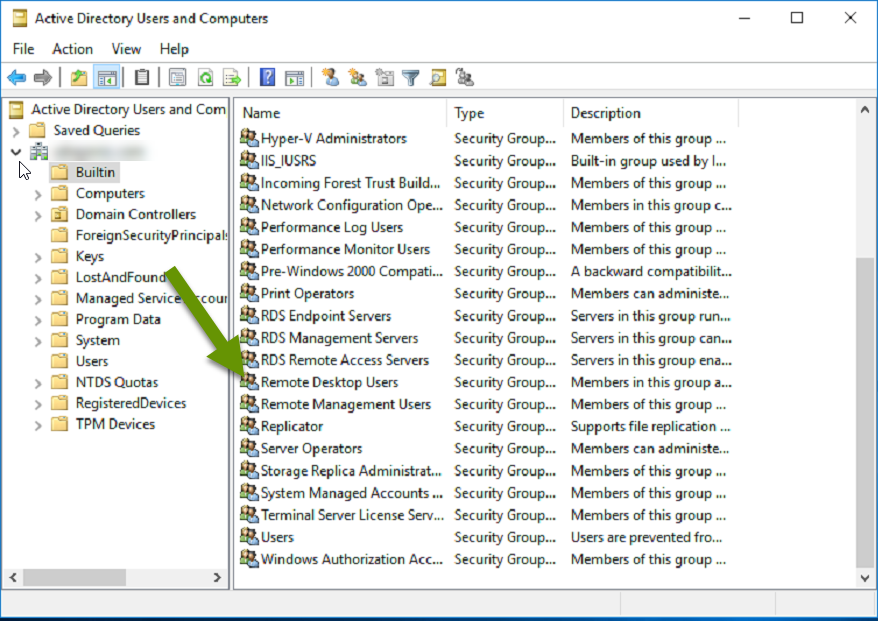
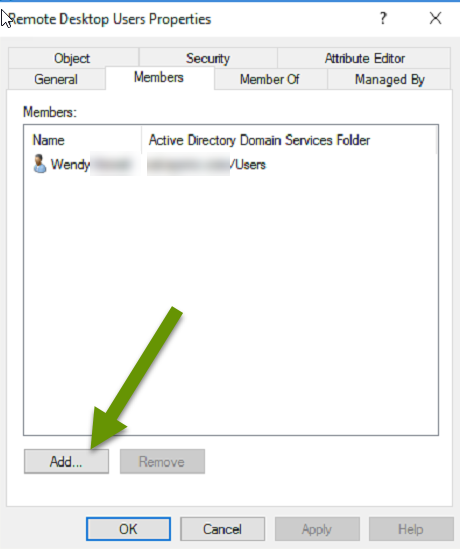
For decades, allowing a user the ability to use the remote desktop application has been a simple task. Simply open Active Directory, expand the "Builtin" folder, open the Remote Desktop Users group and add a user to grant them permissions. While easy, it is important because devices on a network will only allow remote desktop connections from those users with permissions allowing it.
Current status
Unfortunately, recent changes have caused a break between the synchronized permissions granted by the Remote Desktop Users group managed on a server, and what is stored locally on devices across the network. This change affects users in the Remote Desktop Users group who might not be able to access computers using remote desktop. Instead users may receive the following error:
"The connection was denied because the user account is not authorized for remote login."
The ability to connect to a device using the remote desktop application is being blocked because the membership of the Remote Desktop Users group on the local device is no longer automatically syncing with the membership on the server. This means users may experience mixed results when using the remote desktop app.
For instance, a user who has been part of the Remote Desktop Users group for a long time will probably be able to connect to an existing computer without issue. The same user trying to connect to a new computer will likely get the error message since the local group has not synced with the server. Any new user added to the group will probably not be able to connect to any computer whether new or old.
While there does not seem to be an immediate fix for getting the Remote Desktop Users group to sync its membership with all devices on the network, there is a way to work around the issue. Luckily the fix includes syncing user permission settings with all devices so membership is still centrally managed.
Working around the issue
To work around the issue, start by creating a new group policy object (GPO) in Group Policy Management. Next you will create a new group in Local Users and Groups, and then add users to this group. After that, simply wait for the policy to sync to all local network devices.
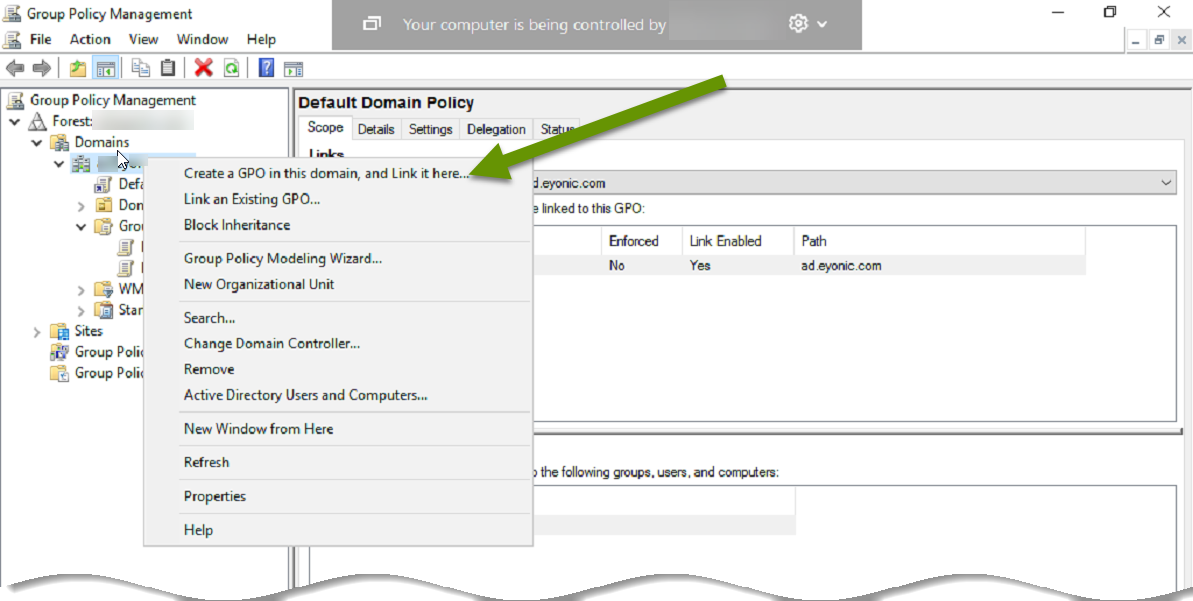
- On the Windows server, search for group policy and select "Group Policy Management" to open the applet.
- Expand "Domains" and right-click on the domain and select "New", then select "Create a GPO in this domian, and Link it here..." from the pop-out menu.
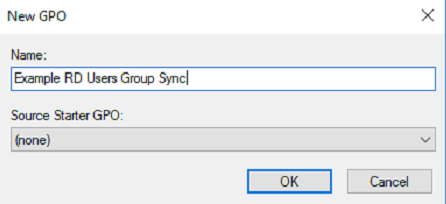
- Name the GPO something related to remote desktop users and verify the group scope is set to "Global" and the group type is set to "Security" then click "OK".
- Right-click on the name of the new policy and select "Edit".
- Under Computer Configuration, expand "Preferences".
- Expand "Control Panel Settings".
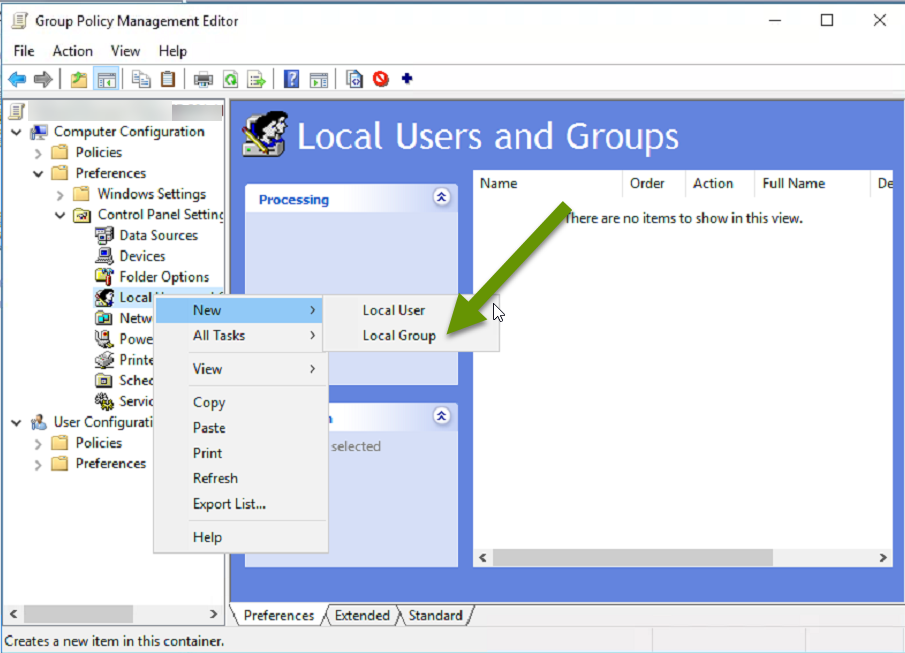
- Right-click on "Local Users and Groups" and select "New", then "Local Group".
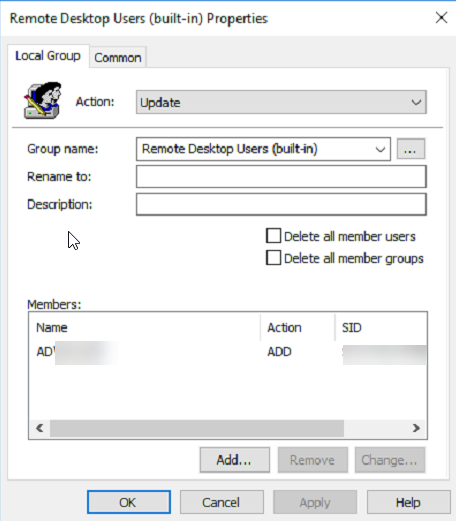
- In the new group properties window, click the drop down menu next to "Group name:" and select "Remote Desktop Users (built-in)".
- Use the "Add..." button at the bottom to add users to the group.
- The new group now shows in the Local Users and Groups list.

Now that the new policy has been created and a group has been added to the Local Users and Groups, you simply need to wait for the policy to automatically sync to all network devices. This is supposed to take 15 minutes, but can sometimes take longer. If you cannot wait, log onto a local machine, open the command window and type "Gpupdate / Force" which will reapply all policy settings that have changed to that singular device.
Using the remote desktop application saves time and can make it possible to connect to devices located on your network that you might not otherwise be able to connect with. While it does introduce some security risks, and should be used with caution, if you are careful in how you use it, it can be a beneficial tool. For those who have been affected by a recent change that broke the syncing of this permission which is managed in Active Directory, following the steps above will allow you to work around the issue.
As always, knowing more than one way to accomplish the same task can be the thing that saves you!