How to Customize What is Autocorrected in Microsoft Office
Most software applications introduce changes with each newly released version and often in revisions. Microsoft Office applications are no different! The most controversial are those changes that move or group an existing feature to an unfamiliar place. This is often extremely frustrating for proficient users and can be equated to having your local grocery store reorganize everything overnight so you now have to find everything all over again.
This post discusses several specific examples of autocorrect settings in Microsoft Word, though it applies to all Office applications, to show how you can customize what is autocorrected to best suit your needs.
How to Customize What is Autocorrected in Microsoft Office
A quick example of autocorrect automatically modifying an item would be changing a fraction from 1/2 as you typed it, to ½. This is a much more streamlined version of the same thing, yet makes the numbers easier to read. Unfortunately, not all autocorrect formatting is helpful. Have you ever tried to add a line for someone to enter information in a form only to have Word turn it into a border line?
These are just a few examples of formatting that autocorrect might automatically change. Obviously autocorrecting is meant to make our lives easier and mostly it does, but like the second example above, sometimes it is more frustrating than helpful. Luckily, if autocorrect makes a change you do not want, you can undo the action by clicking the box with the lightning bolt that appears next to the change.
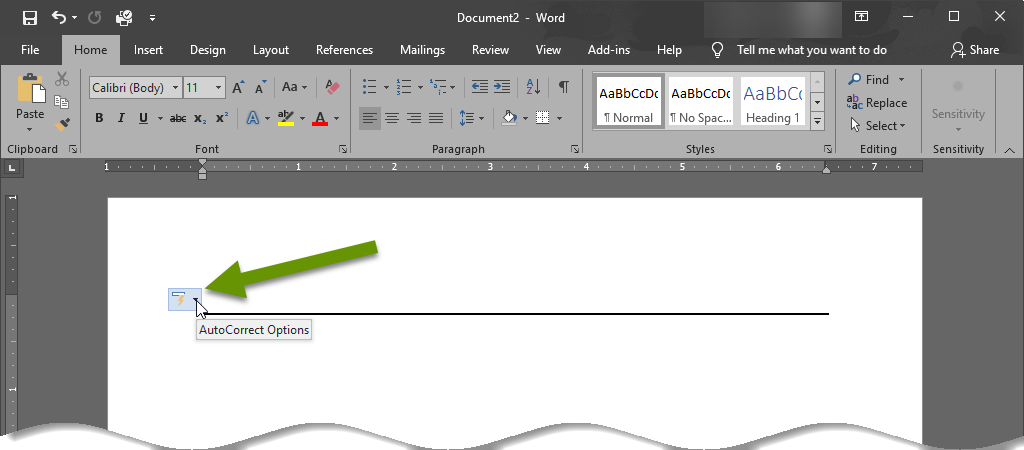
This will bring up a menu of options to choose from, including reversing the recent autocorrect.
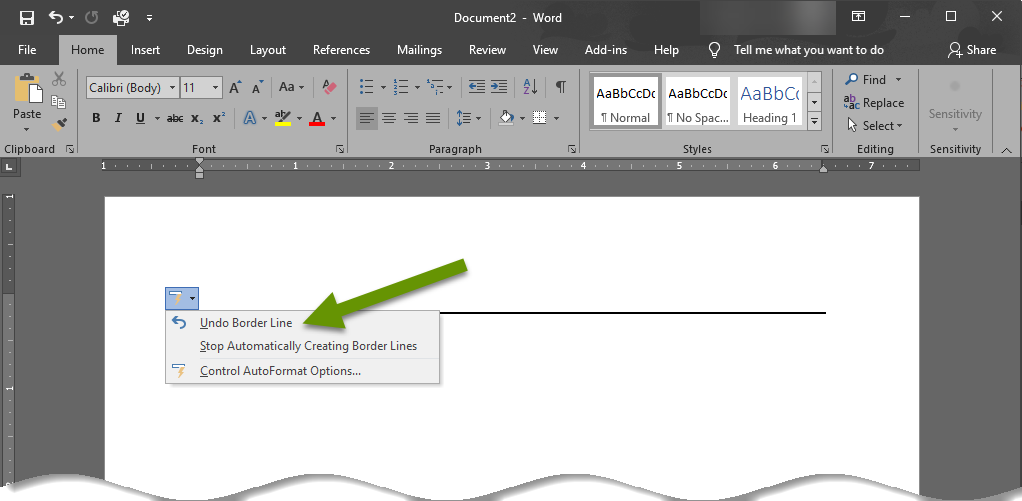
Allowing autocorrect to automatically make changes as you type is fine if what you are working on is rarely autocorrected to something you have to reverse. However, if you often find yourself undoing autocorrect formatting, you would be better served by taking the time to customize what is autocorrected.
Customizing what is autocorrected in Office applications
To customize what is autocorrected in an Office application, open the specific application. In the example below I am using the Word application.
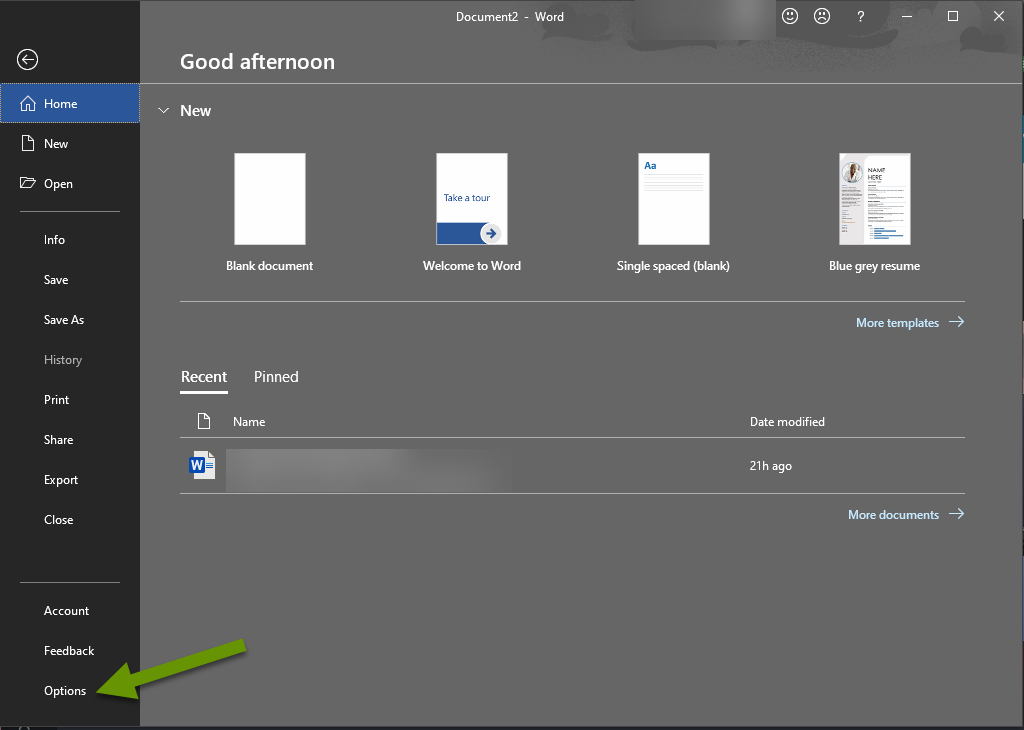
- From within the application, click on "File" and select "Options" at the very bottom of the slide-out menu.
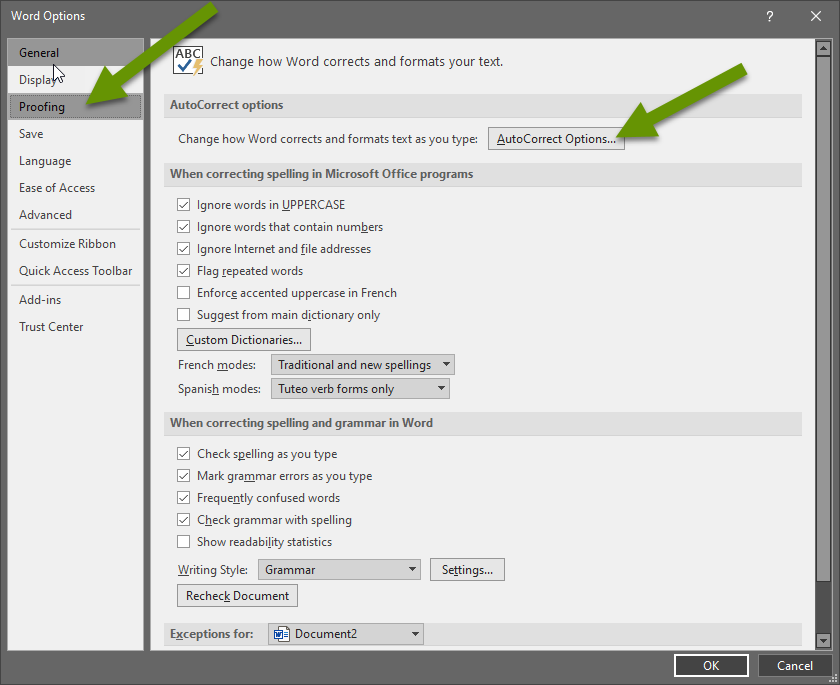
- In the Options box, click "Proofing" in the left panel and click the "AutoCorrect Options..." button at the top of the right panel.
The autocorrect box has five tabs of grouped items that can be customized to control how autocorrect is applied. These include:
- AutoFormat - provides several items that will be autocorrected when a user applies the autocorrect action to a document.
- Actions - allows additional actions in the right-click menu.
- AutoCorrect - modifies specific grammar issues like misused capitalization and has a list of several hundred word and character replacements for common misspellings. Also allows you to add your own custom replacements.
- Math AutoCorrect - provides a list of shortcut codes that will be replaced with symbols when typed. This allows items like copyright, enter, square root and hundreds of other symbols to be used in a document without searching through the symbols menu using the Insert tab. Also allows you to add your own custom replacements.
- AutoFormat as You Type - provides several items that will be autocorrected automatically as they are typed in a document. This list is similar to the AutoFormat list, but is applied automatically.
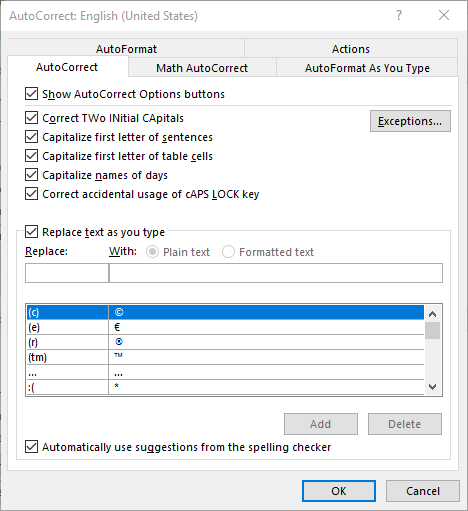
To change what is autocorrected while you are working on a document, click the "AutoFormat as You Type" tab.
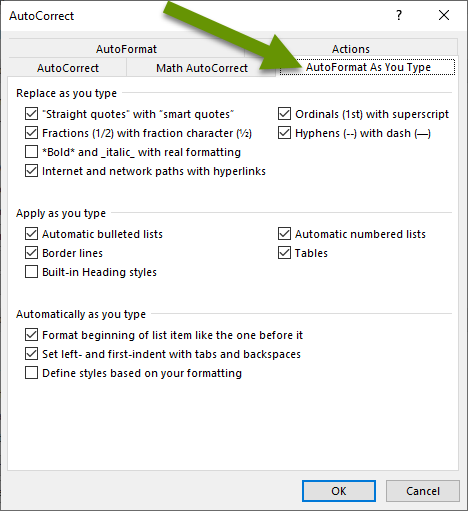
From the image above, you can see there are many different autocorrect options to toggle off and on. Each item with a check next to it means it is enabled. To disable a particular item, click the box and remove the check.
Some great examples of items that users often want to customize are when:
- You work on forms, like mentioned above and want to create input lines for information gathering. Uncheck the box next to "Border lines" under the "Apply as you type" section in the middle of the tab.
- You need to prevent a double hyphen -- from turning into a dash –. Uncheck the box for this under "Replace as you type".
- You have multiple sets of lists in a document and the autocorrect keeps confusing them. Uncheck the box next to "Format beginning of list item like the one before it" under the "Automatically as you type" section.
These are just a few common examples, but there are many more. Also, don't forget about the other tabs in the AutoCorrect box. There are all kinds of settings in those tabs that can also be modified to control what is autocorrected and how the formatting is applied.
NOTE: Each application in Office has variable controls that are accessible by going to File, selecting Options, clicking on the Proofing section in the left pane and clicking on "AutoCorrect Options" in the right pane.
If you are using an Office application and autocorrect features are automatically applied in a way that does not help you, you can fix the issue in one of two ways. One way is to undo the recent autocorrect using the menu for that item in the current document. A second way is more appropriate if the problem is persistent. In this case you should customize how autocorrect features are applied, namely in the AutoFormat as You Type section of the AutoCorrect settings controls.
As always, customizing features ensures they are being used in the most efficient way for your unique needs!

