
How to Create & Manage a Shared Calendar with O365

Shared calendars are commonly used by businesses and groups because they have many uses. Some of these uses include:
- Keeping others in your office, department or group aware of your schedule.
- Delegating scheduling to free up time.
- Providing a way for different departments to collaborate and better manage events, social media blasts, and marketing.
- Helping groups coordinate events and more.
Shared calendars save time by consolidating information, as well as communicating schedule and event details with your business, specific departments or individuals more efficiently. Lastly, creating and using shared calendars in Microsoft Office 365 can be done in a few minutes and they are easy to maintain.
How to Create & Manage a Shared Calendar with O365
Anyone in an organization can create a shared group calendar. The creator of the calendar is also the owner, which is the person who manages access, but this can be delegated to someone else in the organization at any time. Shared calendars can be created using Outlook or via the web interface. The process is similar though it varies slightly between the two. The steps below show this process using Outlook.
Creating a shared calendar group
- Open Outlook.
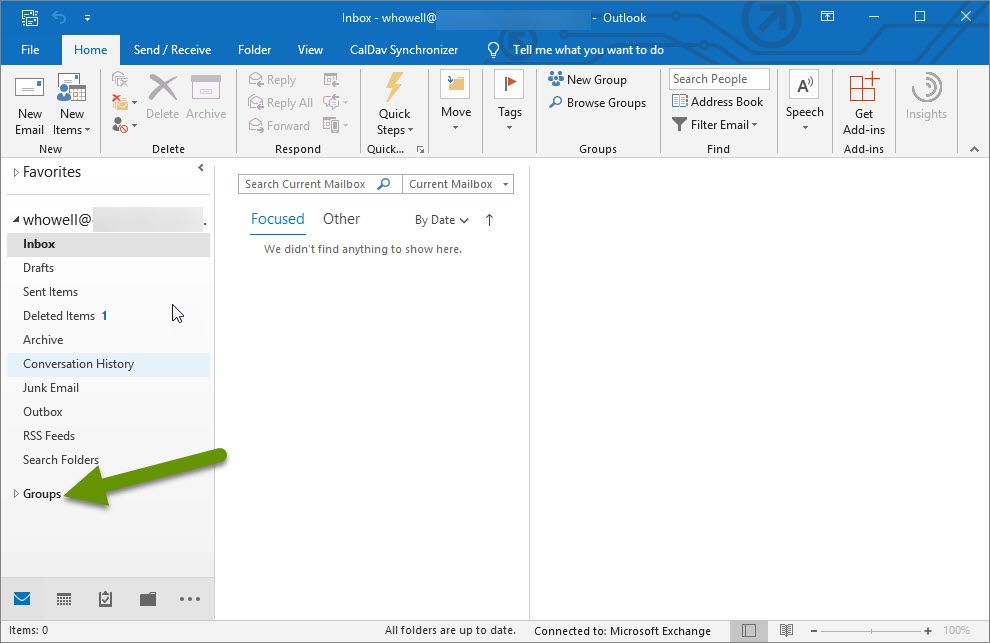
- From the Mail tab, click on the "Groups" section below the "Inbox" section. NOTE: You may need to scroll down to see the Groups section depending upon how many sub-folders are in the Inbox.
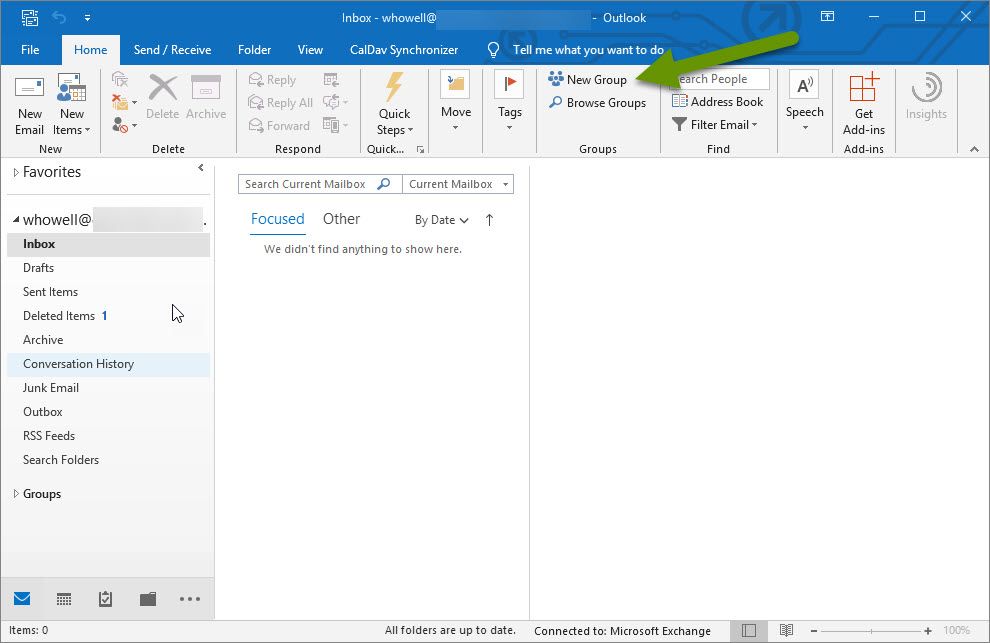
- Click the "New Group" button in the ribbon menu. NOTE: In the web interface, look for a "+ Create" link listed under the Groups heading to create a new group.
- In the Create Group popup box, type a name for the shared group. NOTE: Even though you are creating a calendar, an email account is created. This means the name cannot already be in use so be sure to pick something unique.
- Choose if the calendar will be private or public. Private calendars are accessible to only those members you approve. Public calendars are available to everyone in the organization.
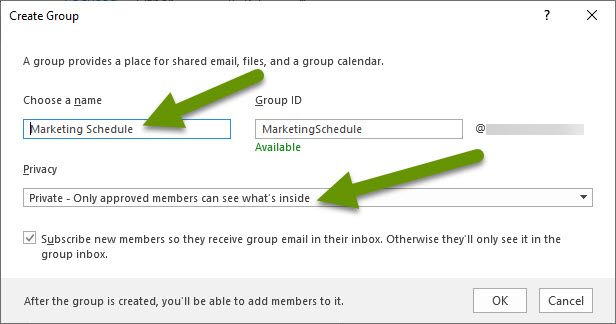
- Click "OK" to create the group.
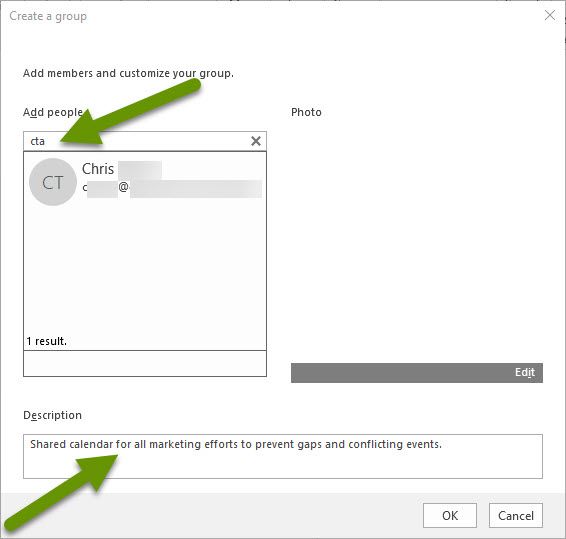
- In the next popup menu you can give the group a description and add members to the group. The group can also be edited at any time to add or remove members.
- To add members, start typing their information in the Search box under "Add people". Click the correct member to add them to the "Members" box below the search field.
- When new members are added, they appear as "Members", while you are listed as the Owner of the group.

- Once all members have been added, click the "OK" button. NOTE: Sometimes this process does not add the members to the group. Adding them later by editing the group proved to be more reliable in our experience.
- Outlook will automatically restart and once it reopens the new group is listed under "Groups".
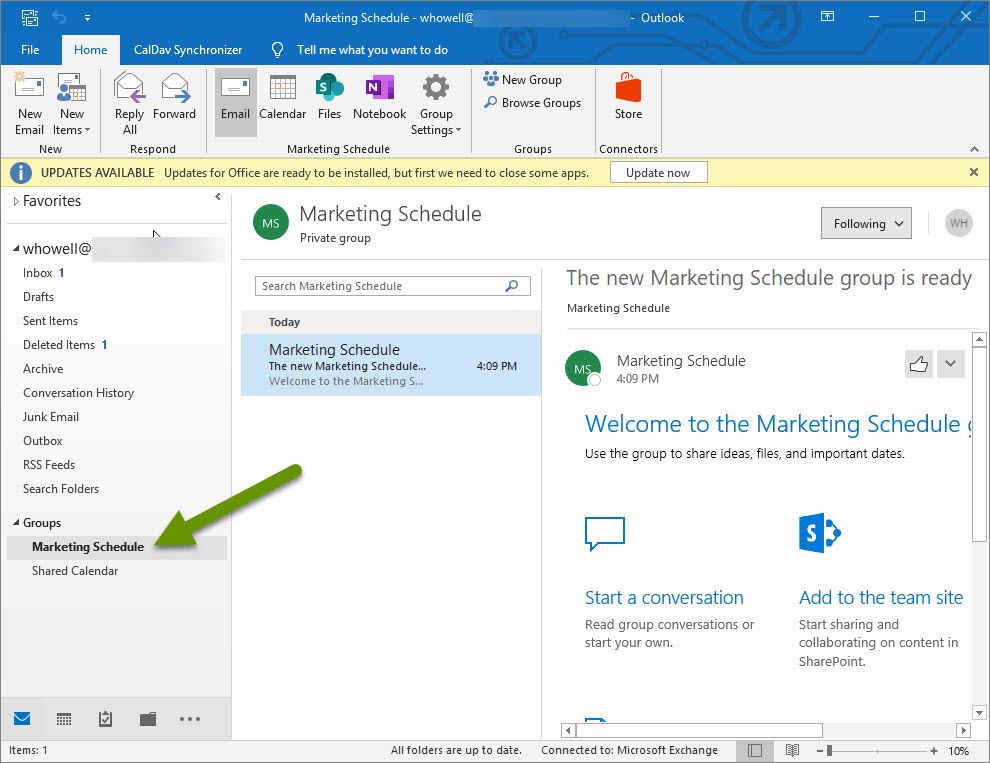
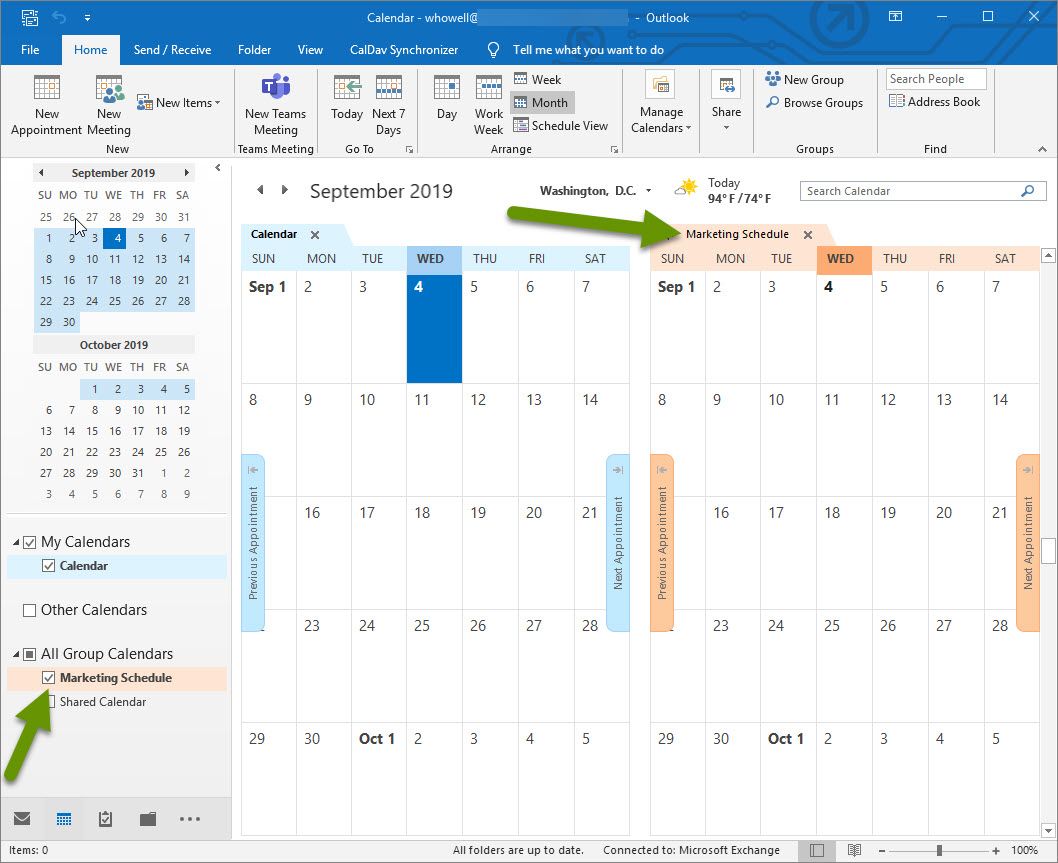
- To access the new group calendar, click on the calendar tab at the bottom of the left panel. NOTE: Initially, shared group calendars are not selected to display.
- Check the box next to the new group calendar to view the calendar.
- Create events in the new group calendar like you would any other calendar.
- Add and remove users
- Change ownership
- Change the description of the group
- Toggle the shared group between public and private
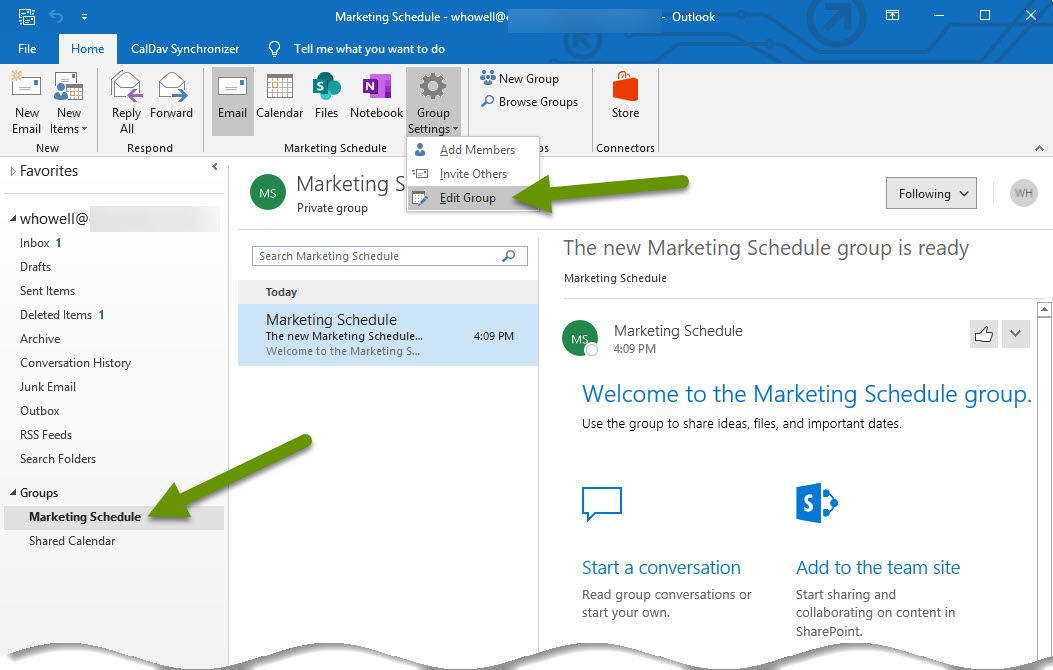
- Click on the name of the group under the Groups section.
- Click on the "Group Settings" drop down menu in the Home tab of the ribbon bar and select "Edit Group".
- In the Edit group box, use the search bar to search for members to add to the group.
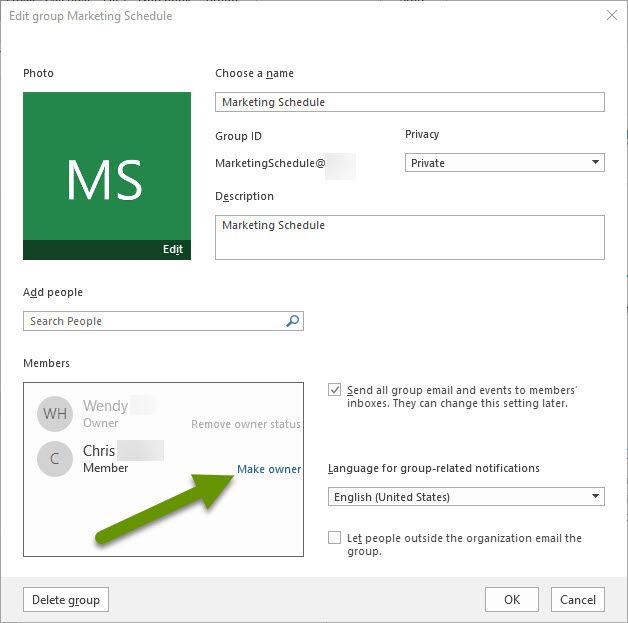
- To make a member the owner of the group, click the "Make owner" link next to their name once they have been added as a member.
- To remove a member, hover over their name in the Members box and click the red X that appears next to their name.
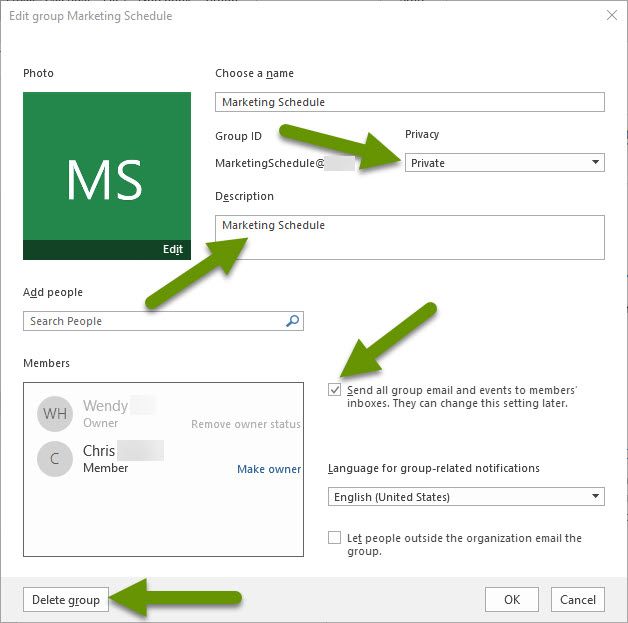
- To switch the group type between public and private, select the desired type from the drop down under the "Privacy" heading.
- To update the description, update the wording listed under the "Description" heading.
- If you do not want members to receive email notifications when they become members of the group, uncheck the box next to "Send all group email and events to members' inboxes". This is helpful when testing a group's settings.
- To delete the group, simply click the "Delete group" button at the bottom left of the box.
- Once all changes have been made, click the "OK" button to save the settings.
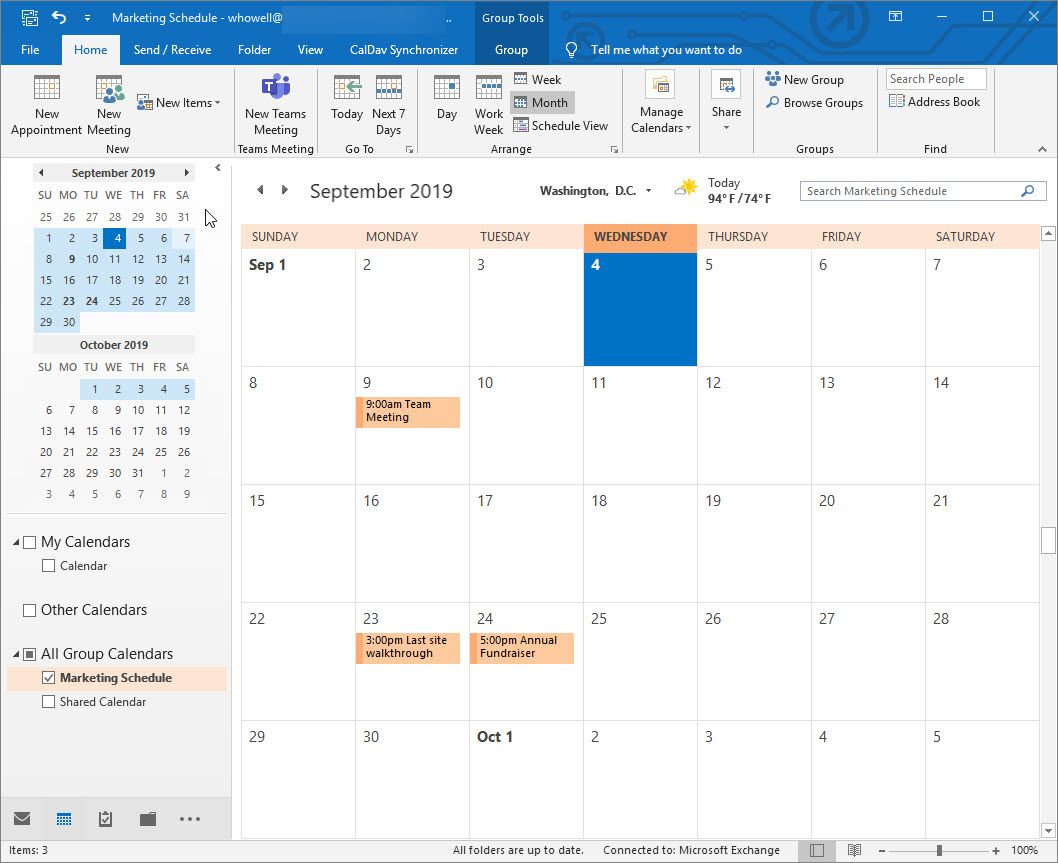
As members are added to the shared calendar, they will receive an email notification. As a member, they can add and view events in the shared group calendar. To view the shared group calendar, members will need to select the group calendar in the Calendar tab.
Managing a shared calendar group
After the shared group calendar has been created, you can edit the group at any time. Edit the group to:
To manage the shared group calendar, open the Mail tab in Outlook.

Shared group calendars are an effective and flexible way to share information. There are many ways a shared calendar can be used. This includes from a micro perspective such as between managers and their support staff. It can also be from a macro perspective such as between groups and departments, or even with everyone in your business. However they are used, they increase communication and effectiveness when used properly.
As always, sharing information in a broad way reduces the time spent on communication, while increasing awareness!