
How to Create and Use Multiple Email Signatures in Outlook

Creating email signatures in Outlook saves time and is a great way to share all the information you want email recipients to see in a singular, convenient location. There are so many details that can be shared: links to a website, blog site, social media, direct phone number, backup contact name and email, company motto and logo, and much more.
However, almost everyone has been part of an email thread that got bulky in part by the repeated email signatures. What often makes more sense is to have separate email signatures for new emails and replies/forwards. There may also be times when a slightly modified email signature is more appropriate. This post discusses several reasons why having multiple email signatures is better than just one, as well as where and how to create them and apply them.
How to Create and Use Multiple Email Signatures in Outlook
People who have created an email signature fall into one of two categories - those who a full email signature included in every email, and those who include an email signature only in new emails. Both ways have their positives and negatives, but there is a better way.
Rather than having an all or nothing approach - create additional email signatures that fit all your needs. Some of these needs can include:
- Having multiple titles within the same organization and wanting to use a signature that makes sense for the group being emailed.
- Differentiating who is emailing when someone emails for themselves as well as on behalf of someone else or is emailing on behalf of a group of individuals.
- Having an secondary, more succinct email signature that is used with replies and forwards so longer email threads do not get bulky yet each email retains the pertinent contact information.
How to create an email signature in Outlook
From within Outlook:
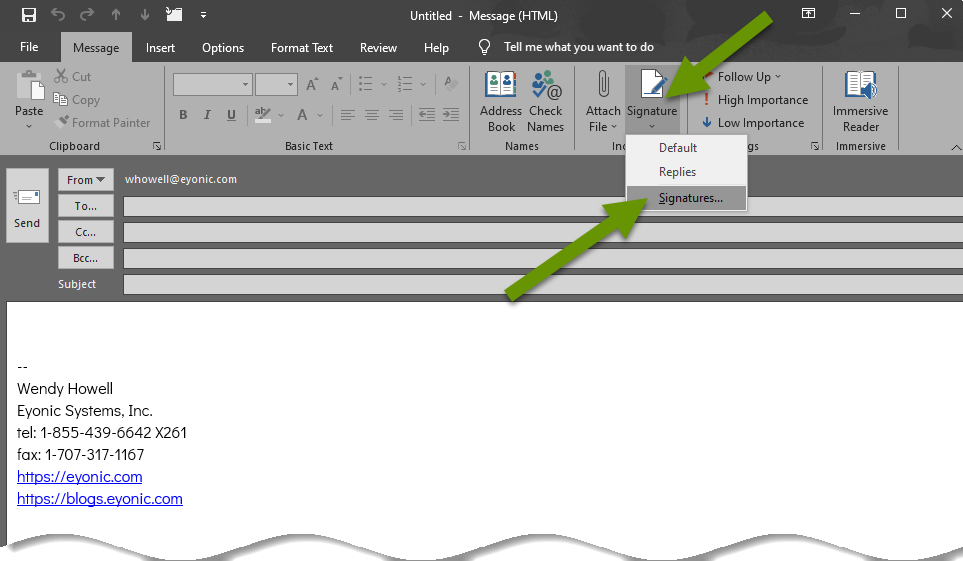
- Open a new email.
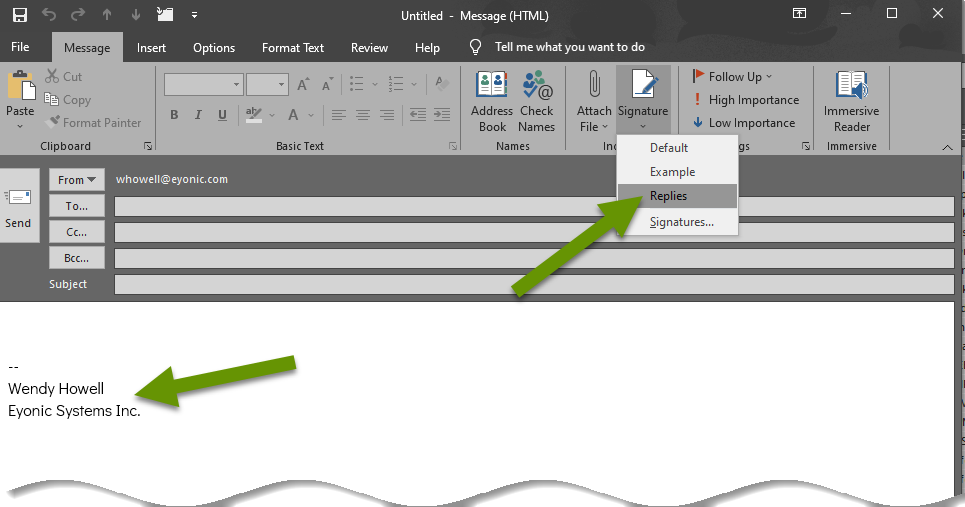
- Click on "Signatures" in the Message tab and select "Signatures" in the drop down menu.
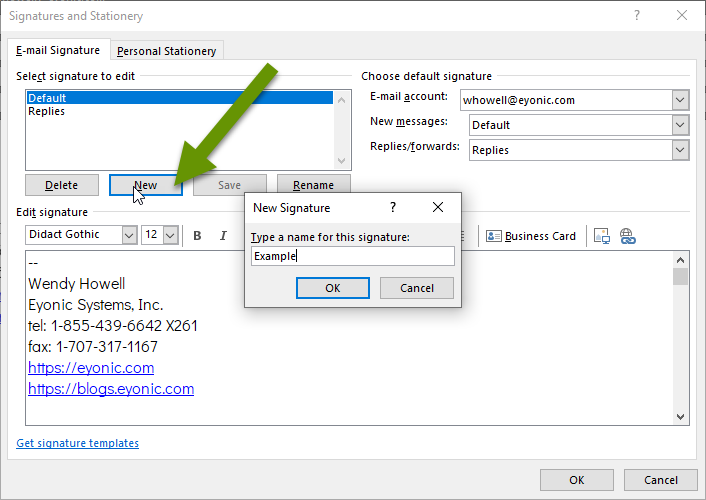
- In the Signatures and Stationary window, click the "New" button to create a new signature.
- When prompted, enter a name for the signature. Be sure to name it something that makes sense to you and is related to its purpose.
- Click Ok.
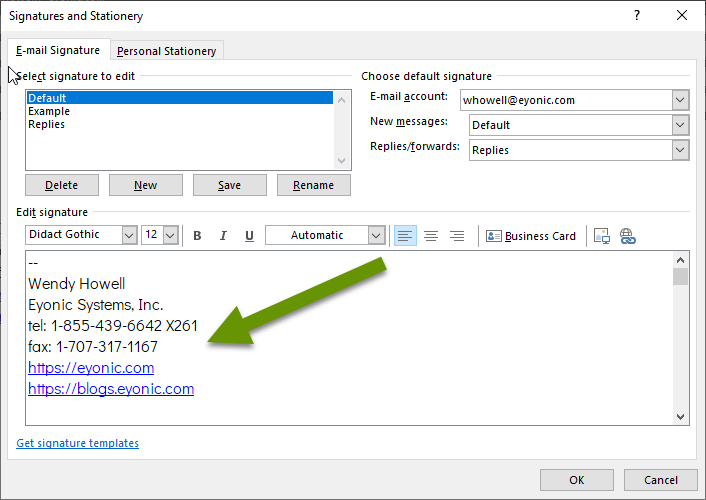
- Enter the information you want included in the signature in the Edit signature box at the bottom of the window.
- Select from available fonts, modify font sizing and styling, orientation and much more to get the desired results.
- When finished, click the "OK" button to close the window.
How to edit an existing signature
- In Outlook, open a new email message.
- Click on the Signature button in the Message tab and select "Signatures" in the drop-down menu.
- Click on the name of the email signature to edit and its contents will appear in the edit signature box below.
- Make any necessary changes and click the "Ok" button at the bottom of the Signatures and Stationary window.

How to create multiple email signatures for different uses
To have a more succinct email signature for replies, or to have access to a secondary email signature for a different project, follow the steps below.
- In Outlook, open a new email message.
- Click on the Signature button in the Messages tab and select "Signatures" in the drop-down menu.
- Create a new signature using the steps outlined above. Be sure to enter the information to match its purpose. For instance, if you want to create a more succinct email signature for replies, add just the basic information needed to this email signature. If the signature is for a different project, add what is needed to make that clear.
- When the new email signature is finished, click "OK" to close the window.
The most efficient way to apply email signatures
For an email signature created for new emails:
- Click on the Signature button in the Messages tab and select "Signatures" in the drop-down menu.
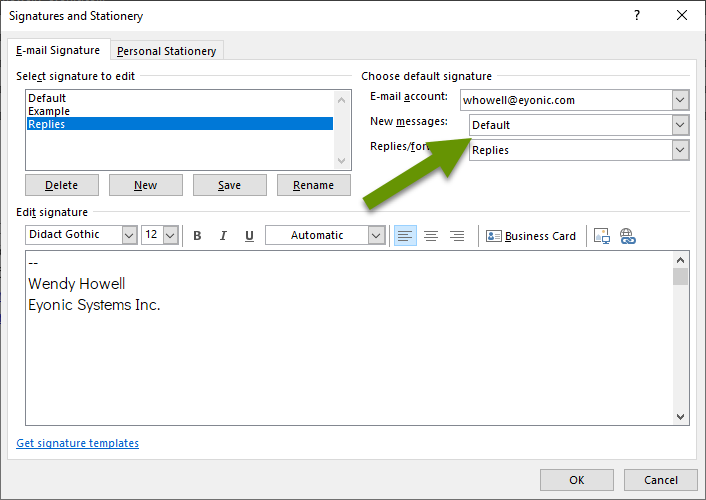
- Set the email signature to be the default signature used in all new emails by selecting the email signature in the drop-down menu next to "New messages:" using the Choose default signature selections in the upper right corner.
For an email signature created for replies/forwards:
- Click on the Signature button in the Messages tab and select "Signatures" in the drop-down menu.
- Set this email signature to be the default signature used in all replies and fowards by selecting the email signature in the drop-down menu next to "Replies/forwards:" using the Choose default signature selections in the upper right corner.
For an email signature created for a specialized project or other use:
- In Outlook, open a new email message.
- Click on the "Signature" button on the Message tab and select the email signature for that particular email.
- The nice thing about adding a signature this way is it toggles between signatures rather than amending the selected signature to the email and duplicating information.
Email signatures are a great way to share several types of information with anyone you email. Utilizing multiple signatures, like a more succinct signature for replies/forwards, keeps email threads from becoming overly bulky. Additionally, specialty signatures can be helpful for group or unique projects. Be sure to apply the correct email signature default for new emails and replies/forwards to get the most effective use of email signatures.
As always, taking a little time to set something up creates long-term benefits!