
How to Control Windows 10 Popup Notifications

Some popup notifications are helpful. They save time, consolidate different types of information into a single location and draw your attention to important items that need feedback. However, they can also be a huge distraction by interrupting what you are currently doing.
Though Windows 10 notifications can feel like popups that come from web browsers, they are very different. The best way to make sure notifications are working to your benefit, rather than being a detriment, is to configure them for your unique needs. This post covers different types of Windows notifications and how to manage them.
How to Control Windows 10 Popup Notifications
Windows 10 notifications appear on your screen as pop-ups that slide out from the right onto your desktop. If ignored, they will slide back off the screen or you can click the x on them to move them off the screen more quickly. To access the notification panel where these popup notifications come from, click the text bubble located in the right corner of the taskbar.
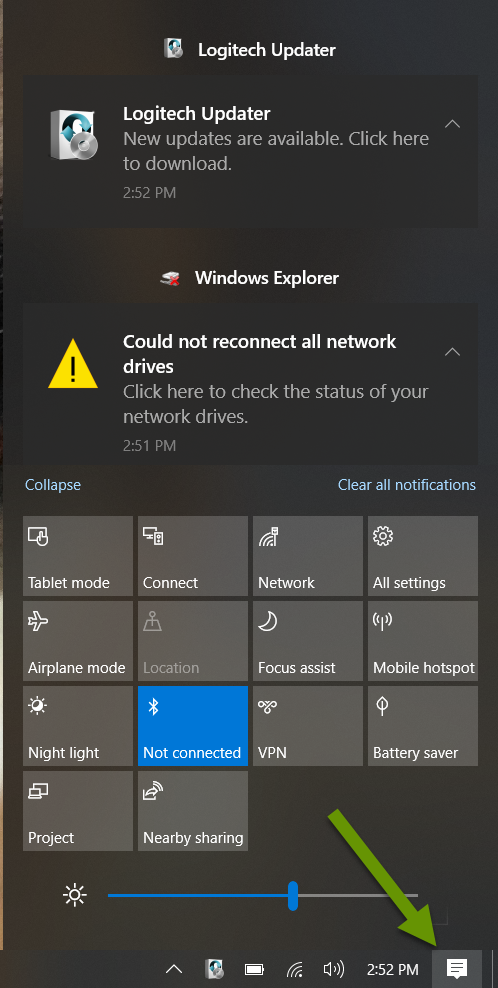
NOTE: The bubble fills in with white when there are notifications and only has a white outline when no notifications are present.
The top half of the notification panel is reserved for notifications and actions. Notifications are sorted into groups based on what generated them, including but not limited to:
- Security and maintenance
- Printing
- Storage settings
- Windows explorer
- USB devices
- Third-party applications and more
There are several ways notifications can be configured as well as multiple ways to modify these settings.
NOTE: The settings available for notification actions and quick actions often vary by device. As such, my images may differ from what you see on your device.
Modifying notifications
Notification types can be disabled directly inside the notification panel. In the notification panel, notifications are displayed at the top while Quick Action buttons are located at the bottom.
- Click on the notification button in the bottom corner to access the notification panel.
- Right-click on a notification from the type you want to remove.
- In the pop-up menu, select the "Turn off notications for 'XXX'" option.

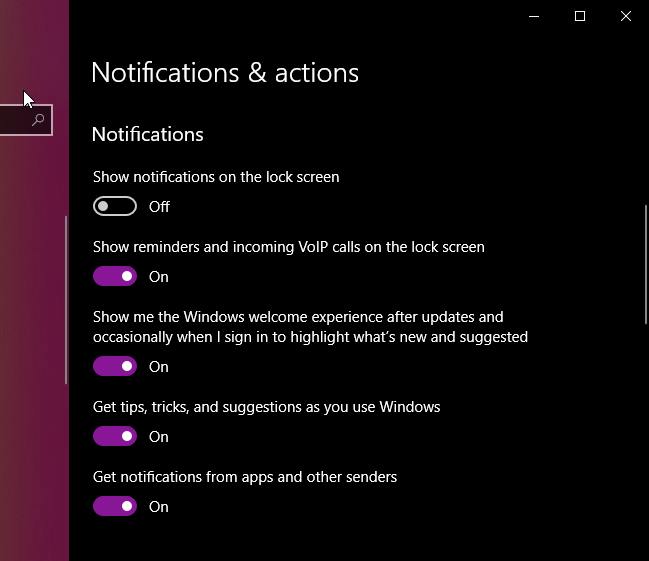
To enable or disable notification types, access them via Settings. The top section of notification settings list displays the Quick Action buttons. The next section shows items than can only be toggled off and on. The bottom section is a list of programs and system services that have more options available including their notification type, alerting, priority and the number of them to display at any one time.
To enable or disable certain notification types:
- Click the Windows start button and click the Settings menu.
- Click the "System" icon to access display, sound, notifications and power settings.
- In the left menu, click "Notifications and actions".
- Scroll to the Notifications section and toggle notification types on or off as desired.
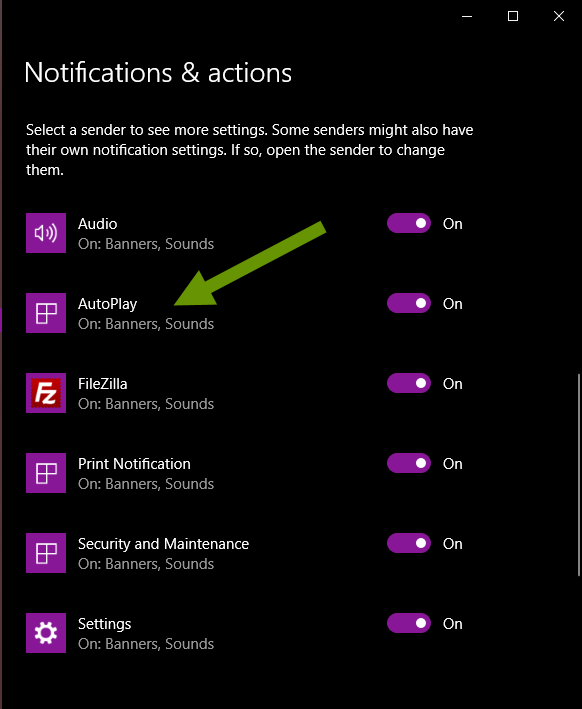
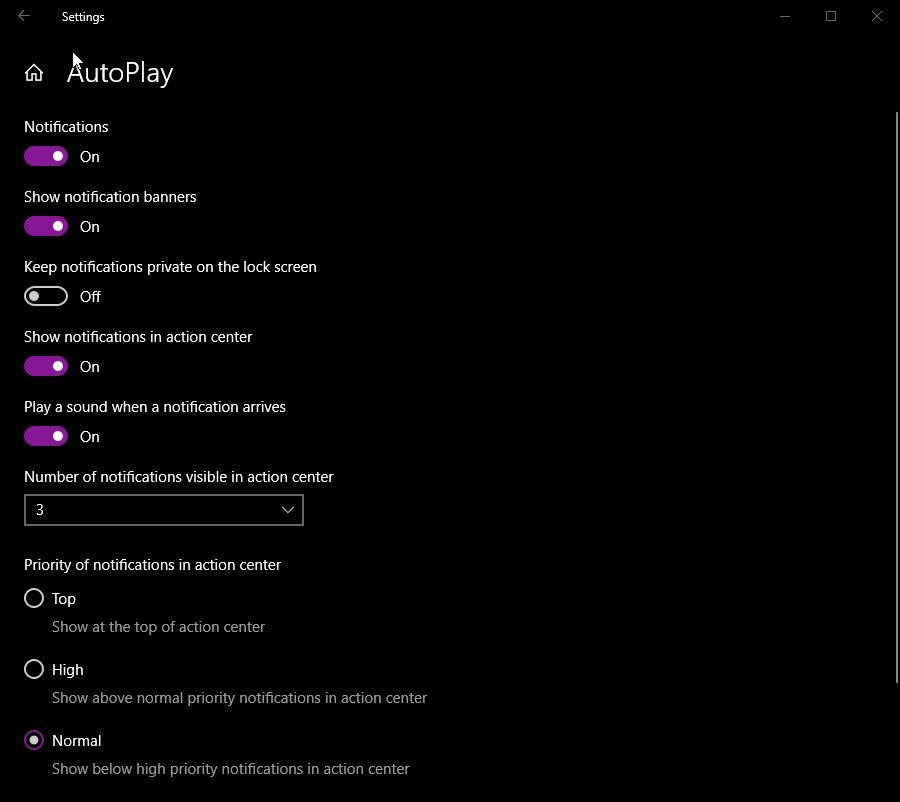
Scroll down to modify program notifications and actions. Toggle notifications on and off based on your needs. To modify specific notification and action settings of anything that is enabled, click on the category or program name.
Go through the additional notification and action settings and change settings as desired to meet your unique needs.
Quick Actions
The lower half of the notification panel is reserved for quick actions. Some shortcuts that can be pinned in the quick actions section include, but are not limited to:
- Tablet mode
- Connect
- Network connectivity
- All settings for the notification panel
- Airplane mode
- Location
- Focus assist
- Mobile hotspot
- Night light
- Bluetooth
- VPN
- Battery saver
- Project to external devices
- Nearby sharing
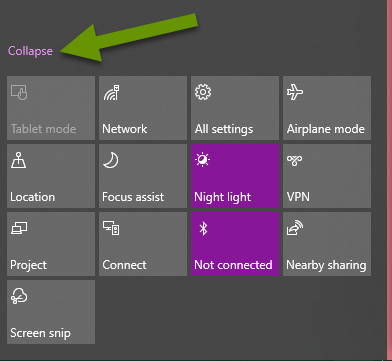
If the Quick Actions buttons take up too much space, consider collapsing the menu rather than removing pinned buttons. Collapsing the menu shrinks the menu to a single row of buttons rather than the standard 3-4 rows. To collapse the quick action menu, click the "Collapse" button above the buttons. To see all the buttons, click the "Expand" button shown above the buttons when they are collapsed.
If there are items you never use, or want to be sure you nor anyone else never accidentally clicks, it is easy to unpin these buttons. A great example is the tablet mode button which greatly changes the layout of the desktop and can be challenging to use.
There are two ways to remove buttons from the Quick Access menu:
- Remove them directly from the notification panel OR
- Remove them in the Settings menu
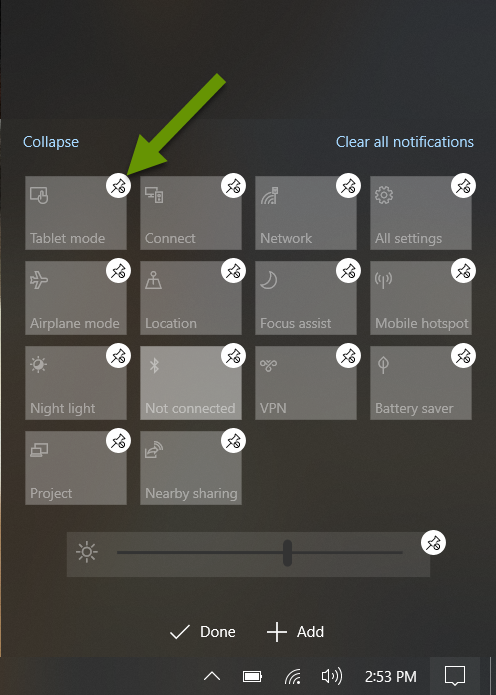
To add or remove quick access items from the notification panel:
- Open the notification panel.
- Right-click in the open space above the quick action buttons and click on the "Edit" button that appears.
- To remove buttons, click the pin in the corner of the existing button.
- To add buttons, click the "+Add" button and click on any of the available buttons you want to add.
- When finished, click the "Done" button at the bottom.
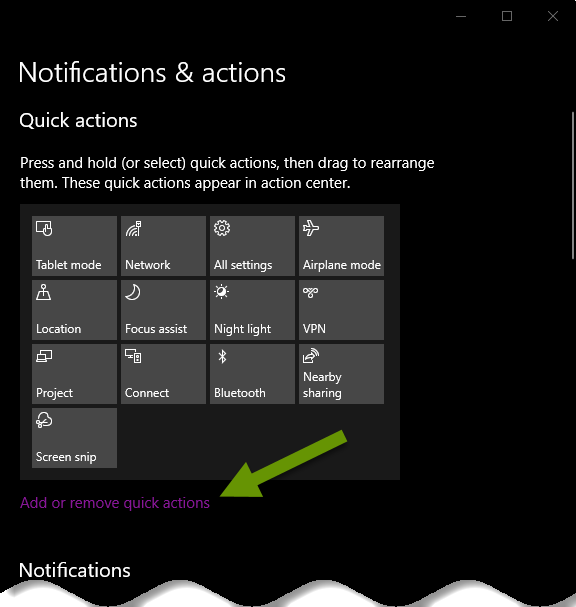
To add or remove quick access items from the Settings menu:
- Navigate to the "Notifications and actions" section in Settings.
- At the top under the Quick Actions section, click the button to "Add or remove quick actions".
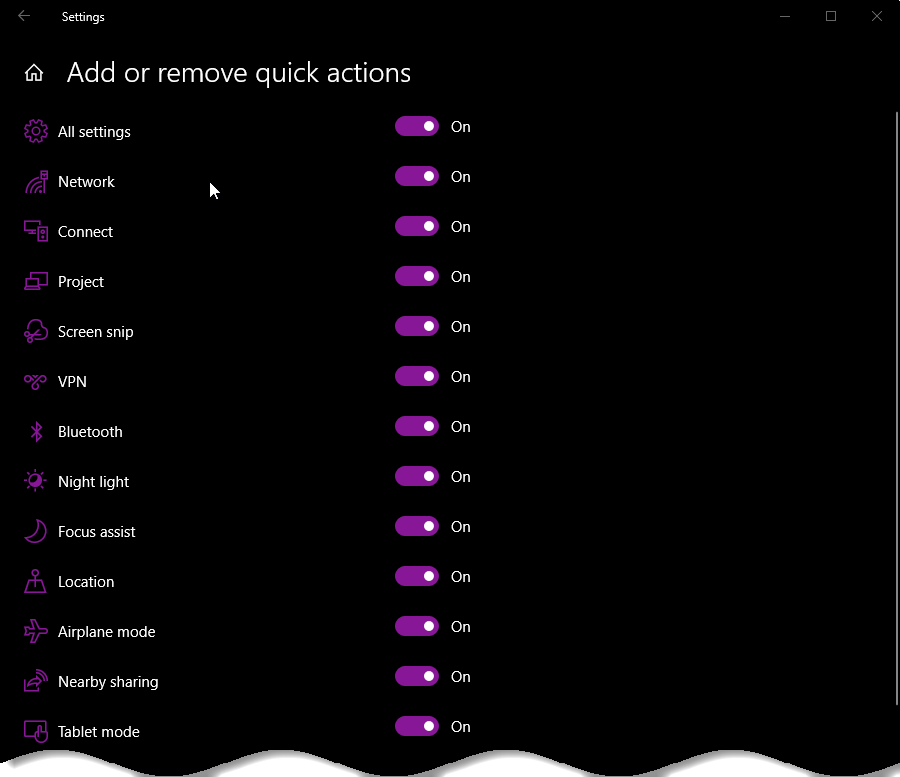
Toggle quick action buttons on and off as desired to choose which quick actions buttons are displayed in the notification panel. Close the Settings menu once all selections have been made.
Configured notifications provide important information in a format that gives you the information you need, in a timely manner. One of the most important facets is for it to provide the information without destroying your focus as this negates the helpfulness it is intended to provide. Configuring settings and program notifications and actions is key in making sure the notifications you receive are actually helpful and increase efficiency.
As always, knowing how to fine tune settings is the key to making them work for you, rather than against you!