How to Continue Receiving Email Once You Reach Microsoft's Size Limit
If you use Microsoft as your email provider, whether you just use a Business Standard plan for email, or a larger plan that has a suite of Microsoft products which include email, you may have run into issues with the size of your mailbox. Microsoft has a hard size limit of 50GB for every email mailbox and there is pretty much no way around this limitation. It is important to note that Microsoft's email mailbox limit will affect both sending and receiving email, so this post deals with both.
This post discusses how you can continue receiving and sending email once you reach Microsoft's size limit for a mailbox.
How to Continue Receiving Email Once You Reach Microsoft's Size Limit
The big problem with running into Microsoft's mailbox limit is that once you do, you cannot send or receive email, which can be detrimental to your business. The 50GB limit went further back before people sent larger files, images and videos, but by today's standards, this is not that large of a mailbox limit. Unfortunately, this is a hard limit, meaning there is no way to extend the limit.
If you run out of space, the first thing you need to do is delete all items in your deleted mailboxes and anywhere else that emails you no longer need are stored. This is simply to get email moving again, not a long term solution.
Once your email is back up and running, the best thing you can do is implement a longer term solution. Since Microsoft has a 50GB hard limit, and there seems to be no budging this limit, the only thing you can really do if you still need or want to keep the majority of your emails, is to add an email archiving subscription to your Microsoft account. Specifically, the product is called "Exchange Online Archiving for Exchange Online".
For standard mailboxes, Exchange Online Archiving provides each user with an additional 50GB of online storage for their mailbox, in effect doubling the size of their mailbox. Currently, the monthly pricing for this license is $3.60 per month per user, with an annual term.
To set up Exchange Online Archiving for user(s):
- First purchase the license the same way you purchase all of your Microsoft licenses.
- Once the license has been purchased, you will want to apply it to the correct user.
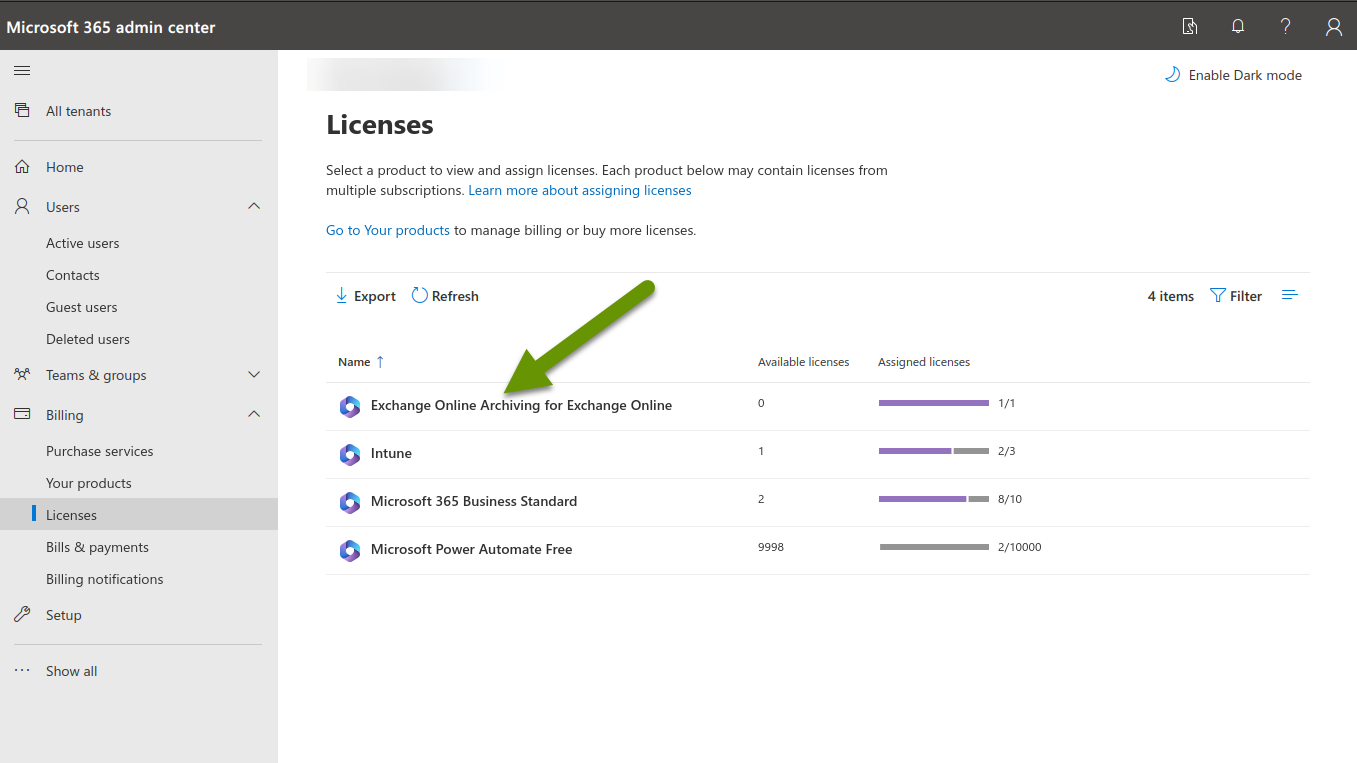
- Log into your Microsoft 365 admin center and click on Licenses in the left panel.
- Verify the Exchange Online Archiving for Exchange Online shows you have an available license. In our example image you can see the license has already been applied to a user.

- Once you have verified a license is available, you want to apply it to the correct user.
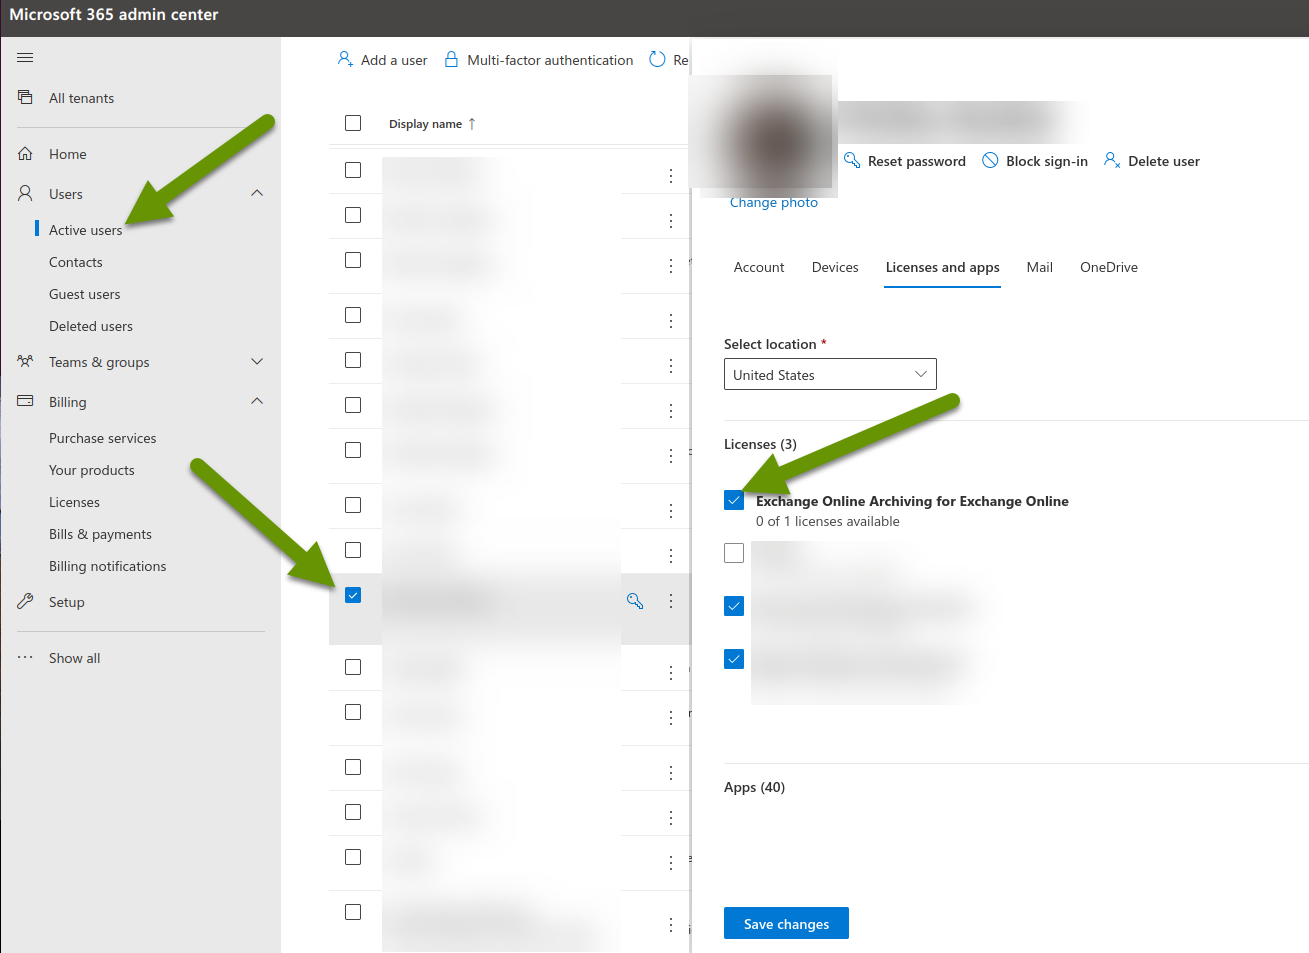
- In the left panel, click to expand Users, then click on "Active Users".
- Click to check the box next to the user you want to apply the license to, then click on the "Licenses and apps" link.
- Check the box next to "Exchange Online Archiving for Exchange Online" to apply it to the user.
- Click the "Save changes" box.

- Once the license has been applied to the user, you need to configure the mailbox archive.
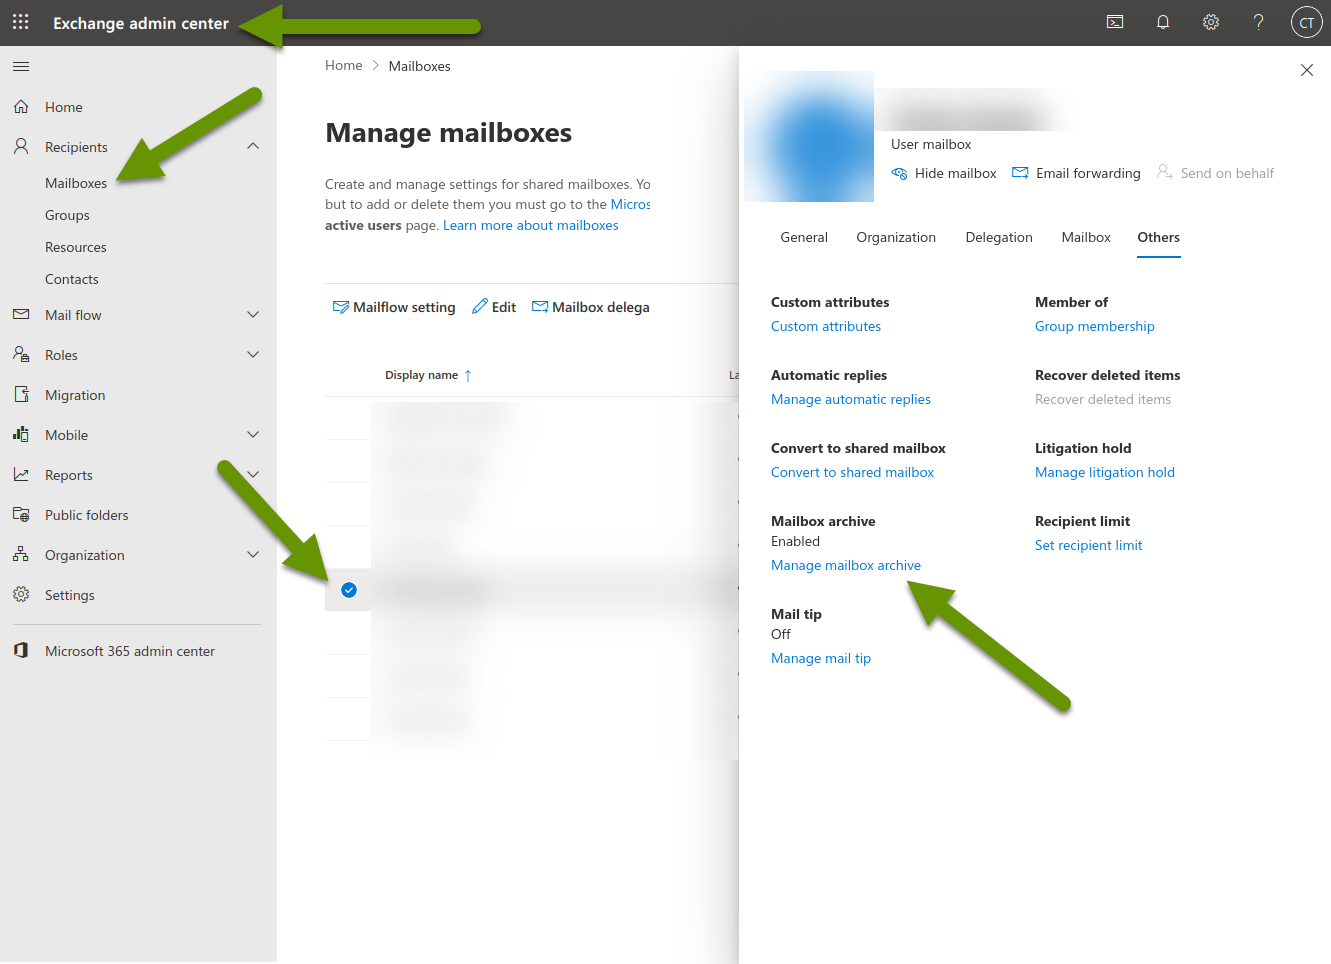
- Open the "Exchange Admin Center", which looks very similar to the Microsoft 365 admin center, but you can tell by checking the titles at the top of the window.
- From within the Exchange admin center, click on Recipients in the left panel to expand and then click on "Mailboxes".
- Click on the user with the email archiving license and then click on "Manage mailbox archive" listed under the heading Mailbox archive.

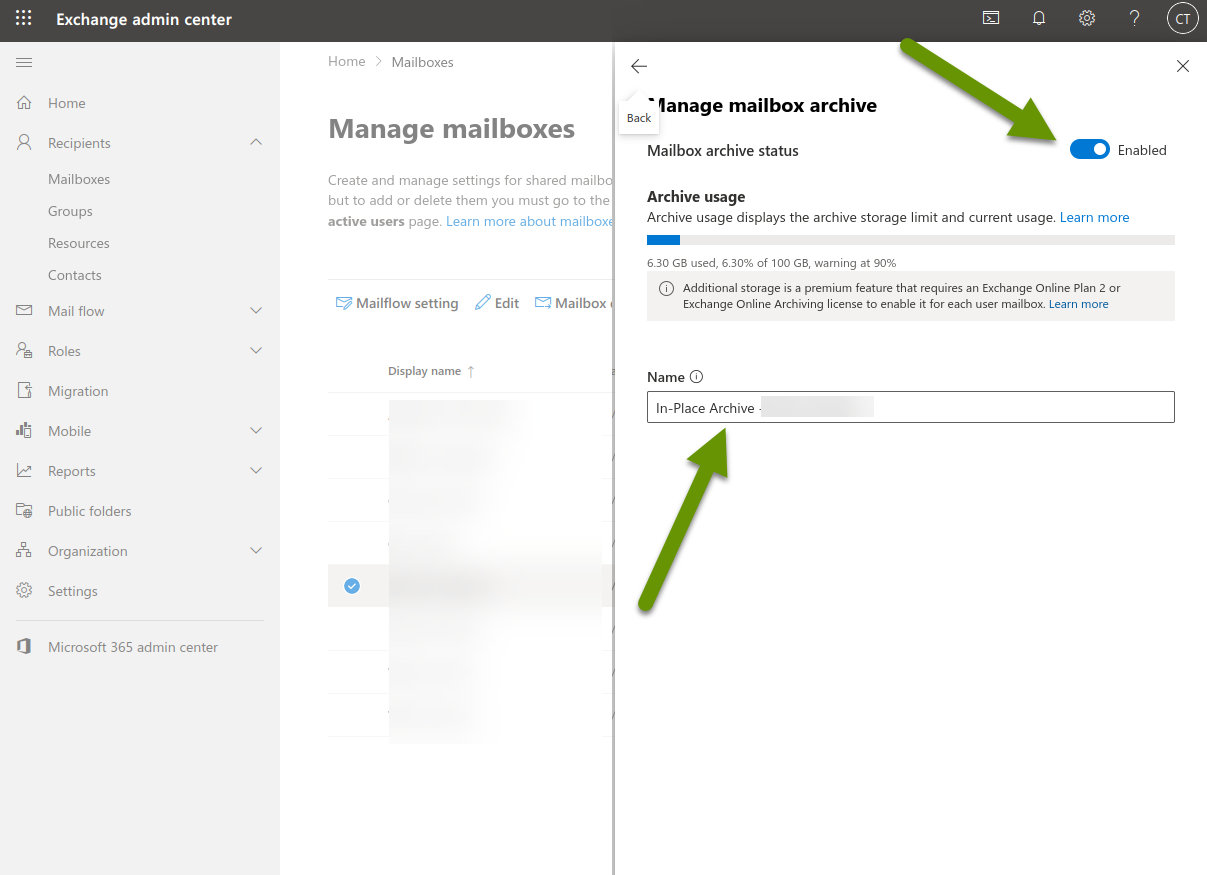
- In the pop-out Manage mailbox archive window, toggle the Mailbox archive status to "Enabled".
- Add a name for the archive as this is a required field.

If you have a Microsoft email mailbox that is reaching its limit, and it is not practical to remove enough email to fall far below the 50GB mailbox limit set by Microsoft, your best option is to add an Exchange Online Archiving for Exchange Online license to the mailbox with the issue. This provides standard email accounts with an additional 50GB of storage. Once purchased, apply the license to the user and then configure the mailbox archive by enabling and naming it. This will allow you to continue to receive and send emails from a mailbox account that has reached Microsoft's mailbox size limitation.
As always, knowing what your options are can make all the difference!

