
How to Configure QuickBooks to Email Invoices Directly

QuickBooks is an accounting software that has been around for decades. Many companies that began using it years ago still use it because starting over with a new software often means losing access to, or making it hard to access, legacy data. In recent years many new competitors have entered the accounting software field. If you are just starting your business, or looking for something different, a quick online search will provide many different options.
If you do use QuickBooks, one thing that makes communicating with clients more efficient is sending invoices and other documents to them directly within the QuickBooks software. This post demonstrates how to configure an email account within QuickBooks desktop.
How to Configure QuickBooks to Email Invoices Directly
Like most things, there is more than one way to accomplish the same task. For instance, when you need to send an invoice, quote, statement, or other document created in QuickBooks, you can accomplish this in one of two common ways:
- Send the invoice directly from within QuickBooks (assuming an email account is already configured in QuickBooks).
- Create a pdf of the file, save it locally, then attach it in an email.
Both ways are equally effective, they are simply different. Often times we do things the way we have always done them, or the way we know how, and end up missing a more efficient way of doing the same task. Sending directly from within QuickBooks is faster as long as you know how to configure an email to work in QuickBooks. In addition to being available within the application so you do not have to switch between apps, you can use the existing template or update the body of the message to meet your needs so you don't have to repeatedly type the same information.
How to configure an email account within QuickBooks
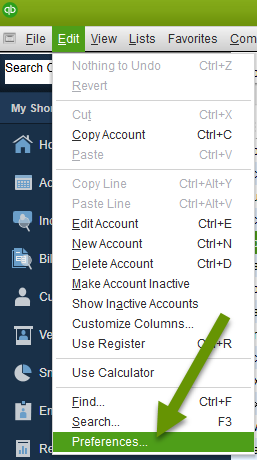
- From within QuickBooks, click on "Edit" in the top menu bar and select "Preferences" at the bottom.
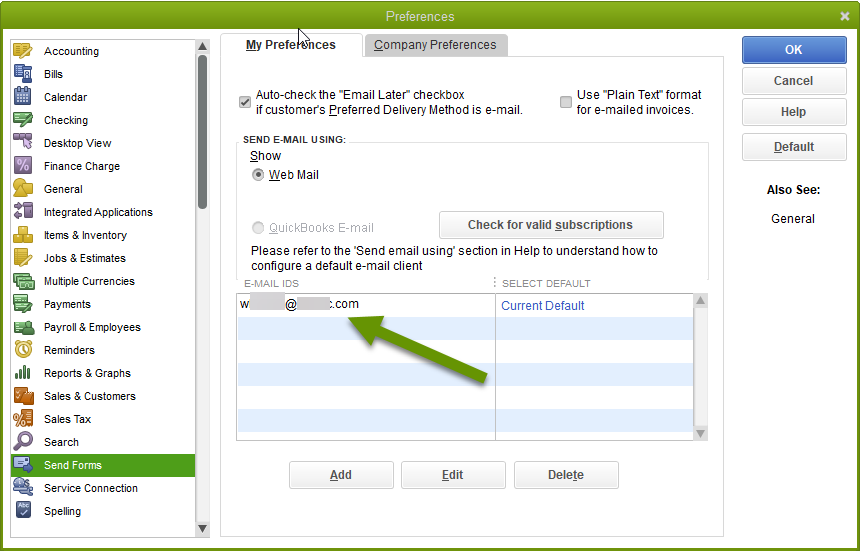
- In the Preferences pop-up, click on "Send Forms" in the left panel.
- Click on the "My Preferences" tab if it is not the active tab.
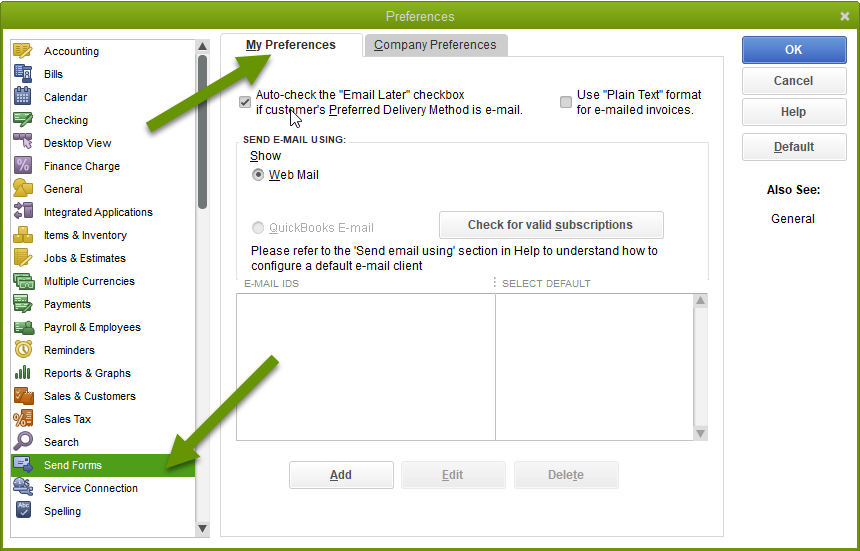
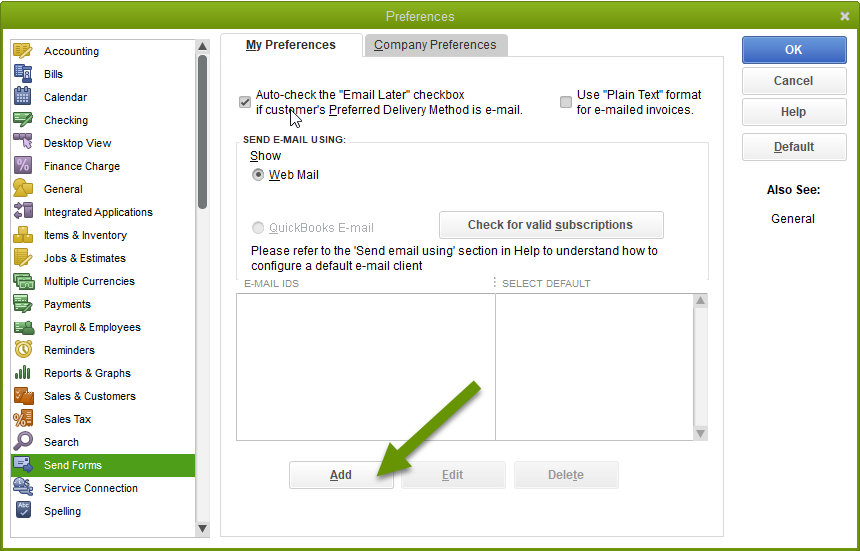
- On the My Preferences tab, click the "Add" button to configure a new email account.
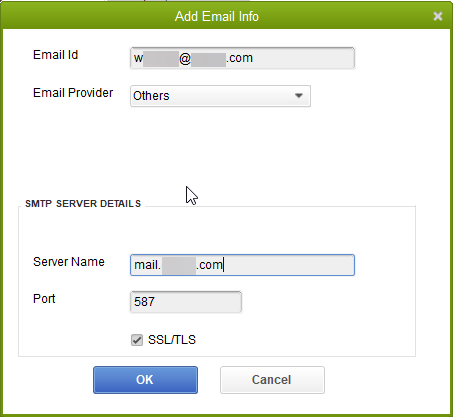
- In the Add Email Info box, enter the email address you want to use in the box next to "Email Id".
- Select the appropriate email provider in the drop down box.
- Fill out the information in the SMTP Server Details section if necessary. Be sure to verify the box next to "SSL/TLS" is checked to be sure a secure port is being used. The most commonly used secure port is 587, but could also be 465.
NOTE: The settings in this box differ based on the email provider chosen. Some selections require your Intuit account, which was implemented in newer updates. - When all settings have been set, click the "OK" button.
- Once you have saved the account, it is listed in the My Preferences tab.
NOTE: You may notice there is no place to enter your password when adding the email account. This probably seems odd, but don't worry, you will be prompted for the account password when you initiate emailing your first document within QuickBooks. Once you have successfully entered the correct password, you will not be prompted for it again unless the email password is changed.
Sending a document from within QuickBooks
Once the email has been added in preferences, you can send your first document from within QuickBooks.
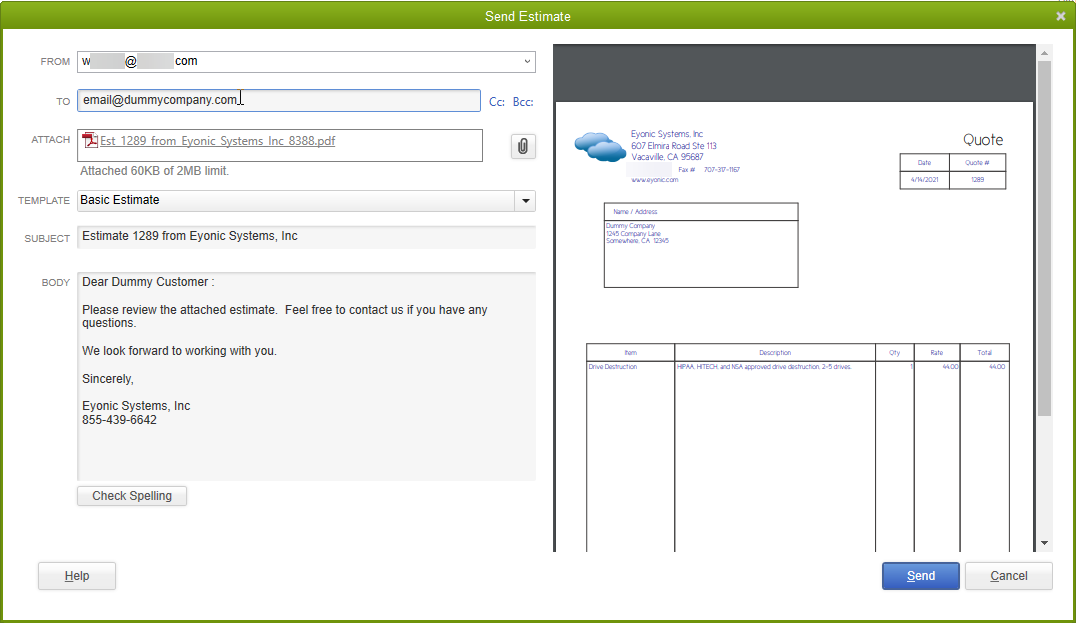
- Open an invoice or other document in QuickBooks.
- At the top of the document, click on "Email" in the Main menu ribbon.
- If you have not entered an email address for that customer, you will be prompted to enter their email address.
- In the preview of the email, change any information in the subject or body of the email as desired.
- Click "Send" to send the email.
- When you click send for the first time, you will be prompted to enter the password for the email account. Be sure to enter the password that goes with the email account you added. In other words, the password you would use if you were logging into that email account, not QuickBooks.
- Click "OK" and the email will send if the password is correct. If the password is incorrect, you will be prompted to type it again.
NOTE: If you are using a Gmail account, you may have to go to your email settings in Gmail and enable the "allow less secure apps" feature so Gmail will allow QuickBooks to send email through that account.
Adding additional email addresses
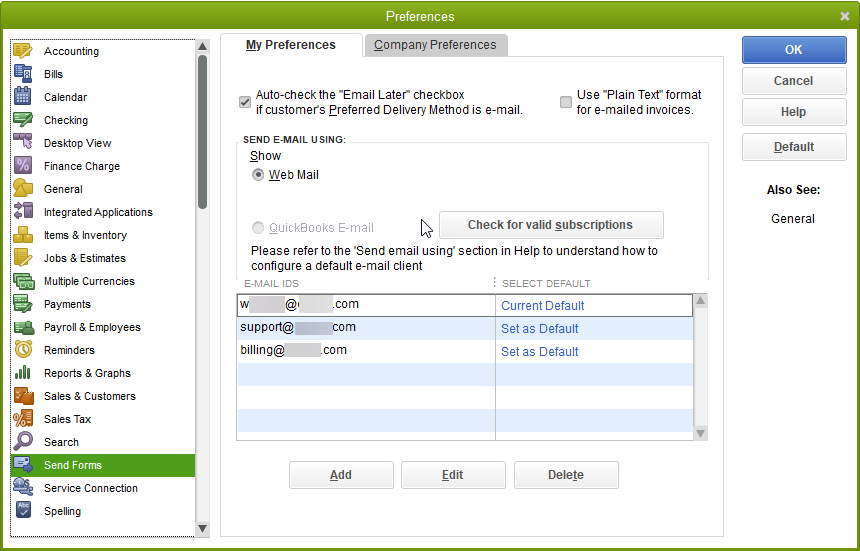
It is possible that you have several people creating items in QuickBooks and want them each to be able to send documents with their own or a department email account. Luckily, you can add additional email accounts and choose which one to send from when sending documents through QuickBooks.
- In QuickBooks, open Preferences again by going to the Edit menu and selecting "Preferences".
- Click on "Send Forms" in the left panel.
- Add additional email accounts as appropriate using the same process demonstrated above.
- You will be prompted to set each new email address as the default when you click OK. Select yes or no as appropriate.
Sending documents from different email addresses
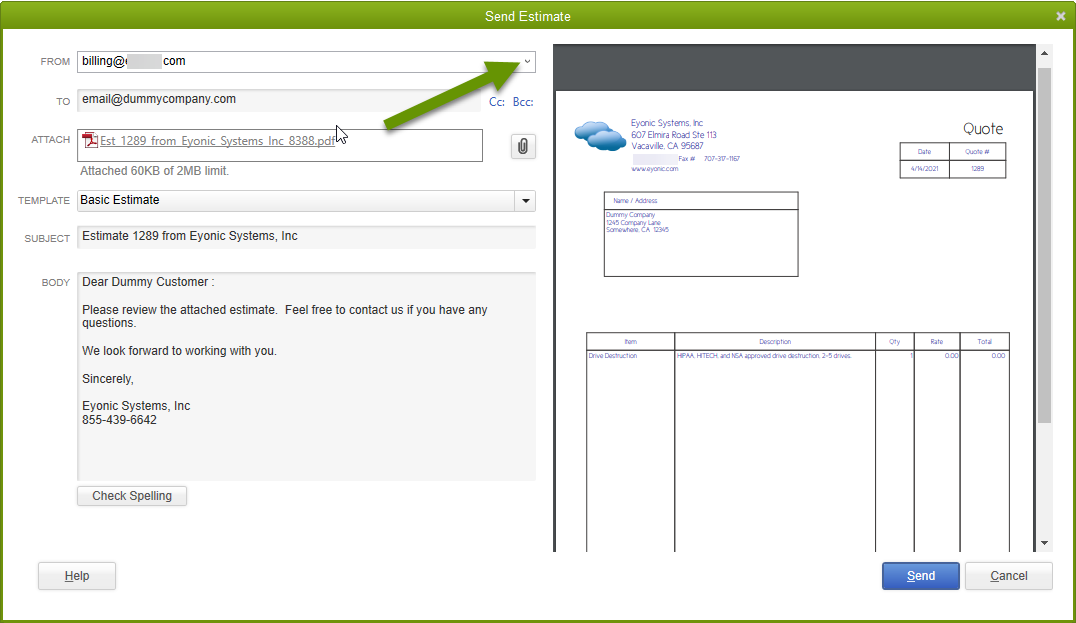
- Open a customer invoice, quote or other item you want to send.
- Click on "Email" in the Main menu ribbon.
- In the preview window, click the arrow in the From field to access all available email addresses.
- Select the appropriate email account for that email.
- Click the "Send" button.
Sending documents as attachments from within QuickBooks, rather than creating pdf documents and attaching them to emails, saves time. If you have different types of documents being emailed to customers such as invoices, estimates, statements and more, you may want to add multiple email accounts so each type can be sent from different users or department accounts. Once all email accounts are added, simply choose the appropriate one from the drop-down list when sending documents to customers.
As always, sometimes there can be so many built-in options it is easy to overlook the ones that save time!