
How to Add Discounts to Items and Invoices in QuickBooks Desktop

There are many reasons for offering discounts to clients. Perhaps a product arrived damaged or is without its original box. There may also be circumstances where you want to regularly offer discounts, say for military members, seniors or children. QuickBooks desktop has two main ways to apply discounts - against items and against all items in an invoice.
For many businesses, there are reasons why you could implement both types of discounts to use at varying times. This post discusses how both types of discounts can be applied, the ways they operate and how you can best use them in your business.
How to Add Discounts to Items and Invoices in QuickBooks Desktop
The two main ways to apply discounts to invoices are by applying them against a single item and applying them against all items in the invoice. Both types of discounts can be configured in QuickBooks and used at different times based on the needs of the business. The instructions below cover:
- Applying a discount against a single item - creating a discount item and applying the discount to an item.
- Applying a discount against all items in an invoice - creating a subtotal item and applying a discount to the subtotal.
Applying a discount against a single item
Creating a discount item
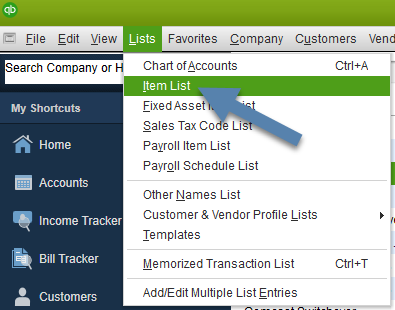
- In QuickBooks, click on the Lists menu and select "Item List".
- At the bottom of the screen, click on the Item menu and select "New" from the pop-up menu.
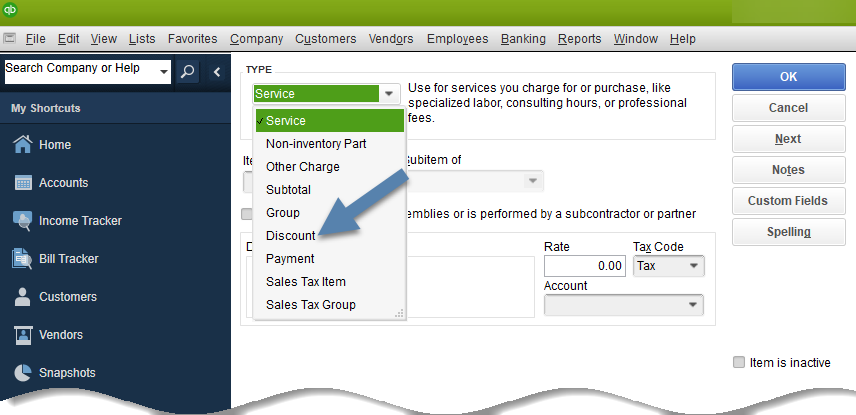
- In the item details, select "Discount" from the drop-down list under Type.
- Type a name for the discount. If you plan to give multiple types of discounts, create a separate name for each so you can track their usage easily at the end of any year or other period of time.
- If you have multiple discounts, it is a good idea to create a generic "Discount" item before creating more specific discounts as subitems so they are grouped together. When applying discounts, be sure to use the specific discount items.
- If desired, add a description for the discount.
- Enter the amount of the discount in dollars, or if it is a percentage, type the number and the percent sign in the box under "Amount or %".
- Choose an account for the discount to be associated with.
- Click "OK" to create the item.
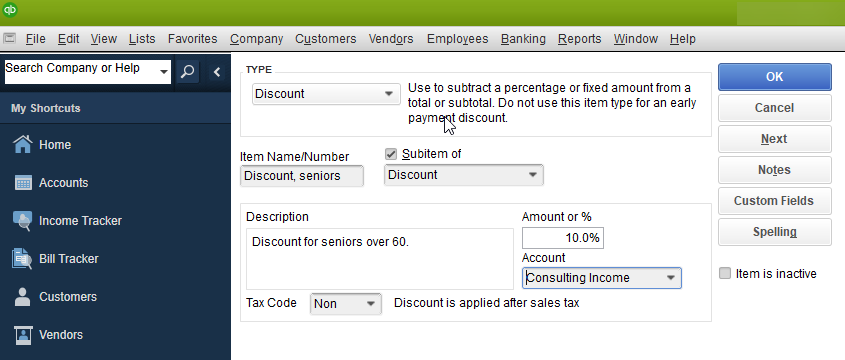
Note: The one thing not addressed in the list above is Tax Code. There are two settings to choose from, non and tax. Selecting "Non" means the discount is applied after the sales tax is assessed for all taxable items on the invoice. Selecting "Tax" means the discount is applied before tax is assessed for all taxable items on the invoice. Please check with your specific state requirements to determine which way to set this. The example above does not constitute advice on how this should be configured, it is merely an example.
Applying the discount to an item
Now that the discount has been created, you can apply it to an item in an invoice.
- In QuickBooks, open a new invoice and add at least one item to it.
- In the next line, add one of the new discounts available.
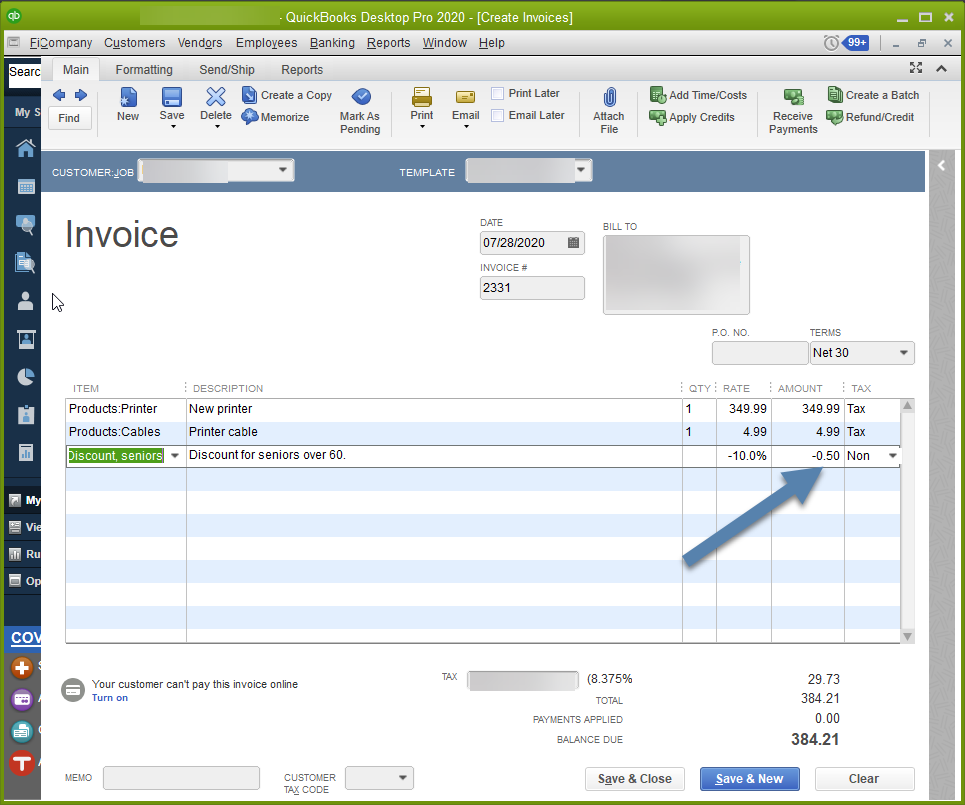
As you can see in the image below, the discount appears as you type in the item list. Once selected, the discount is applied.
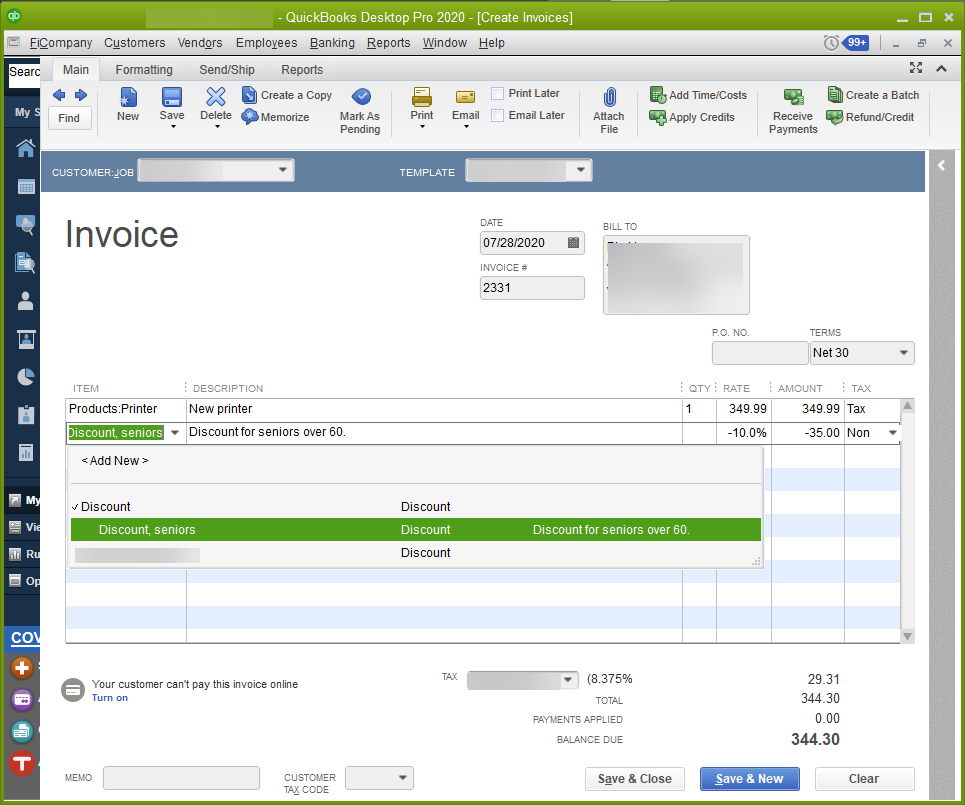
It is important to note that discounts using a percentage are applied only to the line item directly above them. In the example below, another item has been added to the invoice. Because it was entered above the discount, the discount changed, but probably not how you would expect. Instead of increasing the total discount since the invoice total increased, the amount of the discount decreased because the item in the line above the discount it now smaller.
NOTE: This distinction does not matter for discounts set to a specific dollar amount, it only affects percentage-based discounts.
If you wanted both items to get the discount, you could add a discount line after the first item. A more efficient way would be to utilize the subtotal feature in the example below.
Applying a discount against all items in an invoice
Creating a subtotal item
To apply a discount against all items in an invoice, you first have to add a line to subtotal all items in an invoice. Then a discount can be applied to the subtotal of the invoice. The subtotal item is created similarly to the way the discount item was created.
- In QuickBooks, click on the Lists menu and select "Item List".
- At the bottom of the screen, click on the Item menu and select "New" from the pop-up menu.
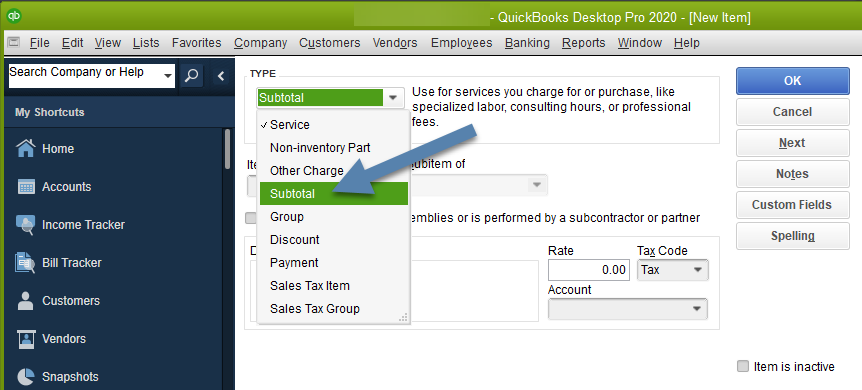
- In the item details, select "Subtotal" from the drop-down list under Type.
- Name the item and give it an optional description.
- Click "OK" to save the item.
Applying the discount to the subtotal
- Add items in a new invoice.
- Add the subtotal item after all items have been added to the invoice.
- Insert a discount item immediately after the subtotal line.
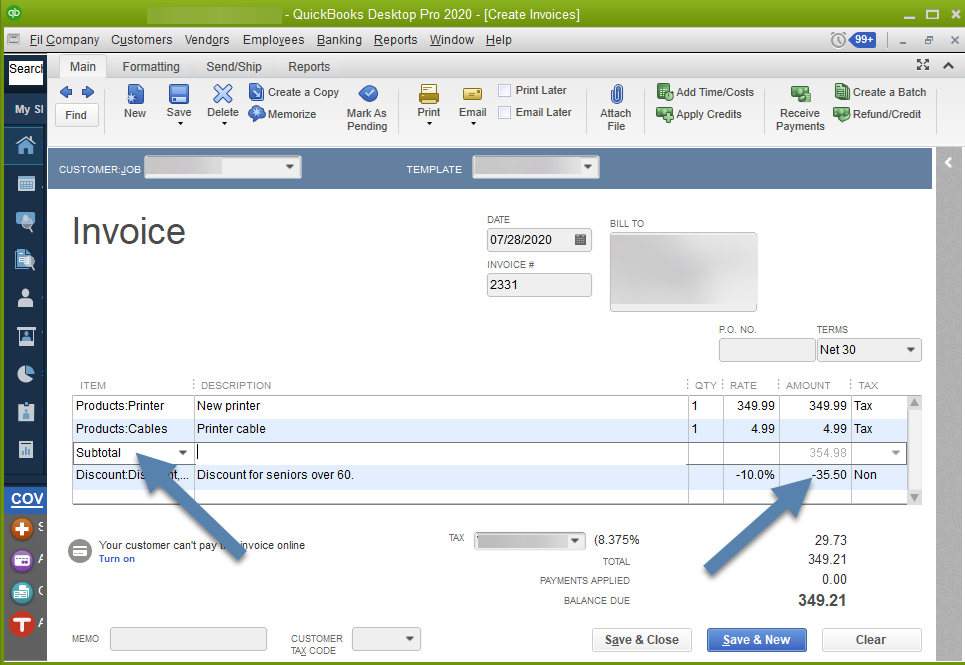
As you can see in the example above, subtotaling all items applies the discount against all items in the invoice. This works because first the discount, which still only applies to the line above it, is placed after a subtotal of all items. If you need to go back later and add more items to the invoice, the subtotal will automatically update as will the corresponding discount.
To use discounts in QuickBooks you first have to create discount items. Once created, these can be applied in one of two ways. Discount items are only applied to the item in the line directly above them. Discounts can be applied against singular items, or against all items in an invoice by utilizing the subtotal item before the discount is added.
As always, your business will determine how this information can best be implemented, but knowing how the features work is key!