
5 Tips to Help you Start Using Photoshop

Adobe Photoshop is an image editing software with dozens of built-in tools for manipulating images. Unless you are a graphic designer or have a need for understanding all the tools, there are probably more than you would ever need. Still, Photoshop can be a great tool. But with so many options, where do you start? Luckily, there are several helpful tools you can use that are not overly complicated.
This post is part one of two discussing 5 tips to help you start using Photoshop.
Also, you can watch this video covering the information below:
5 Tips to Help you Start Using Photoshop
In parts one and two of this topic, we will demonstrate how to use the following commonly used tools in Photoshop:
- Setting a color code/determining a color code
- Resizing an image - canvas size versus image size
- Stepping backwards
- Layers
- Adding a transparent background
- Setting a color code/determining a color code
At times the ability to set a specific color code can be very important. When working with anything related to a logo or marketing materials, you will likely need to use specific colors. Determining a color code can be just as important. If you are working with something that has a set color, adding to it or creating new materials will require having the correct color code.
Even when you aren't using specific colors, you will want to use the color picker so you can find a color that matches your needs.
To set a color code:
- In Photoshop, click on one of the color boxes in the left tool panel. The top or front color represents the foreground color and the bottom or back color represents the background color.
- Once you click on either box, the Color Picker window will appear and will denote whether it is the foreground or background color you are modifying.
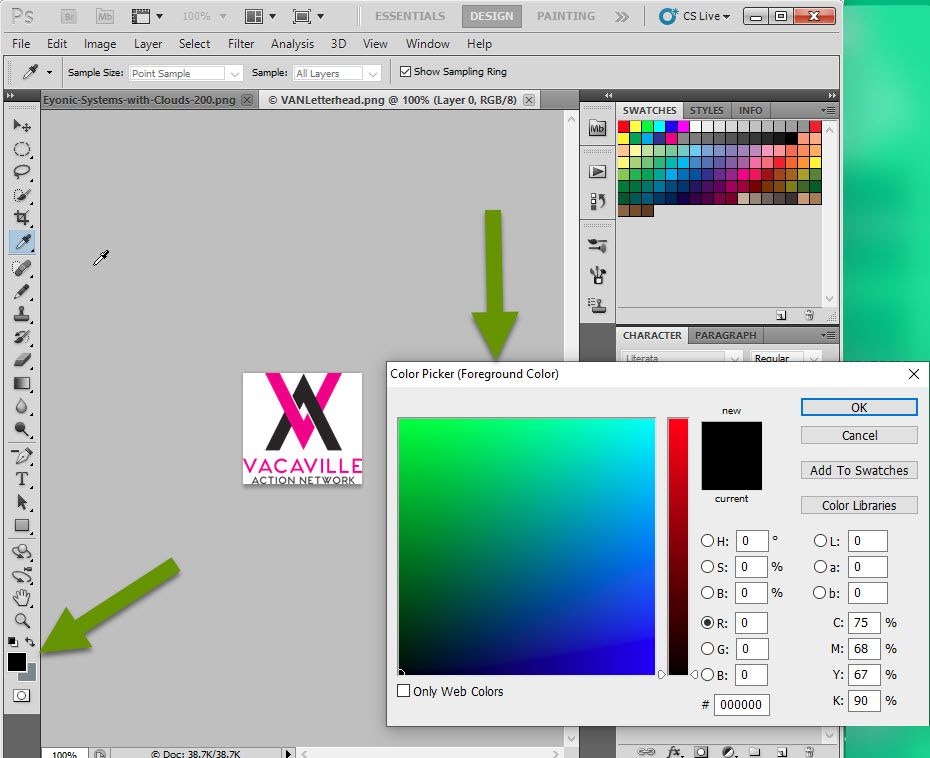
- In the Color Picker window, set the specific color using any of the available methods: HSB, CMYK, RGB, Lab, or using a hex code which is entered next to the #.

One of the really cool things about typing in codes for new colors is that the new color appears at the top of the Color Picker box next to the current color for comparison. This is especially helpful when you are looking for a color that is only slightly different than the one you already have.
For example, if you have a color that has too much blue in it you could decrease the C number in CMYK which would get you closer to what you wanted.
To determine a color code:
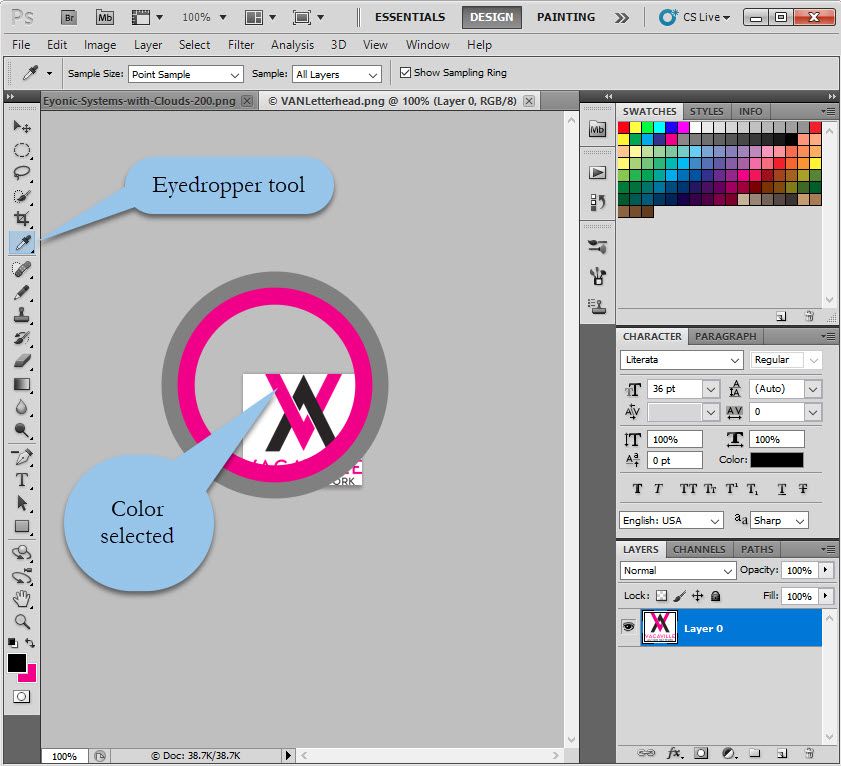
- In Photoshop with the image opened, click on the "Eyedropper tool" in the left tool panel.
- With the eyedropper tool selected, move to the color you want the code for and left click. When you click on a color, a circle will quickly display showing the color you selected.
- The color you selected appears as the background color swatch.
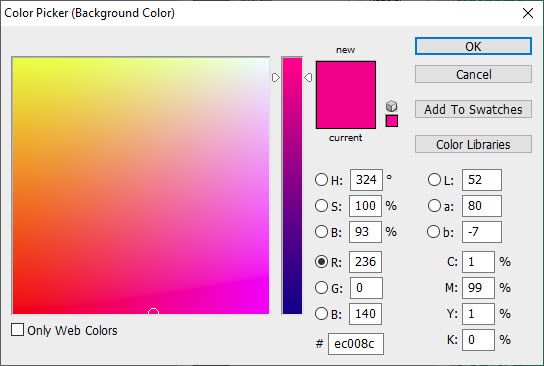
- Once the color is in the color swatch, click it to open the Color Finder. These color codes can be used to add to the existing image, create other images or other marketing materials, all while ensuring the colors match.
Resizing an image - canvas size versus image size
There are two different sizes that can be changed when it comes to any image. When you open an image and the file size is way too large or small, you can resize it using the image size tool. This will expand or shrink the entire image based on your modifications. In contrast the canvas tool changes the size of the canvas the image is on, meaning it can add spacing around the image or cut out some of the image.
To change an image size:
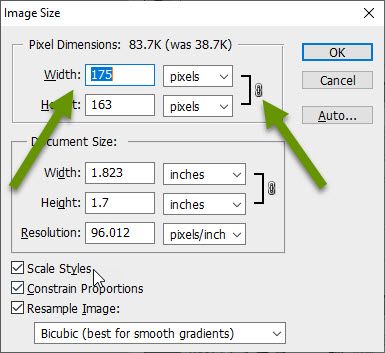
- With the image open in Photoshop, press control+alt+i to open the Image Size window.
- Change the sizing in the width or height under either the pixels or document size heading.
- Typically you will want to be sure the width and height are linked. This maintains the scale of the image. Without these being linked the image can get skewed in ways you may not intend.
To change the canvas size:
- With the image open in Photoshop, press control+alt+c to open the Canvas Size window.
- Change the width or height of the image in any of the available measurements. I typically use pixels. If you want to delete content from a certain section, like the bottom, then you would use the Anchor box at the bottom to direct where the clipping originates from.
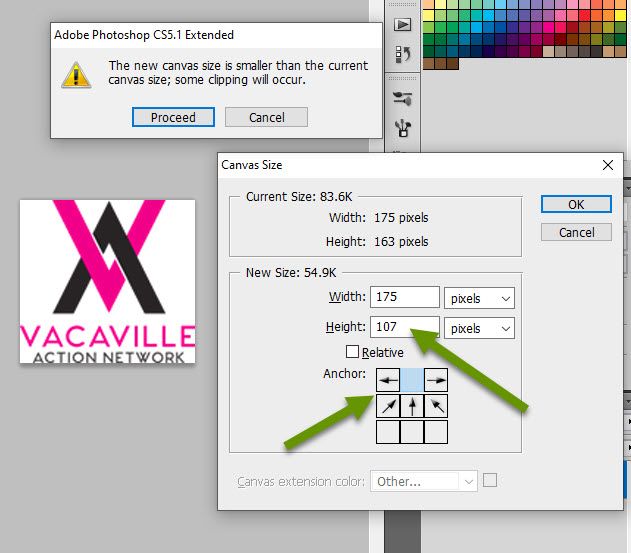
NOTE: When you use the canvas sizing to reduce the size of an image, unlike when you use the image sizing to reduce the size of the image, you run the risk of cutting some of the image content out.
In this example, the image would end up looking like this:

This is a perfect example of dropping the canvas down too much and a great lead into our next tool.
Stepping backward
It would be bad form not to share information on how to undo something when you are just becoming familiar with Photoshop. In instances like this, stepping backward is the tool that will undo a change you just made. Bear in mind, this is not an unlimited tool, meaning there is no guarantee that you can step backwards enough times to undo something you modified fifteen changes ago. This is why using layers should be your go-to and we will discuss them in part two.
To step backward:
- In Photoshop, after modifying an image in a way that you do not want, or which did not turn out as intended, press control+alt+z or go to Edit and select "Step Backward".
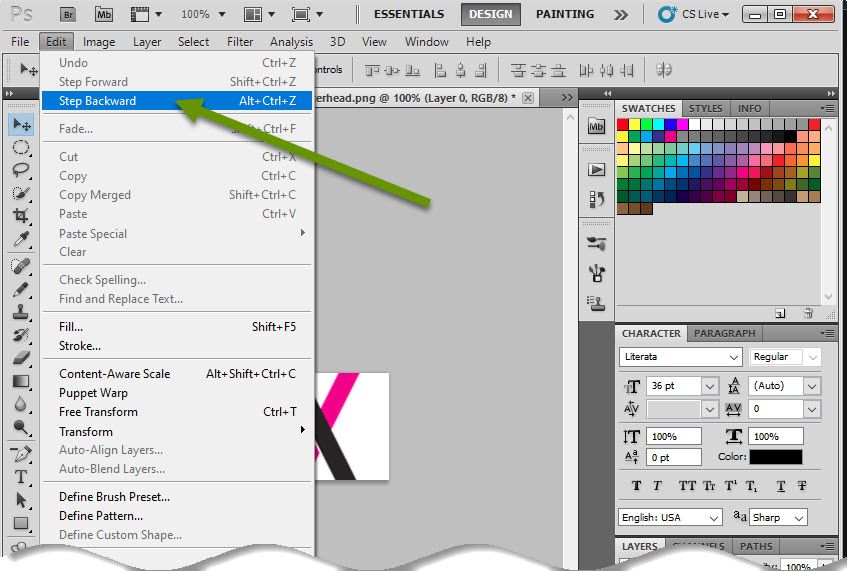
In this example the image goes right back to the size it was, without any of the content clipped out.

Note: There is also a step forward tool in case you go back and realize it was not what you wanted. Step forward can be accessed under the Edit menu or by pressing control+shift+z.
This post is part one of two and only scratches the surface of what can be done in Photoshop. By discussing how to set a specific color or simply pick a color, determining a specific color, resizing images using the image and canvas sizing tools and how to undo a modification, we hope you can start developing the tools you need to work with images in Photoshop. Next week we will discuss the benefits of using layers and how to add transparent backgrounds to images.
As always, some applications are more complicated than others, but you can still begin using them one piece at a time!