
5 Tips to Help you Start Using Photoshop Part 2

Last week our blog discussed three of five tips to help you begin using Adobe Photoshop. We also created a video demonstrating how to use these tools, which included: setting a color code and determining a color code, resizing an image using the canvas and image resize tools, and stepping backwards when something unintended happened.
This week we will continue with this topic and discuss two more tips - using layers and adding transparent backgrounds to images.
Also, you can watch this video covering the information below:
5 Tips to Help you Start Using Photoshop Part 2
In this post we will discuss the last two tips which are:
- Using layers
- Adding a transparent background to an image
Using layers
The biggest reason for using layers in Photoshop is so you can isolate modifications you are making from other aspects of the image. For instance, you can add something to an image without affecting the original, by adding a layer. If the modification does not work out, you can simply delete the added layer and viola, you are back to your original.
Another reason you might want to use layers is to allow you to create duplicate versions of the same item, but in different sizes, colors, fonts, or other item, thereby allowing you to toggle layers on and off to compare and see which version you like best. Layers provide a great deal of flexibility as well as providing ways to remove modifications more easily.
For example, say you changed something and then 5 modifications later decided that change was not the best. Undoing the five things done after that is a waste of time. But with layers, you can isolate modifications. This means you can simply go back, delete a layer and then implement the modification that will work best.
In the example below I'm going to show how layers operate using a very simple color comparison image that shows how the layers can be useful.
- In Photoshop, create a new canvas. The sizing does not really matter for this example, just create something big enough for you to work with.
- Once you have the transparent canvas, as is shown with the checkerboard pattern, we will add our first new layer.
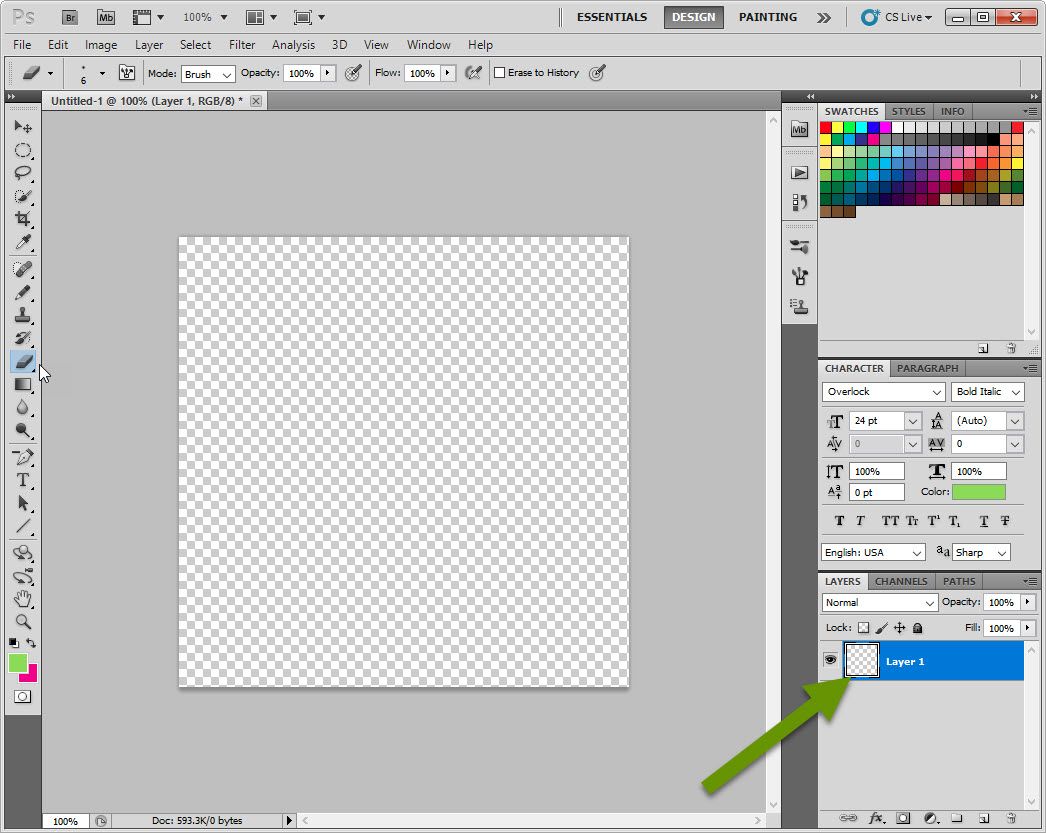
- The newly created canvas begins with a single layer. If I wanted to, I could upload an image, add coloring, text, rotate the image, blur aspects and much more all on the same layer. But again, by doing that, I limit myself to making changes, or rather in making changes efficiently. Instead, we will utilize the benefits of adding layers.
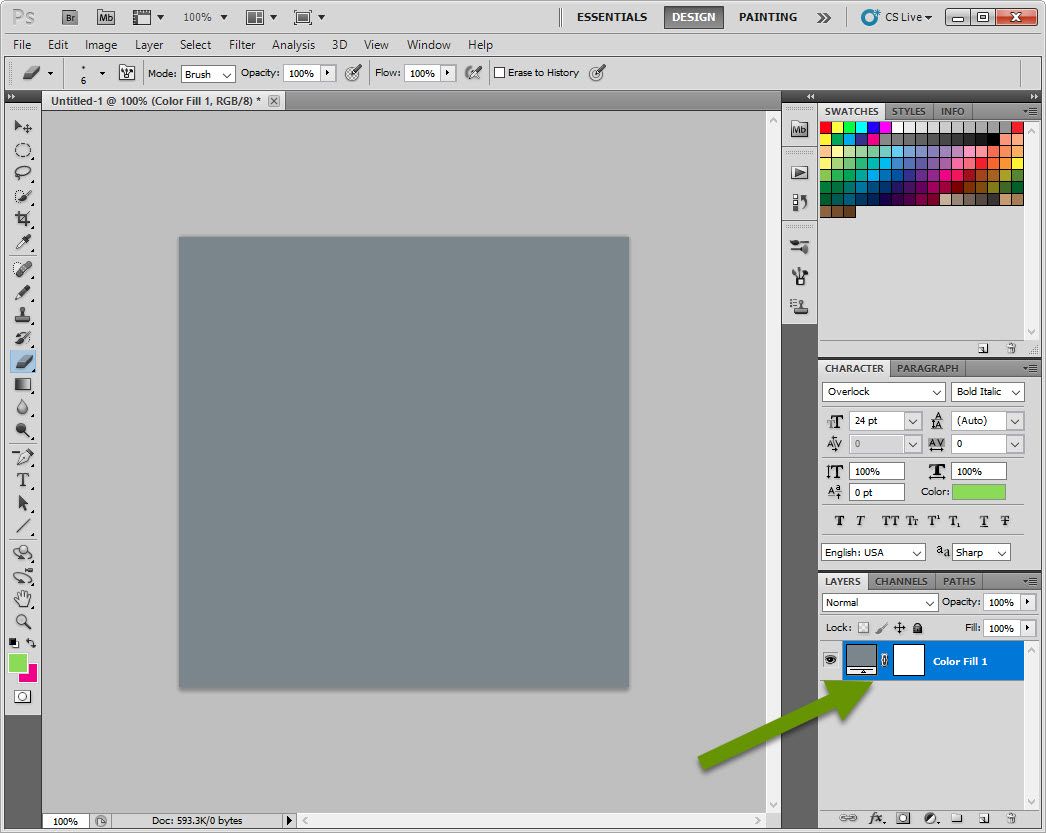
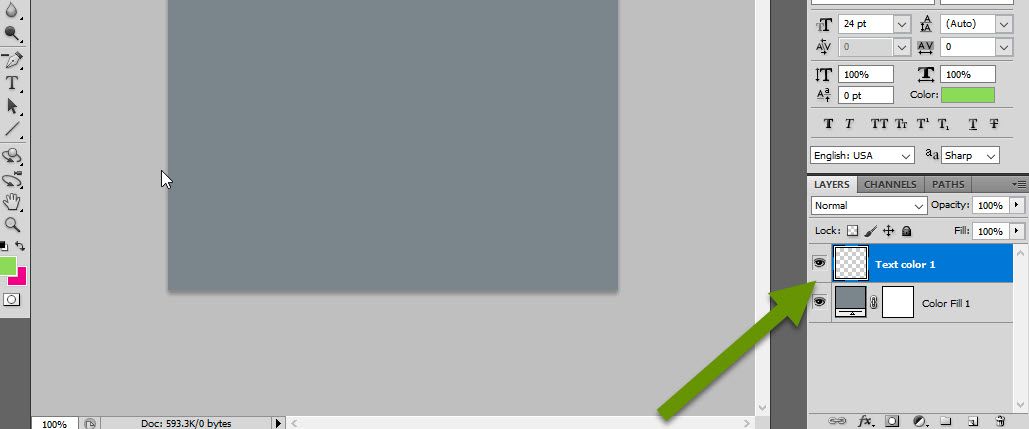
- In this case, we will add a background layer so we have a solid background we can build upon. To add a new background layer, click on Layer, select "New Fill Layer", and select "Solid Color".

- When prompted, give the layer a name that will make sense later when you are playing with the different layers and choosing which are best.
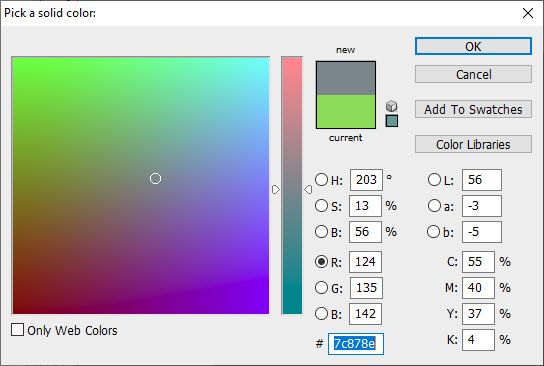
- Click "OK" and then type in the color code in the color picker window then click "OK" again to apply the color as the background in the new layer.
The background color will fill the canvas and the color is attached to the original layer.
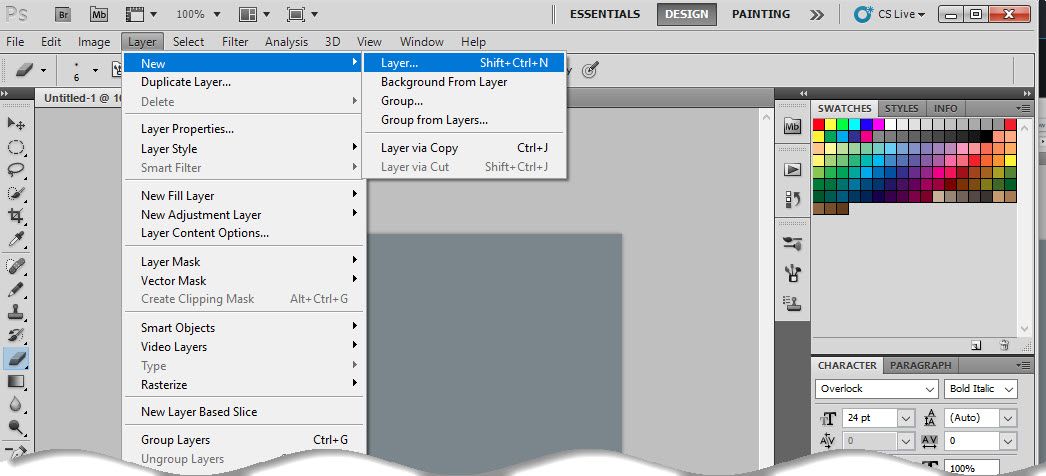
With a background created we can start adding more layers.
- Click on Layer and select "New" then select "Layer" in the pop-out menu.
- Name the layer and click "OK".
- The new layer will now show up in the Layers overview in the right panel.
- In this example we will add a text box and enter some text as if we were trying to find the perfect color combination. To add a text box, click on the T in the left panel of tools.
- Draw a box over the top of the background to whatever size you like for the text box then type something.
- You can resize or move the text box later if you need to. Just be sure to click on the text layer in the layers control panel in the bottom right then click inside the text box with the text tool.
- Continue adding layers with different objects or modifcations. In this example we added more text boxes with different color text to see which matched the best.
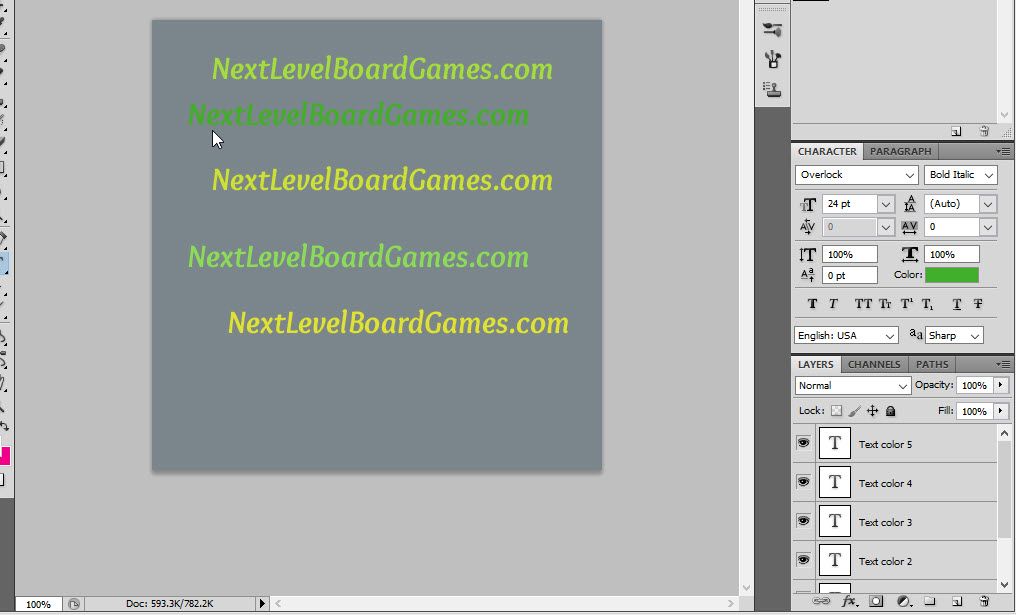
In the example above, all the layers with all the colors are viewable. If we were leaning towards eliminating a color, we could delete its layer. Or, if we were not quite sure yet, or wanted to compare a few settings against each other, we could toggle layers off and on by clicking the eye next to a layer.
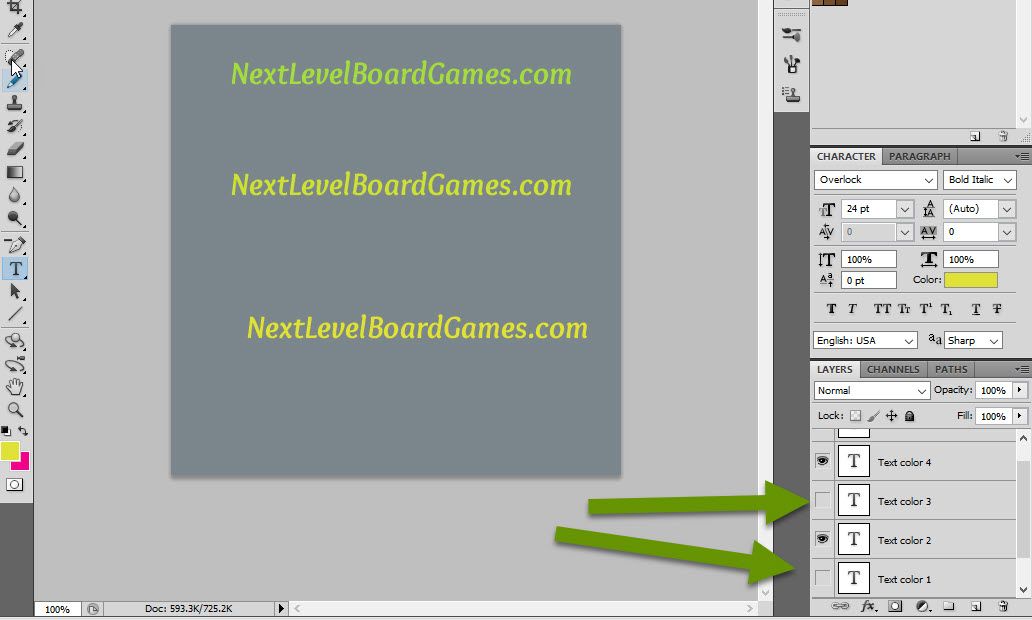
In this image we have hidden two of the color layers by toggling off their viewability in the layers control panel. They are still there, and we can easily bring them back. Toggling layers on and off is an easy way to compare items to see which is best without deleting and recreating items. Also, layers created at any time can be toggled off and on, they do not need to be toggled off or on in chronological order. This is one more reason using layers will save you time and frustration.
Adding a transparent background
Sometimes it can be really challenging to get an image to resize to the exact measurement you need without distorting the image, unless you have a vector graphic. Whether it is for a website or just social media, every platform has an ideal image size it prefers. When you ignore those size guidelines, you will get mixed results - sometimes an image will be clipped, other times it won't be accepted at all.
You could quickly add to the canvas, like we discussed in part one, but there are a couple of tricks to get the additional canvas to be transparent so that it does not clash with the existing image. Luckily, there is a quick and easy way to deal with this without affecting your original image.
To add a transparent background to an image:
- Open the image to modify in Photoshop.
- If the image layer has a lock on it, right-click on the layer and select "Duplicate Layer".
- In the duplicate layer popup, click "OK".
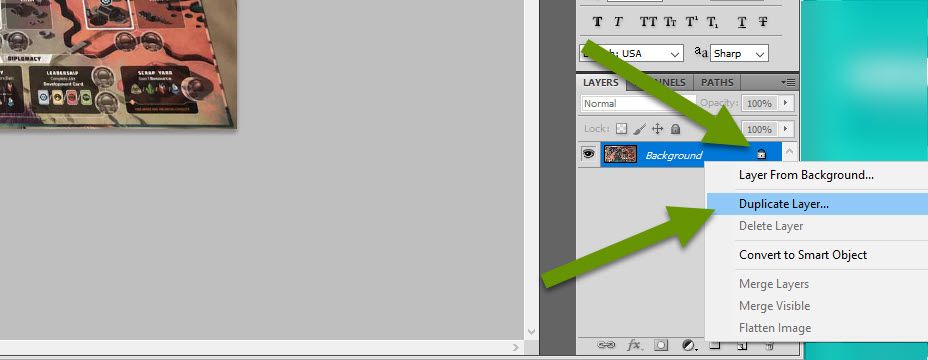
The new layer is an unlocked layer where you can now add a transparent background.

- Right-click on the original layer and select "Delete Layer". Click "Yes" to confirm.
- Now you can use the canvas resize tool that we discussed in the first post. Press control+alt+c to open the canvas size tool.
- Add height, width, or both to get the image to the exact size you need it to be and click "OK" to apply those changes.
The additional height, width or both will be added to the image as a transparent background. The transparent background appears as a checkerboard and can be seen in the image above on both the left and right sides.
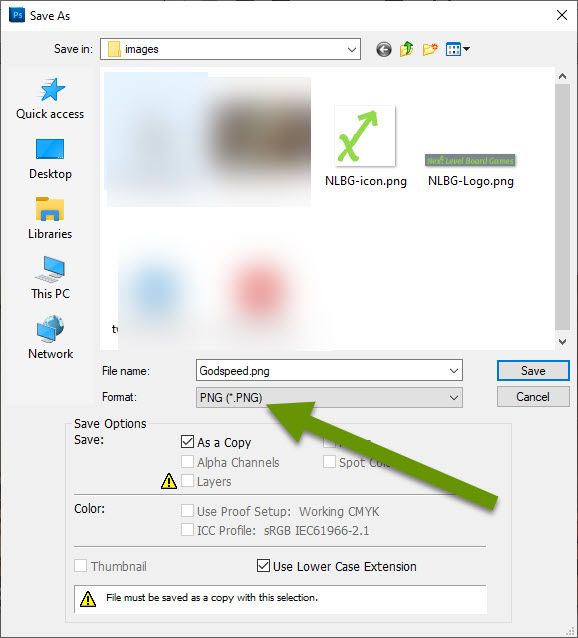
NOTE: To keep the transparent edging, you must save the file in a .png format, regardless of what file type the image was originally. If you save it as a .jpg, whatever you added will be saved as white.
- Go to File and select "Save As".
- In the Save window, be sure to select .png in the format window before naming the file.
- Click "Save" to save the image.
Hopefully the last two posts have shown you some easy, yet powerful, ways you can get started using Photoshop. These five tools only scratch the surface of what Photoshop can do, but they are often quicker than alternative apps and it is such a powerful tool. Using layers makes your work far more efficient and adding transparent backgrounds can make working with images far easier.
As always, if you can just get started using a new application, you will quickly find more and more ways to use it!