
5 Security Controls Accessible to Zoom Meeting Hosts

Zoom meetings have become a staple of our lives. If you are a student or have children, it is likely being used to attend classes. If you own a business or are working, this is probably how you are keeping up with employees and coworkers. Even if none of these apply, you may be using Zoom to keep up with the friends and family you cannot visit during the pandemic.
Whether you are attending meetings or hosting them, it is good to know what security controls are available. Many features are set when the meeting is created, but there are five important security controls accessible to Zoom hosts after a meeting has already begun covered in this post.
5 Security Controls Accessible to Zoom Meeting Hosts
Controls prevent meetings from needing to be restarted, due to the wrong people joining or other such issues. These controls fall into two categories:
- Meeting management
- Participant management
Meeting management
Two important features available to help manage a meeting are: making a participant a host and managing screen sharing.
Making a participant a host
When you create or start a meeting, you are considered the host of the meeting. The host has more controls than participants, including the ability to manage each of the other settings discussed in this post. The host controls who can enter a meeting, if screen sharing is allowed, if chat is allowed, approves or denies people in the waiting rooms, can remove and mute participants, and MUCH more.
Additionally, hosts can share their screen without allowing it for the participants. Luckily, hosts can assign host permissions to participants at any time.
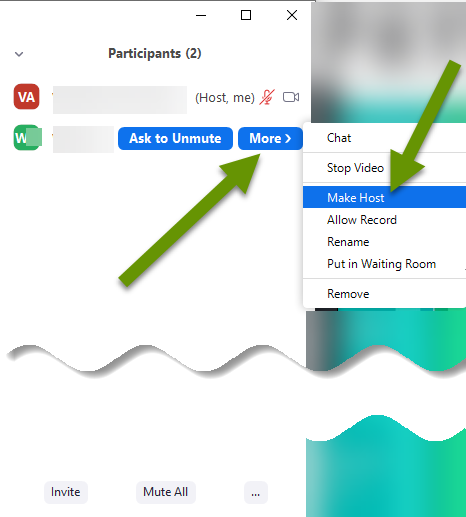
To make someone else a host:
- Click "Participants" in the pop-up menu bar in the bottom of the Zoom window if it is not already open.
- Hover over the the name of the participant to make a host.
- Click the "More" button that appears next to the participant name.
- Select "Make Host" from the pop-out menu.
Assigning multiple hosts is a great tool when more than one person is presenting during the meeting or webinar, and to allow specific users to share their screen without enabling the screen share feature for all participants. This setting is also helpful if you are introducing a meeting, but others are doing the actual presenting.
Controlling screen sharing
As discussed in the setting above, all hosts have the ability to share their screen. Allowing participants to share their screens is controlled in a different setting. In general, it is a good idea to disable screen sharing unless you absolutely need to have others share their screens, and do not want to make them hosts. Even then, it is best to leave it disabled until the person is about to present.
To enable or disable screen sharing during the meeting:
- Click on "Security" in the pop-up menu bar at the bottom of the Zoom window.
- Click "Share Screen" to toggle between enabling and disabling screen sharing. A check next to "Share Screen" means it is enabled.
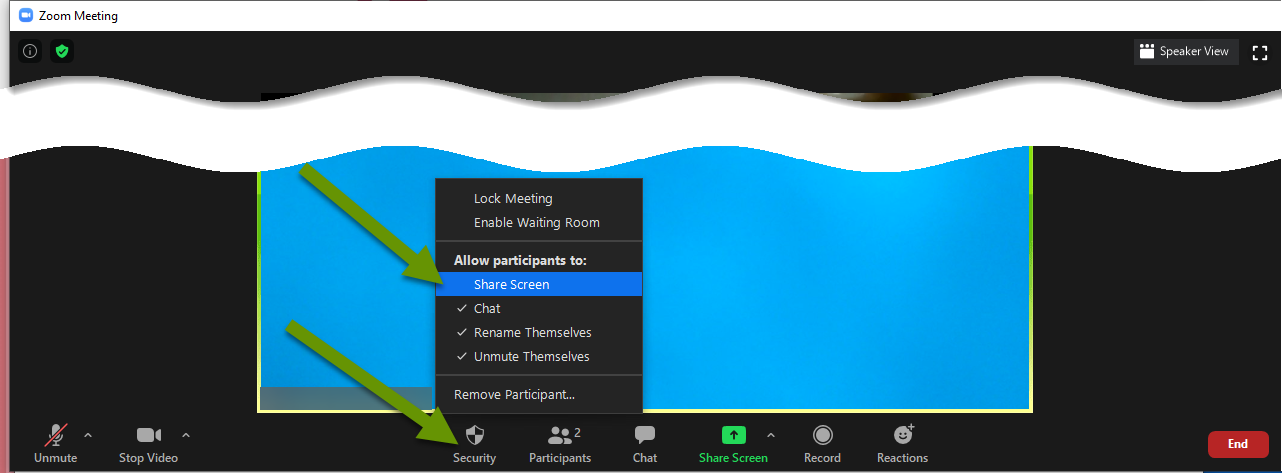
Remember this setting can be toggled on or off at any time during the meeting.
Participant Management
Three important participant management features are: removing members, locking the meeting and enabling the waiting room.
Removing a member
Perhaps one of the most important abilities is to be able to remove a participant from a meeting. Perhaps someone accidentally shared the meeting information publicly, or someone misrepresented themselves and got into a meeting only to be disruptive. Whatever the reason, being able to remove a participant at any time is critical. A host can remove a participant at any time.
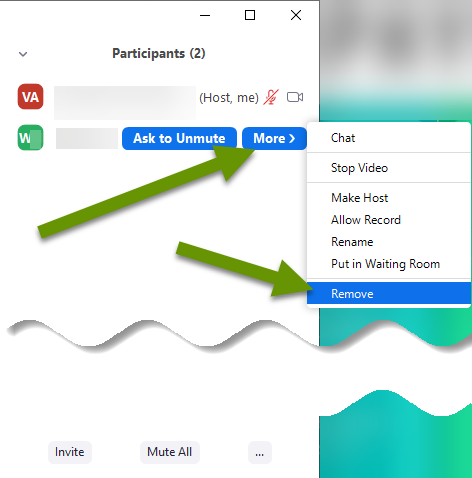
To remove a participant:
- Hover over the participant's name in the list and click the "More" button.
- In the pop-out menu, select "Remove".
Locking the meeting
Locking a meeting means new participants cannot join. This is helpful in several situations. Perhaps you are hosting a meeting with a specific group and do not want guests. Perhaps you are hosting a webinar and advertised that you were only allowing the first 40 people to join. Once you hit that number, or all participants have joined, you could lock the meeting as an extra security measure.
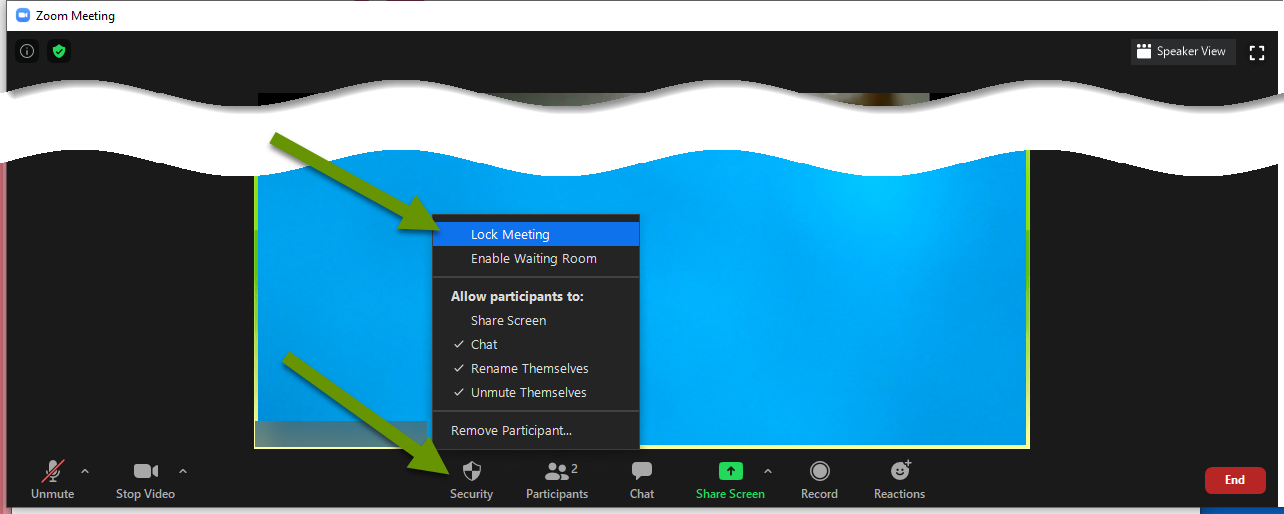
To lock a meeting:
- Click on "Security" in the pop-up menu bar at the bottom of the Zoom window.
- Click "Lock Meeting" in the menu. A check next to this setting means it has been enabled.
Enabling the waiting room
The waiting room feature was developed after Zoom's popularity soared in response to people "dropping in" meetings for the sole purpose of wreaking havoc. Using the waiting room means a host must approve all participants before they can join the meeting or webinar even if they have the meeting ID and password. Keep in mind, the greater the number of participants, the bigger a burden this plays on the host(s).
Sometimes it might make sense to enable or disable the waiting room. For instance, a meeting where guests only join for small portions of meetings. In this case, the host could allow regular members to hop on without the waiting room, then enable it as guests are meant to arrive. Keep in mind, this only works if participants arrive when they are supposed to and might not work in every situation.
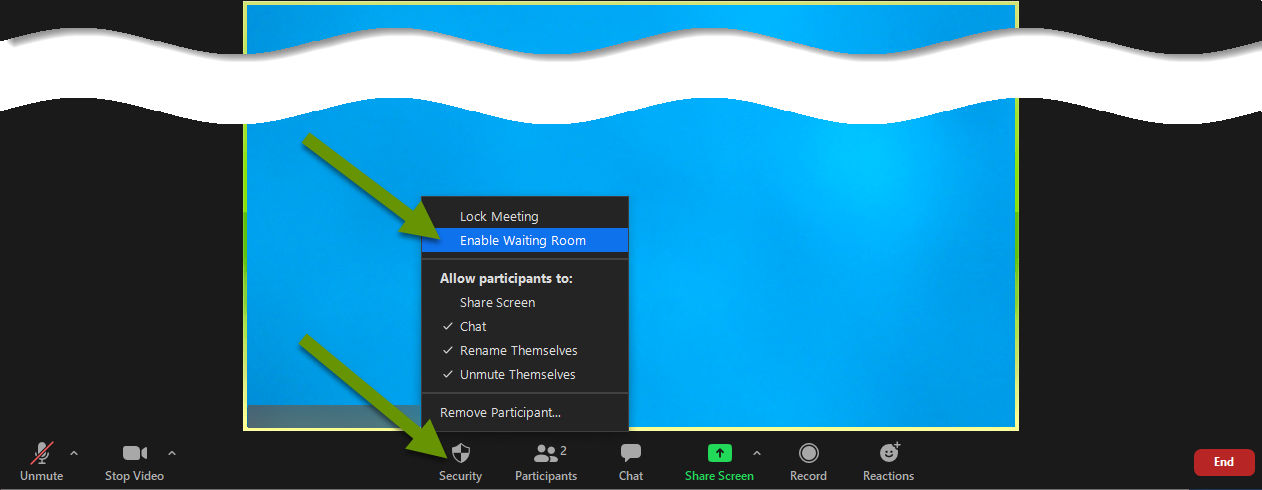
To enable or disable the waiting room:
- Click on "Security" in the pop-up menu bar at the bottom of the Zoom window.
- Click "Enable Waiting Room" to enable this setting. A check next to the setting means it is enabled.
There are many features and settings available to the hosts of Zoom meetings that participants do not have. This includes the settings discussed here: removing members, making a participant a host, locking meetings, enabling screen sharing and the waiting room. In addition, there are many other settings not included in this post. If you are going to host a meeting, take the time to look at the settings when you create the meeting or webinar.
As always, putting time into preparation more than pays off when it comes to hosting online meetings!