
4 iPhone Features you Might be Missing Out On

When a device is new we are much more likely to click every app, open settings, and generally check out every capability of the device. With time, as we become more proficient at using the device and accomplishing the things we need to do, we often stop poking around. Instead, we use the device with less curiosity and approach it from a functional perspective.
This post covers 4 iPhone features that are not necessarily the newest features, but are features you might have run across or forgot exist. These features can be super helpful in accomplishing tasks and/or save time and energy accessing other items.
4 iPhone Features you Might be Missing Out On
The four features are:
- Accessing photos and attachments sent in messages
- Customizing the control center
- Screen recording
- Using the camera as a QR code reader
Quickly accessing photos and attachments from within the Messages app
How many times has someone sent you something that you wanted to look at later, but the thought of scrolling back through weeks worth of conversation deters you? If this has ever happened to you, you are in luck! There is a very easy way to access all images and attachments shared between people within the Messages app.
To quickly access photos and attachments someone sent you:
- Open Messages and then open the conversation with the person, or group of people, in question.
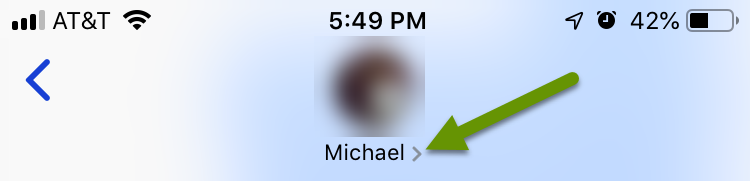
- Touch the right arrow next to their name at the top of the conversation to get the pop-out menu.
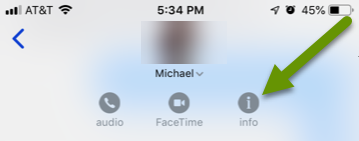
- Touch the "Info" button.
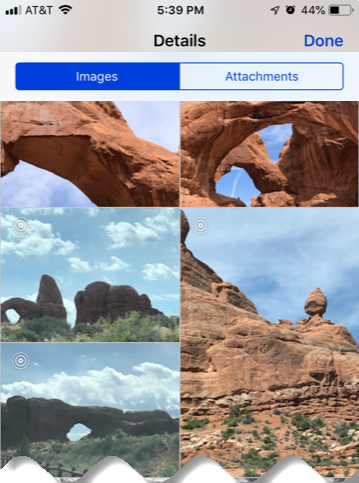
- The info section shows all the items sent and puts them in two categories: Images and Attachments. Both categories are sorted chronologically with the most recent at the top.
Customizing the Control Center (aka the shortcut menu when you swipe up)
The Control Center is a useful tool providing quick access to common features. What makes it so convenient is you can access this menu from any screen, much like the toolbar locked at the bottom of each screen although it is limited to just 4 apps. Applications and features automatically included in the Control Center are:
- Brightness and volume control
- Screen orientation lock
- Airplane mode
- Wireless, Bluetooth and cellular communications
- Do not disturb
- Music controls
- Screen mirroring
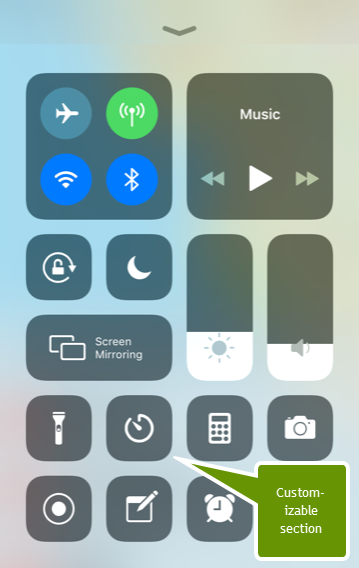
In addition to these default controls, there are other features that can be enabled so they are also available in the Control Center. To customize what appears in the Control Center:
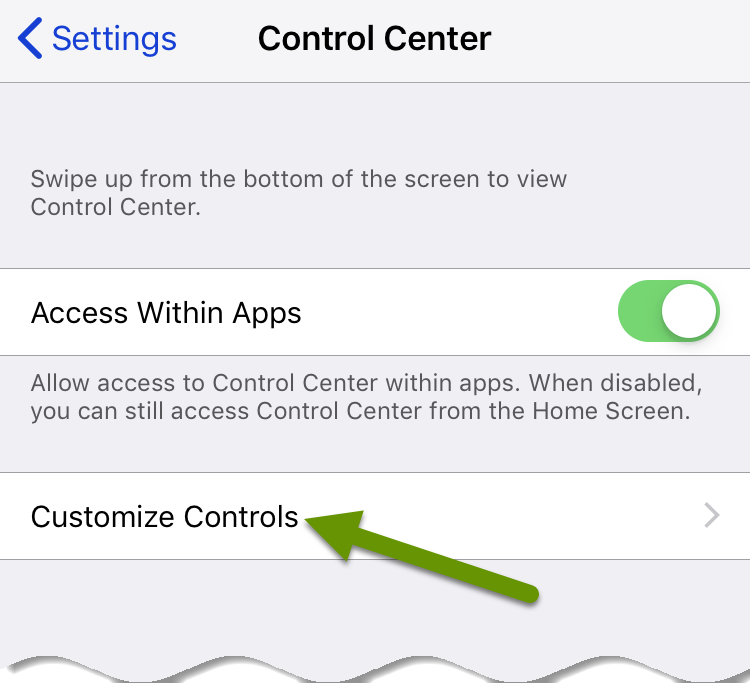
- Open the "Settings" app.
- Open "Control Center".
- Select "Customize Controls".
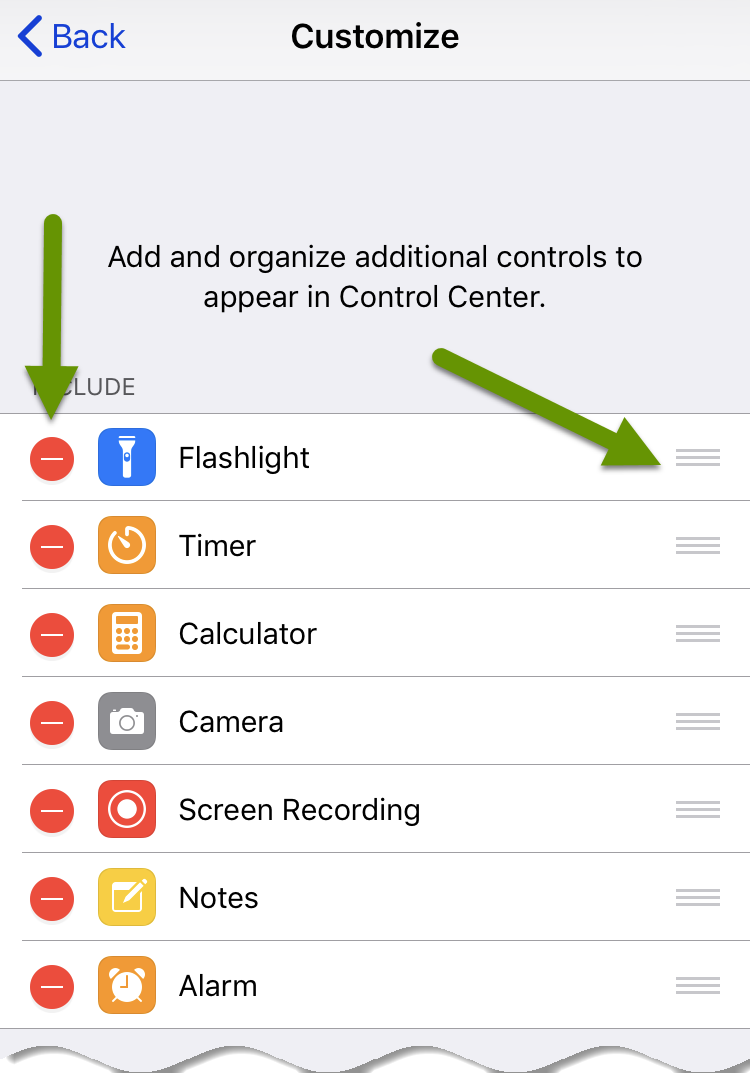
The items listed at the top under the Include heading are enabled features included in the Control Center. Reorganize features by using the hamburger menu on the right side or use the red circle to remove them from the Control Center.
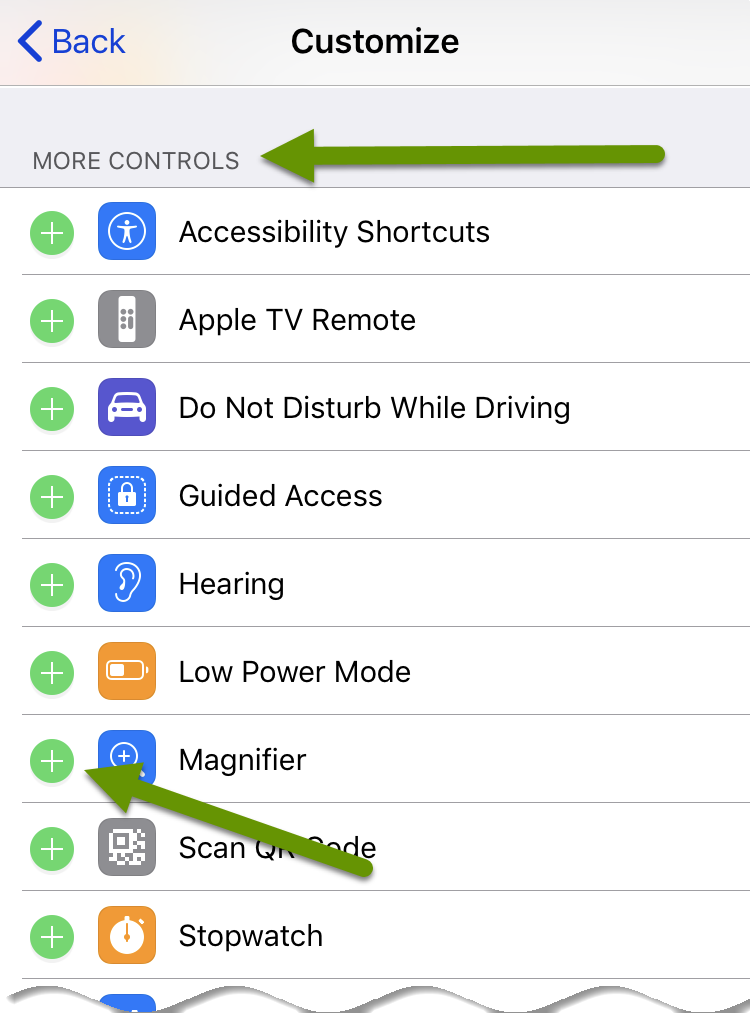
Below the included features is a list of disabled features under the "More Controls" heading. These are additional features that can be added to the Control Center by enabling them. To enable a feature, simply touch the plus next to its name.
Below is a video demonstrating how to customize the Control Center using the screen recording feature discussed next.
Screen recording
Another great feature you might not be utilizing is screen recording which is exactly what it sounds like - a way to record your screen. Screen recording is best used as a tool to demonstrate to others how to access a setting or accomplish something that is much easier shown than told. Screen recording is much more efficient than capturing screen shots and typing out instructions.
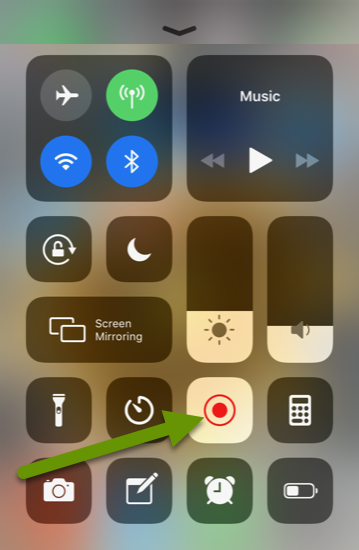
To access screen recording, first make sure it is enabled in the Control Center using the steps above. To begin a screen recording, open the Control Center menu and touch the icon. A 3-second timer will count down before the recording begins. Once the recording has begun, the center of the screen recording icon will turn red. NOTE: Screen recording does not record sound, that was added using a separate program.
Once you have finished recording what you wanted to share, click the red banner at the top of the screen and click the "Stop" button from the popup menu. This saves the video to the Photos app. If you make a mistake and want to start over, click the red banner at the top and select the "Cancel" button from the popup menu to discard the recording. Alternatively, open the Control Center and touch the screen recording icon again to automatically stop and save the video.
Reading QR codes using the camera app
QR codes allow information to be embedded into a small square and are often used on business cards, flyers, and documents. These codes hold information including links to specific websites related to the content they are on. When QR codes first came out, you needed to download an app to take advantage of them. Luckily this is no longer necessary.
To read a QR code, simply open the camera app and get close enough to the QR code for the camera to read it. Once the code is read, a popup notification will prompt you with the link for the webpage. It is important to verify the link makes sense before clicking to visit it. Once clicked, the webpage embedded in the QR code will open in a web browser.
Poking around a new device to check out all the features is common, but slowly this often dissipates with time. This post covers 4 features you might not realize are available to you. These include quickly accessing images and attachments in message conversations, customizing the control center, screen recording, and reading QR codes with the camera app.
As always, the more familiar you are with what the tech you already have is capable of doing, the more likely you will get the most out of that device!