
3 Ways to Expand and Shrink Screen Views on your Computer

Different monitors support different screen resolutions which are what allows users to customize how items are displayed on the screen. Screen resolution affects how sharp the colors are as well as the sizing of items. Using a lower resolution provides bigger icons and text while a higher resolution provides a crisper view. Unfortunately, preferences can change over time as people's eyes change.
This post discusses three ways you can expand or shrink different screen views on your computer so you always have a viewability that works best for you.
3 Ways to Expand and Shrink Screen Views on your Computer
Whether you have purchased a new device, use multiple devices, or have recently had some changes in your personal visibility, knowing how to modify the screen resolution can make items on the screen vastly easier to read. Below are three different ways you can customize the visibility of a monitor.
Screen resolution
Changing the resolution on your monitor is a really common way to expand or shrink the view of all items on your monitor. Screen resolution is a measure of how many pixels are displayed on the screen in a width by height measure, e.g., 1920X1080. Since the physical screen is a static size, changing the number of pixels displayed across it changes the sizing of all items on it. The higher the resolution, the greater the number of pixels, and as a result, the smaller each pixel will be and hence the appearance of items will be smaller.
To change your screen resolution:
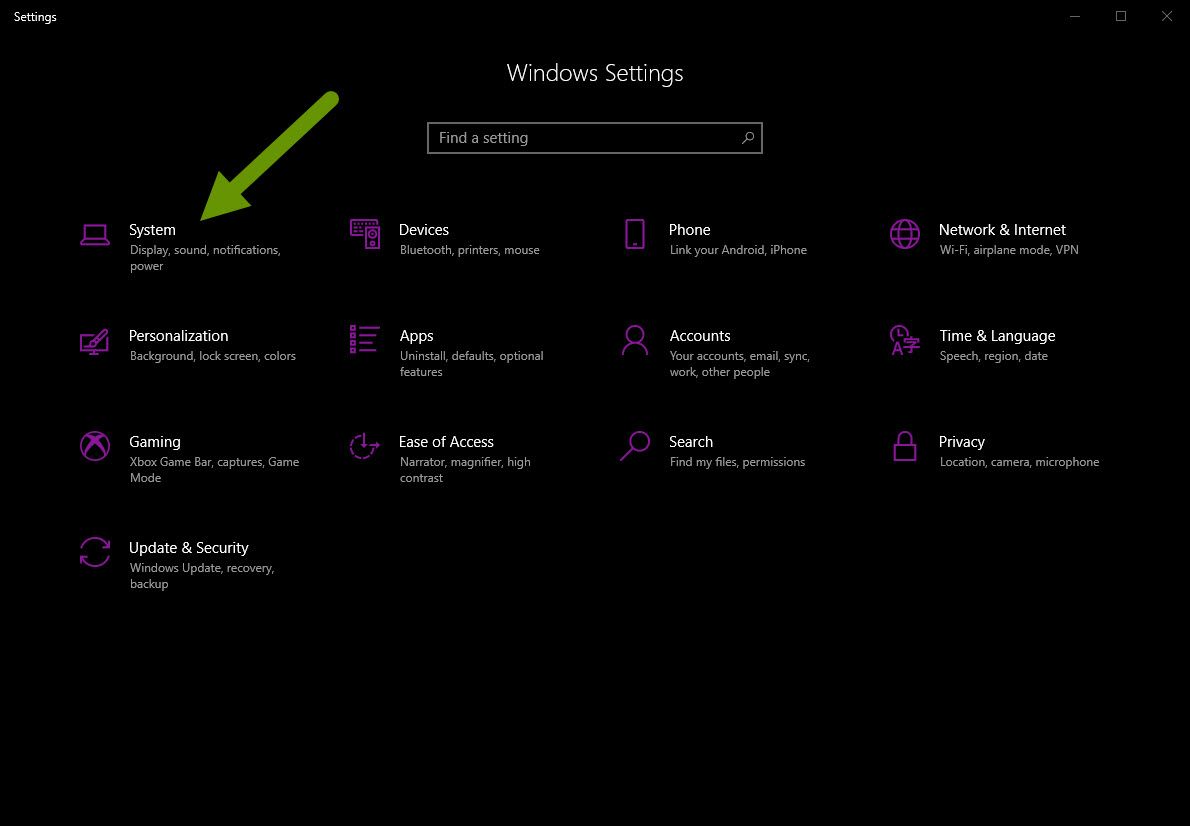
- Open Settings by clicking the Windows button and clicking on the "Settings" cog.
- In the Settings menu, click on "System".
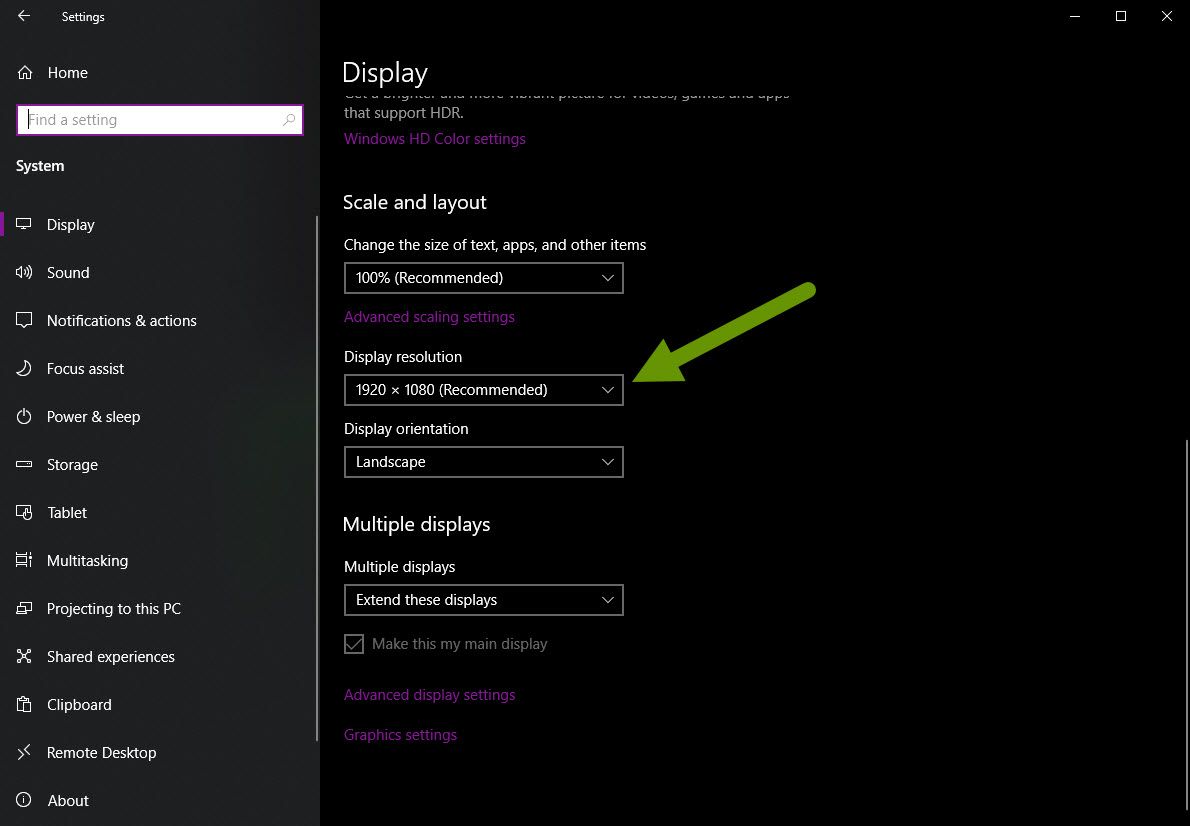
- Scroll down on the Display tab to the menu under "Display resolution".
- Click on the drop-down menu and select a higher resolution so items appear smaller, or a lower resolution so items appear bigger.
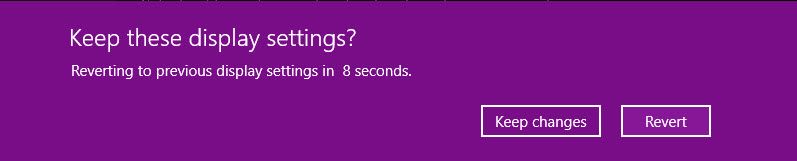
- When you change screen resolution, the setting you chose will be applied and you will be prompted if you like the change and want to keep the setting.
- Click "Keep changes" if you like the setting, which will apply it, or "Revert" to try other settings until you find one you like.
NOTE: Some of the available resolution settings will be better than others. Try a few before you decide which one is best for your needs.
Screen settings
Another way you can modify a global setting, like screen resolution, is to use the Ease of Access settings. These settings provide access to control some items that can affect all areas where the item is used, while others are more specific. Some of the settings you will see here can also be accessed by the Display menu we used above, but the Ease of Access menu provides more items that can be customized.
To modify additional screen settings:
- Open Settings by clicking the Windows button and the Settings cog.
- Click on "Ease of Access".
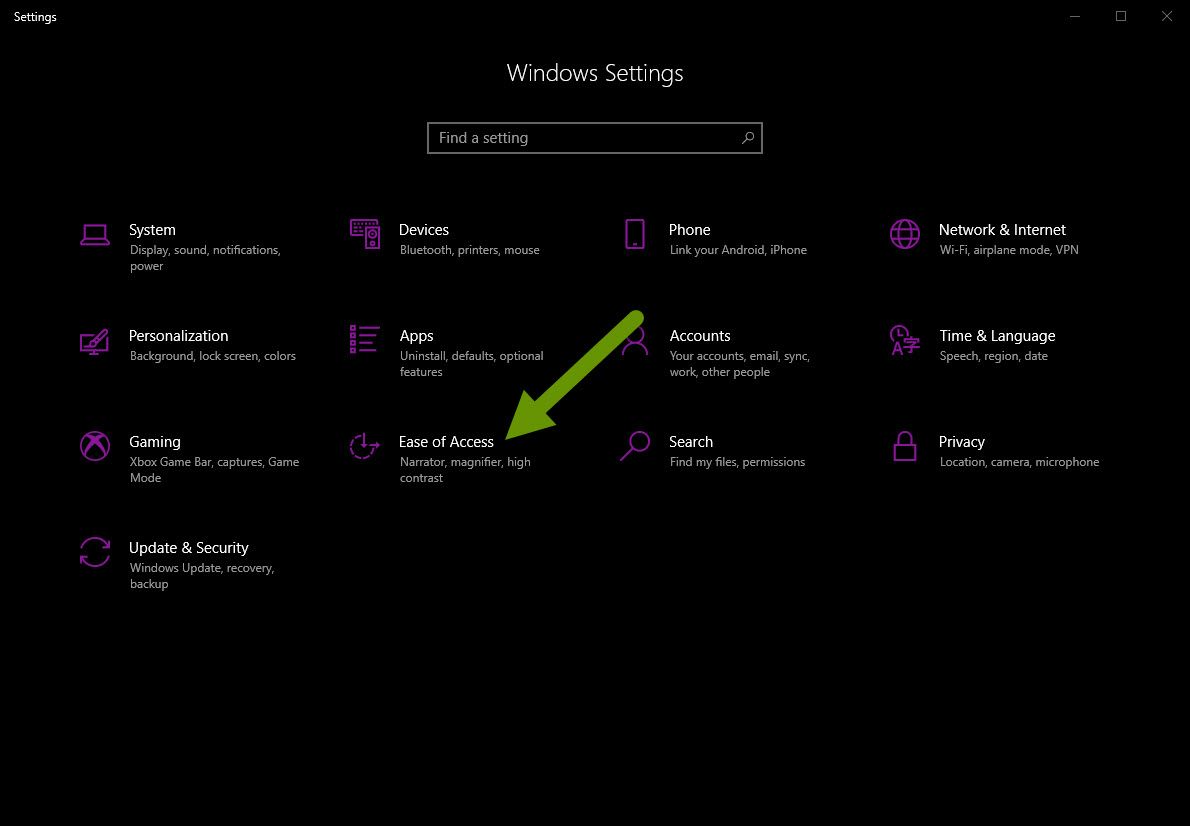
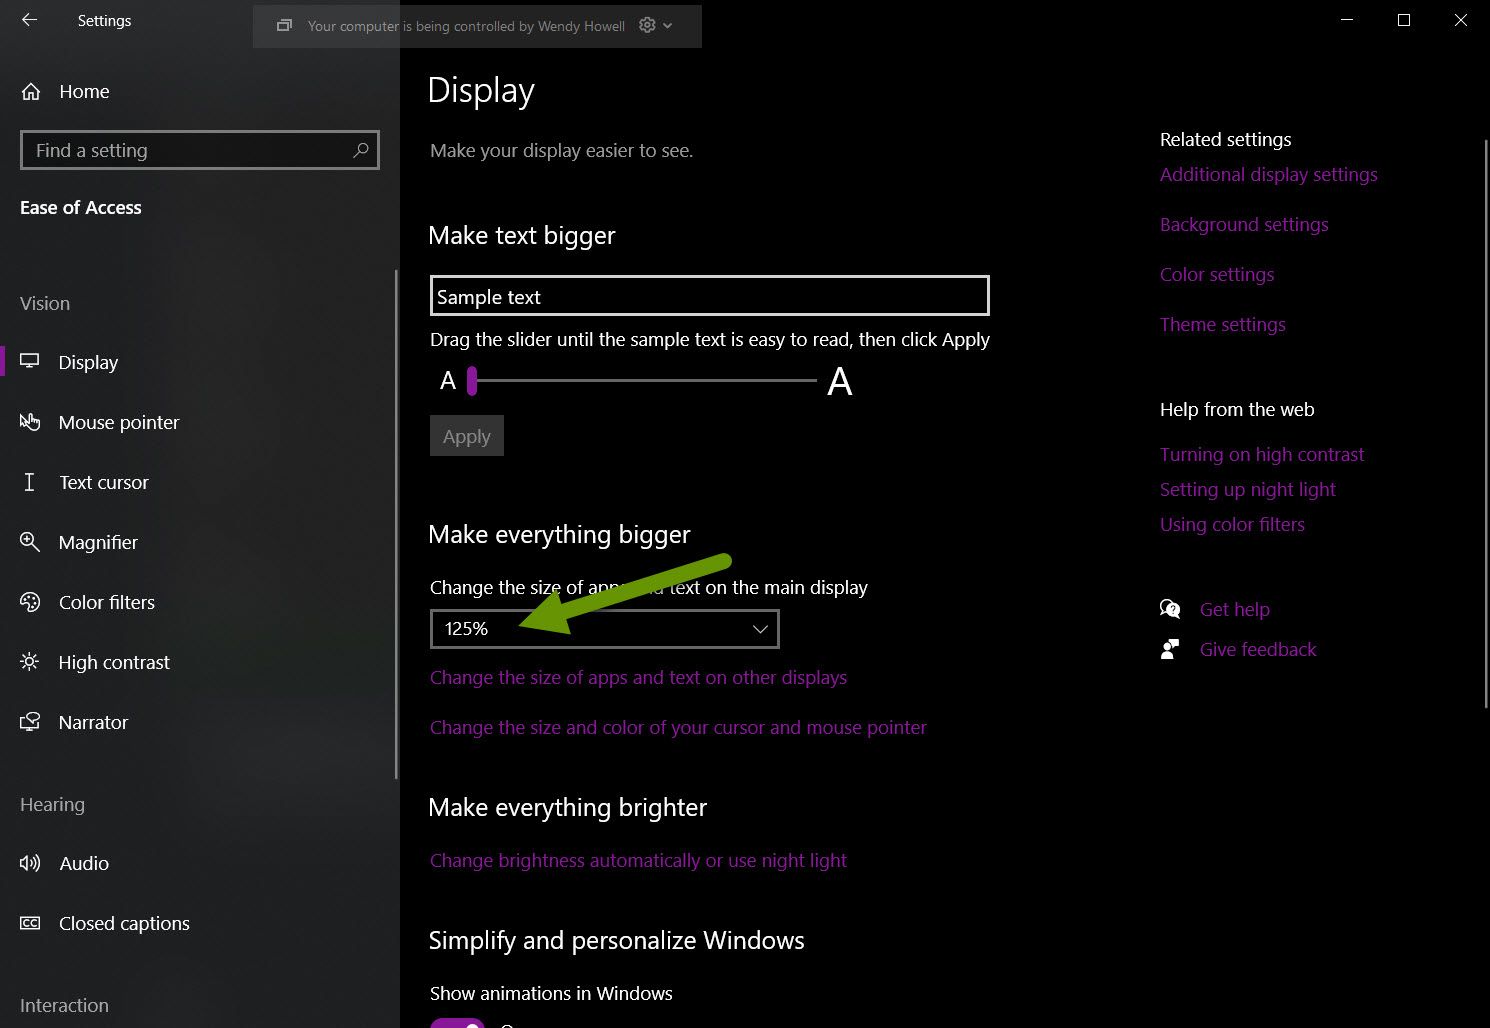
- The top tab in the Ease of Access menu is also titled Display, but has different settings.
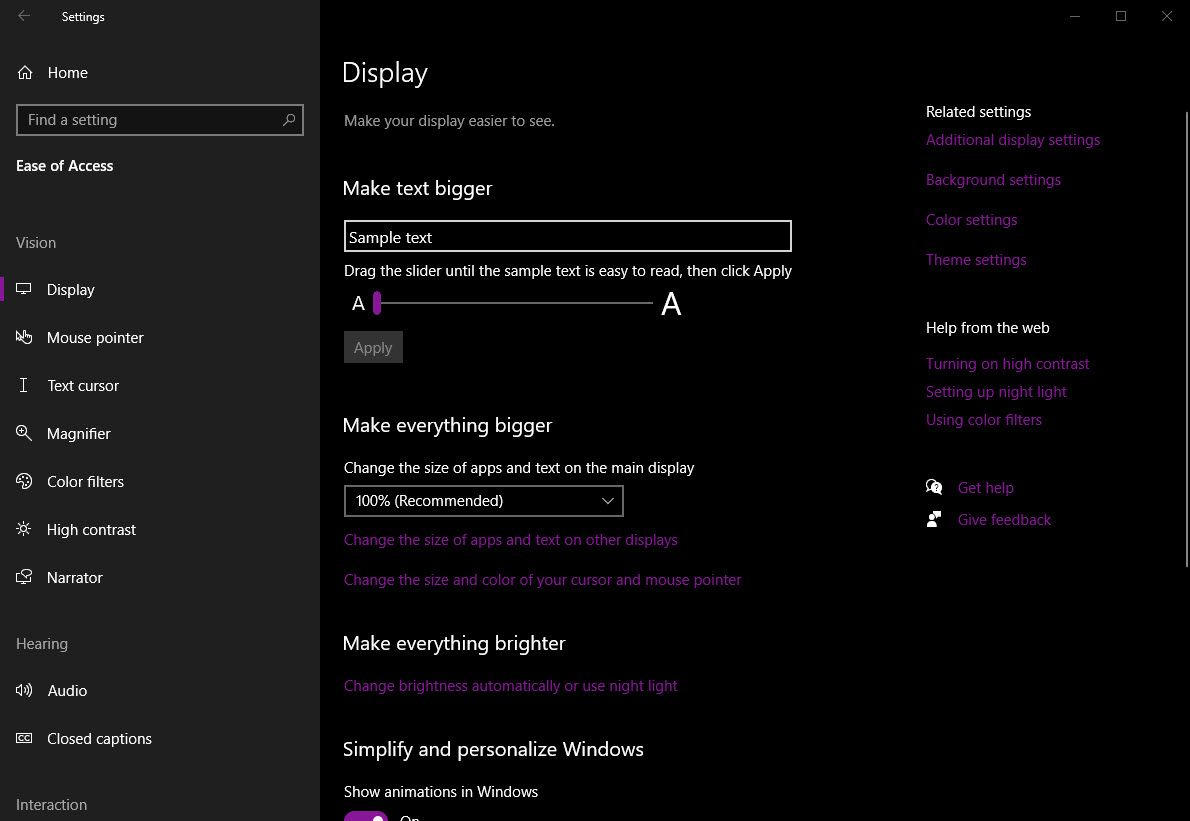
- Click on the drop down under "Make everything bigger" and select a different size. NOTE: This setting allows you to increase the size of content, but does not allow you to shrink the size below 100%. Instead, to reduce the size, use the steps shown above to modify the screen resolution.
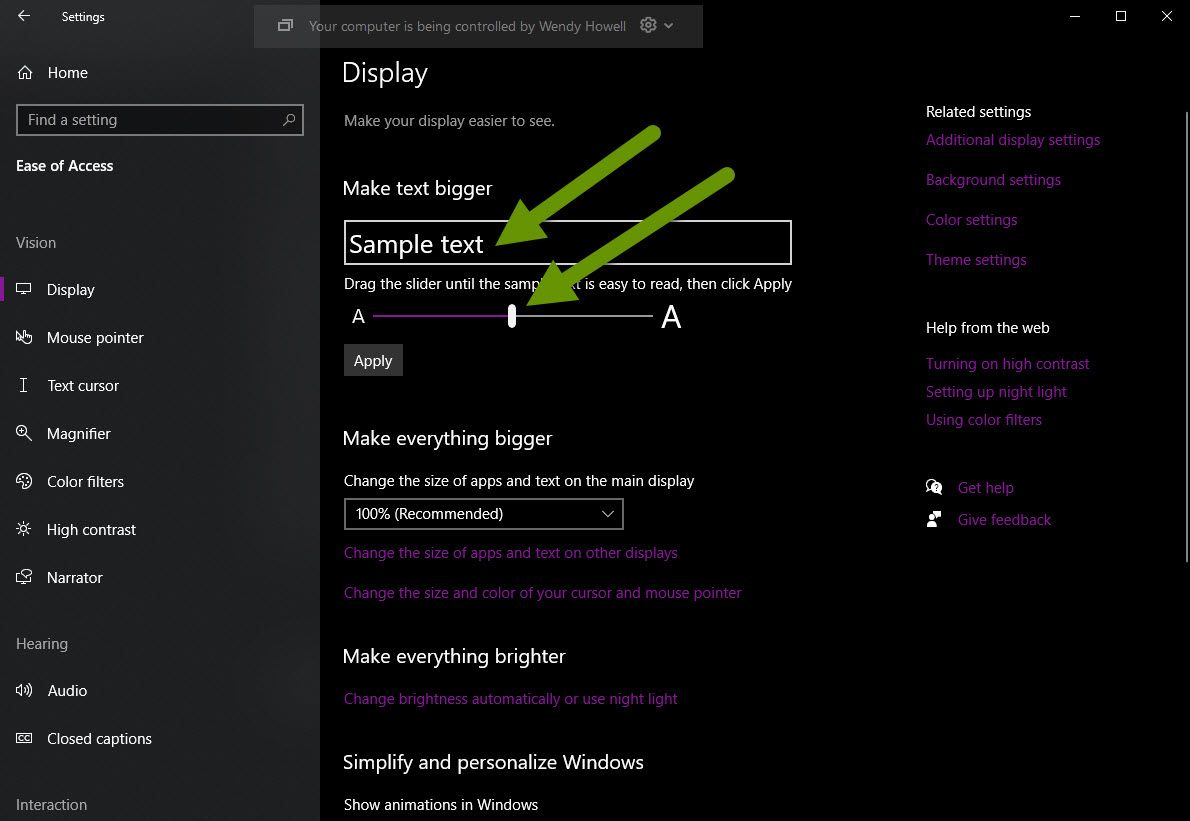
- To change the size of the text, slide the bar under the "Make text bigger" section until the text preview in the Sample text box is the size you like.
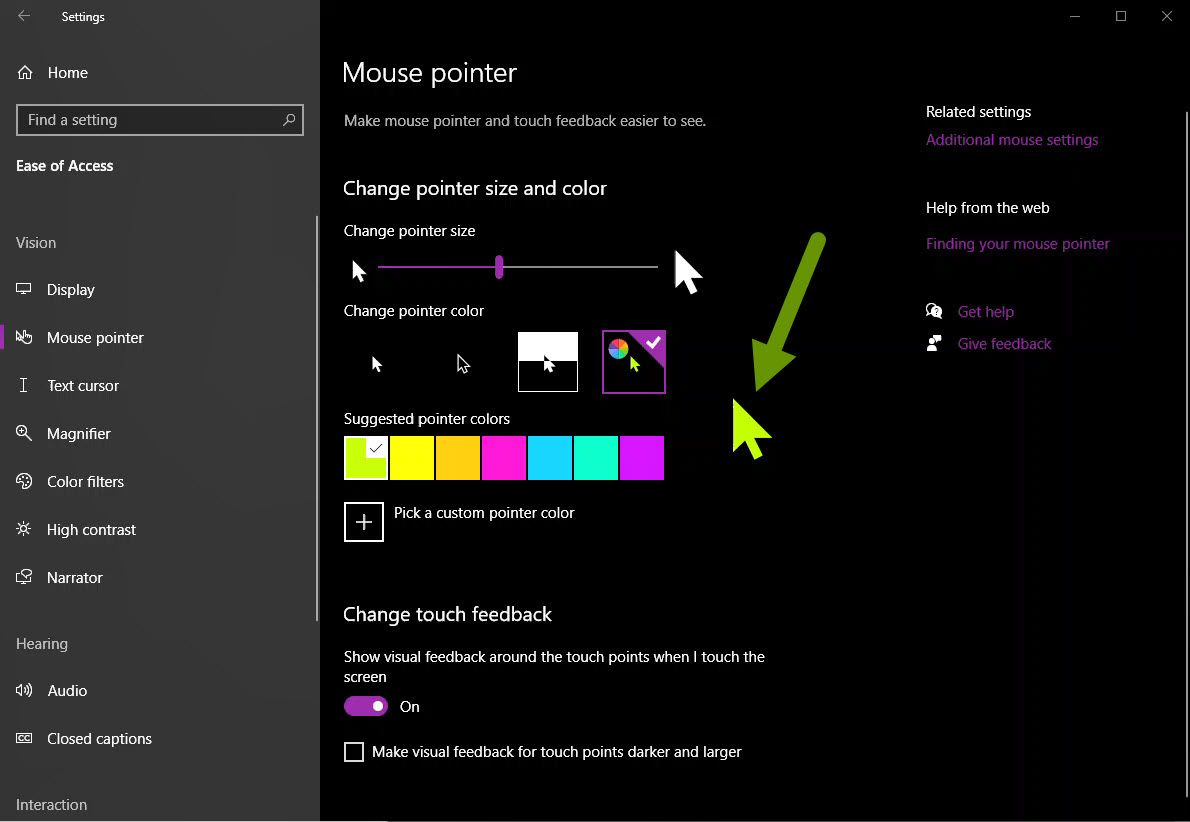
- You can also change the size and color of your cursor and mouse by clicking on the "Change the size and color of your cursor and mouse pointer" link under the "Make everything bigger" section.

- Slide the bar between the mouse pointer sizes to make it larger or smaller.
- Change the color of the mouse pointer by choosing one of the options available or by picking a custom color.
Modifying the settings for specific programs
Another way you can increase or shrink the visibility of a window is to modify it within a specific program.
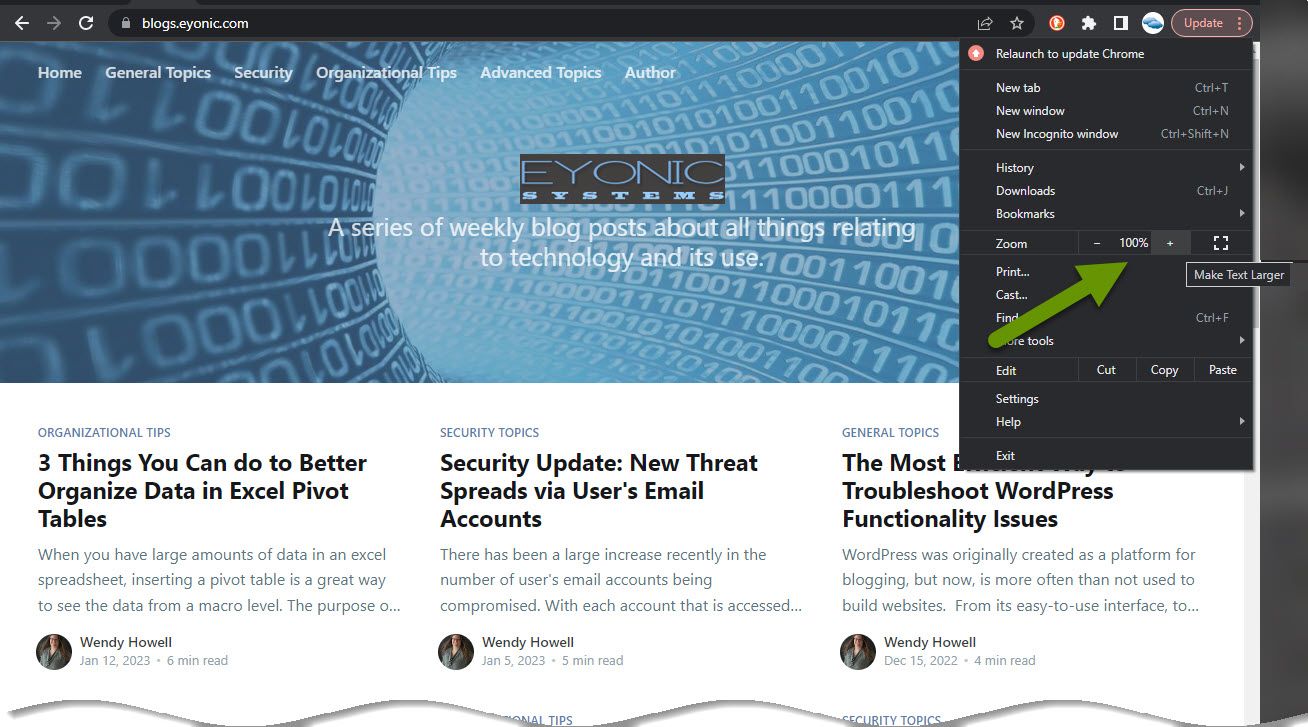
- In any web browser, click on the dots in the upper right corner to access Settings and click on the plus or minus sign to zoom in or out. This will instantly expand or shrink the content in the window.
Other programs, such as Adobe, have zoom levels you can adjust from within the application. These settings can be located in several places so be sure to look through the menus to locate them. Common locations are on the view menu, or on the home menu.
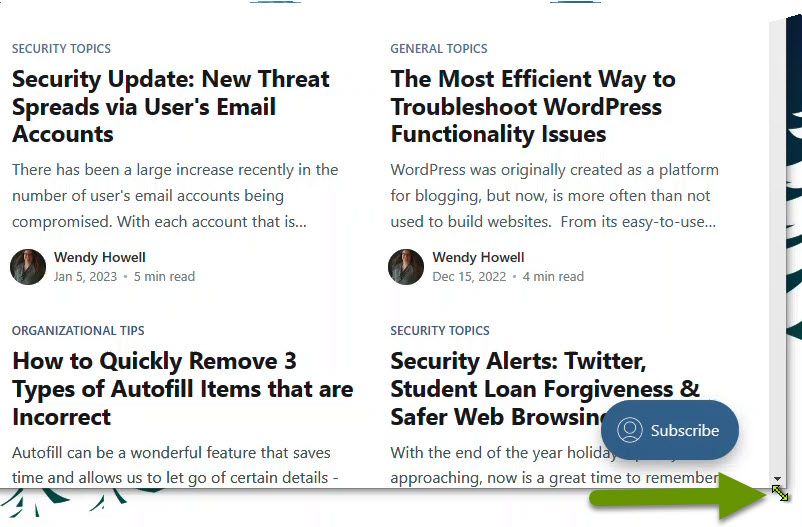
The last way you can expand or shrink the view of an application is to resize the window it is in. While this does not work in all applications, there are many applications that will automatically adjust the size of the content in it if you resize the window it is in. The easiest way to accomplish this is to hover over one of the corners of the application window, then click and drag when you get the double-sided arrow.
There are several ways to expand and shrink the way items appear on a monitor. These include making global changes like setting the screen resolution and using ease of access to modify text sizing and more. Additionally, resizing some application windows will resize the content within.
As always, knowing how to get the data to present the best way for you is key in being effective and efficient!