
2 Ways to Share Files Created in Google Apps

Google apps are an affordable suite of apps utilized by many because they are cloud-based, reasonably priced and do not require a local download. One of the most beneficial uses of Google apps is the ability for multiple users to make changes to the same files in real time. Some common Google applications are Docs (comparable to Word), Sheets (comparable to Excel), Calendar and Gmail (comparable to Outlook), and Slides (comparable to PowerPoint).
This post discusses the two ways to share files created in Google apps.
2 Ways to Share Files Created in Google Apps
There are two main ways to share a file created in a Google application:
- Copying a link to a file and sending it directly
- Giving the user permissions for a file
When sharing files, an important thing to keep in mind is it is always best to give the lowest level of permissions possible while accomplishing what you need. If a user needs greater access, you can always change their permissions later. On the contrary, giving full access right away may come with surprising results which is why it is always better to err on the side of caution.
Copying a link to a file and sending it directly
The important thing to know about sharing a file by copying a link to it and sending it to whomever you want to share it with is that this gives them view only access. This means the recipient can see the file, but they cannot modify or edit it in any way.
There are two ways to copy a link to a file and share it directly. One allows only the user you add to use the link, while the other allows anyone with the link to access the file. Since sharing a file this way only allows view access, there is less risk to allowing anyone with the link to access it, but keep in mind, if there is any proprietary information, you will want to lock this down to only the person you permitted to have access to the file.
To share a file created in a Google app by copying a link directly to it:
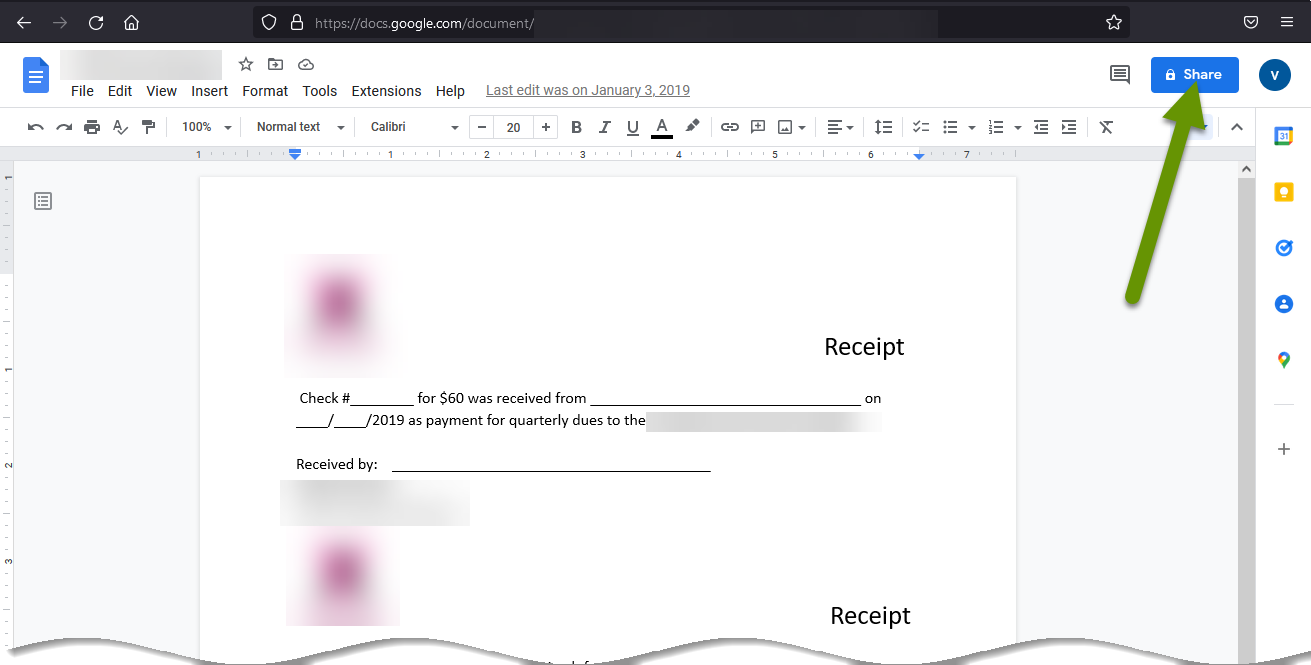
- Open the file you want to share.
- Click the "Share" button in the upper right corner.
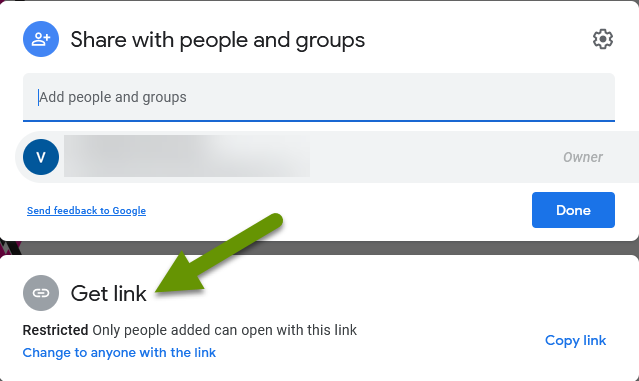
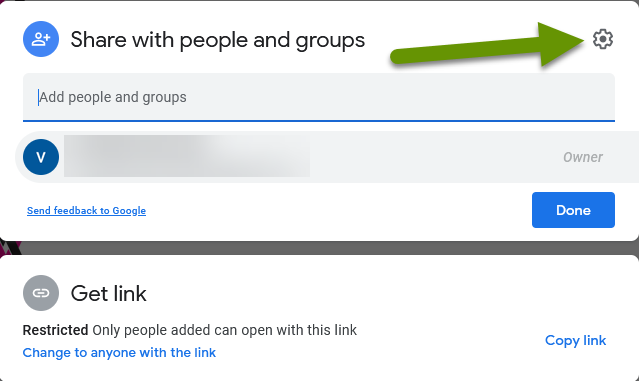
- In the pop-up options, click on "Get Link" in the lower box to see the permissions for sharing the link. In the image below, the permissions are set to only share with the person the link is sent to, which is why the link below says "Change to anyone with the link".
- This brings up the current permissions assigned to sharing a file link with someone else. As mentioned above, there are two possible options:
- Restricted
- Anyone with the link (less secure)
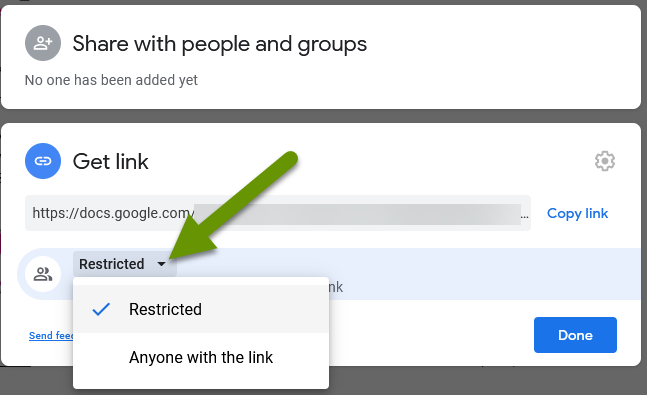
- Select the best option for the file you are sharing and click "Done".
- Click "Copy link" in the bottom right corner, then paste the link into an email to whomever you want to share the file with.
Giving the user permissions to a file
The second way to share a file with someone else is to give them permission to the file. This is the way you will need to share a file when you want the recipient to have permissions beyond simply viewing the file.
- Open the file to share.
- Click the "Share" button in the upper right corner.
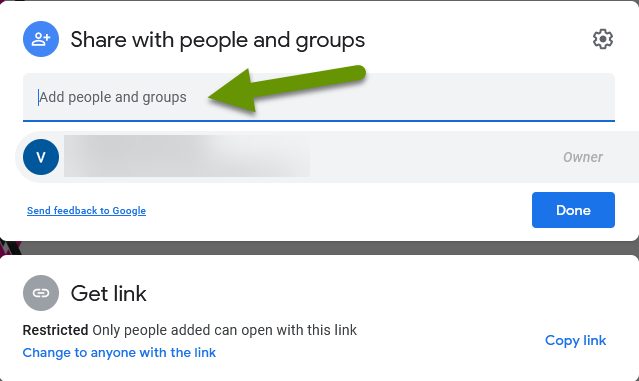
- Type the email address of the recipient in the first box under "Share with people and groups".
- After typing the email of the recipient, click the button at the end showing the current permission.
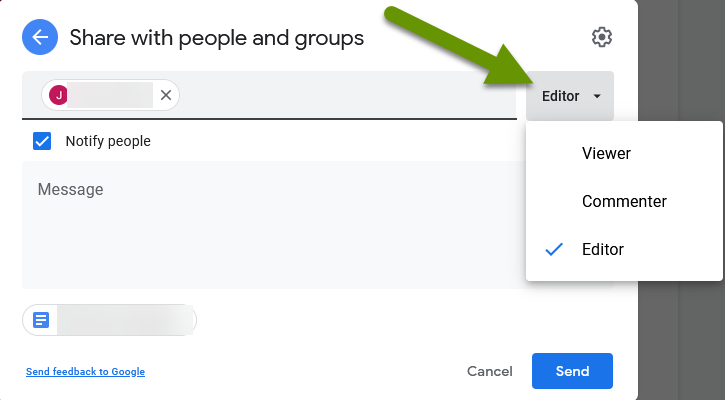
There are three permission levels available:
- Viewer - which allows the recipient to access and view the contents of the file.
- Commenter - which allows the recipient to view the file and leave comments, but not change the original content or invite other users.
- Editor - which allows the recipient to make changes to the file including the special permissions allowed by editors.
- Once the correct permissions have been selected, type an optional note, and click "Send". NOTE: If the box next to "Notify people" is unchecked, you will have a "Share" button instead of a "Send" button.
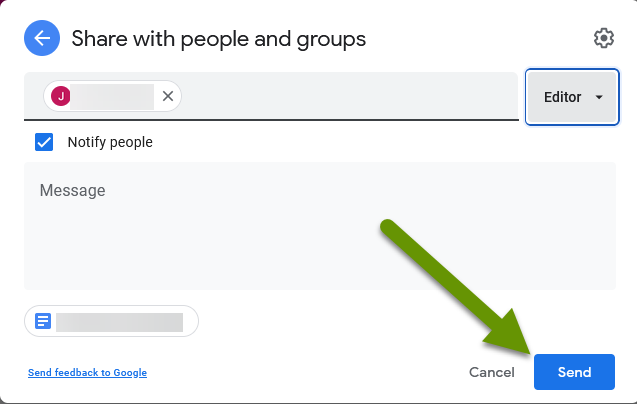
This will send an email notification to the user with a link to access the file.
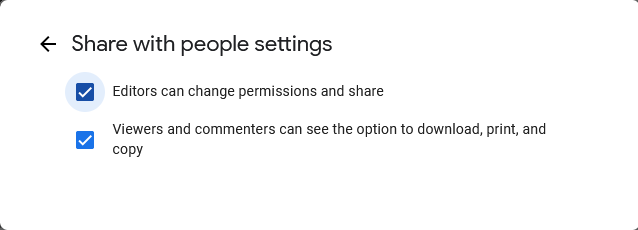
You may also want to check the extra permissions available to the Editor role. To check these:
- Click the Settings cog next to the title "Share with people and groups".
- Check or uncheck permissions as desired.
- Click the back arrow to go back to the file share pop-up.
There are two main ways to share files created in Google apps: sharing a link and adding the user to the file and giving them one of three available permissions levels. When copying a link to a file, the recipient has only view access. To give greater access, add the user to the file and give them commenter or editor access. Be sure to check the special permissions available to the Editor role. Where possible, always apply the most restrictive permissions, which is more secure than giving wide open access.
As always, knowing the different ways to accomplish something can make all the difference!